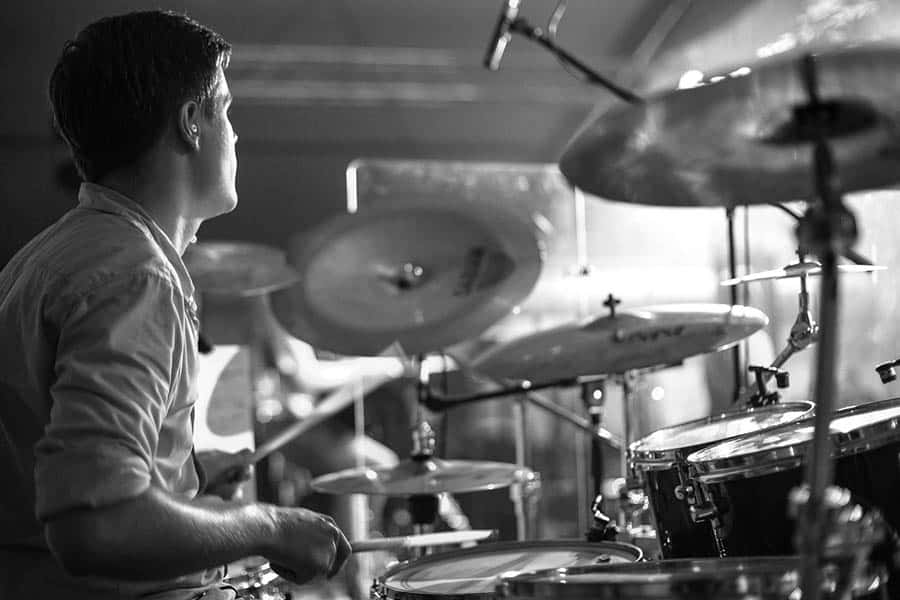
Have you ever watched a drummer play their drum set live, or hear the drums on the radio and wonder exactly what was happening? Then this is the guide for you! Today we will go over some of the basic concepts of what playing the drums entails, and go over some of the elements that help drummers define and create their own unique style.
The drum set itself is composed of several different pieces and individual instruments, each with its own purpose and sound. From the drums themselves to the cymbals, a drummer has a wide array of sonic possibilities at their disposal, and it’s up to them on what to play to best suit the song.
With that being said, this article will be a bit of everything and let’s start with what makes up a drum set!
Anatomy Of a Drum Set
A basic drum set typically consists of four main elements:
- the kick drum
- snare drum,
- toms, and
- cymbals.
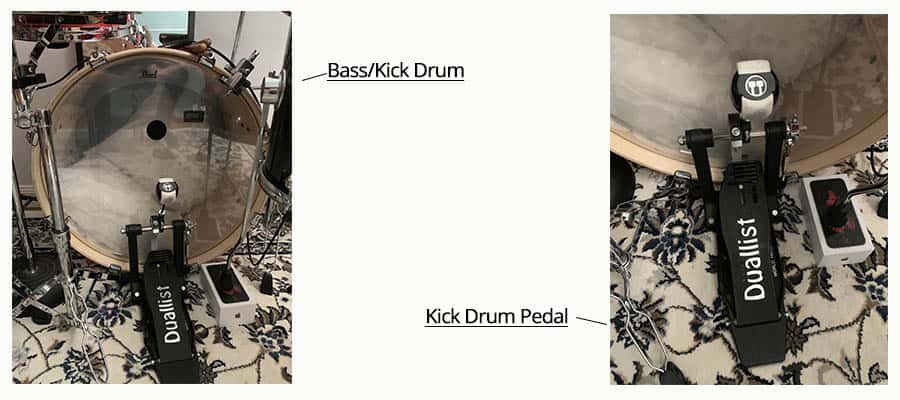
1. Kick Drum, or Bass Drum
It refers to the largest drum that is played with the drummer’s foot while using a pedal. This foot-controlled pedal usually has a spring mechanism attached to a beater, so that when the drummer steps on the pedal, the beater strikes the drum. This kick drum is responsible for the lowest bass frequencies that come out the drum set. Essentially, it’s the heart of the drum set.
Kick Drum Pedal – This helps you hit the kick drum. It is a pedal using a spring mechanism to hit the drum when you push down on it.
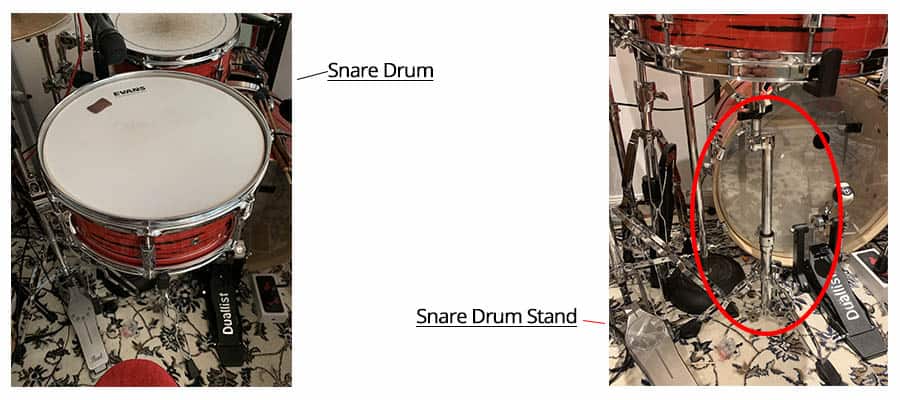
2. Snare Drum
It is the drum that sits at the center of the drum set, providing a sharp crack and/or snap, due largely in part to the snare wires on the underside of the drum (also where the drum gets its name!). These wires vibrate against the bottom of the snare drum when struck, and provide a buzzy sound in addition to the sound coming from the top.
Snare Drum Stand – This holds the snare drum up. You put the snare drum stand in between the gap in your legs. The drum kit is based around the snare drum
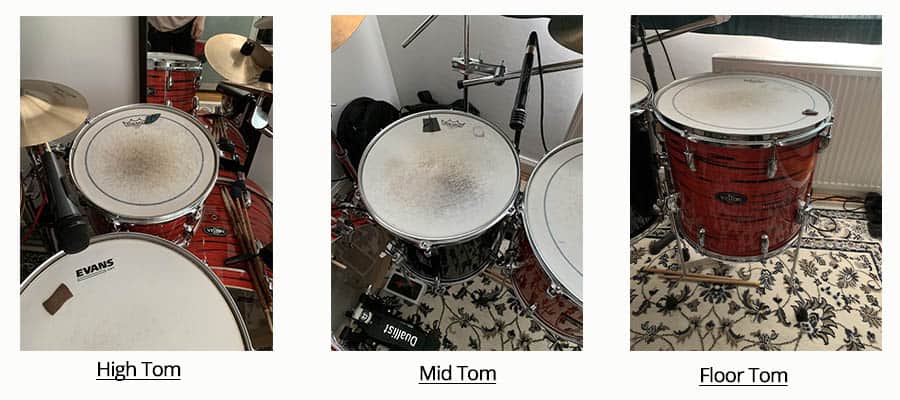
3. Toms, or Tom-Toms
They are the drums around the kick and snare drums, which are responsible for more of the sustained sound coming from the drum set. These toms can be suspended on a stand for the drummer to hit, or on legs holding them up off the floor (the “floor toms”).
4. Cymbals
They are the circular pieces of metal (usually a bronze alloy) suspended around the drums by cymbal stands, which create a sustained metallic sound to accompany the rest of the drums.
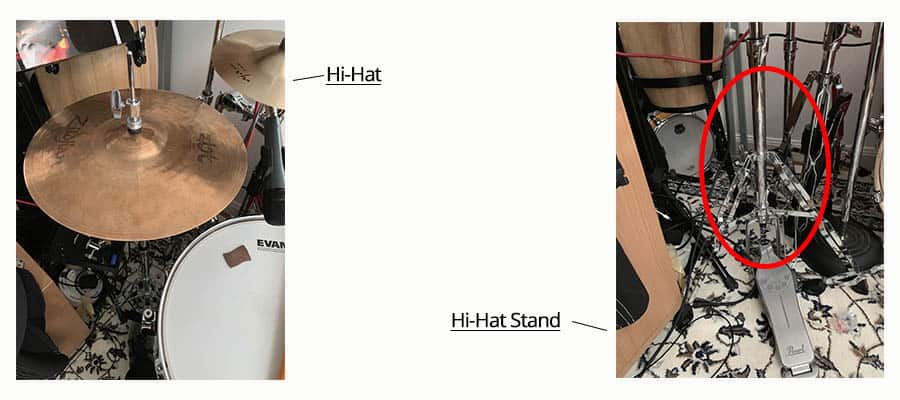
- Hit-Hat – It is a cymbal which is very sharp sounding. You control it with a foot pedal and this allows the cymbal to be open – for a more trashy sound – and closed – for a more tight sound. But overall because of the high pitched sound it cuts
- Hi-Hat Stand – This usually sits to the left of the snare drum. It has a pedal which allows you to control the hi-hat
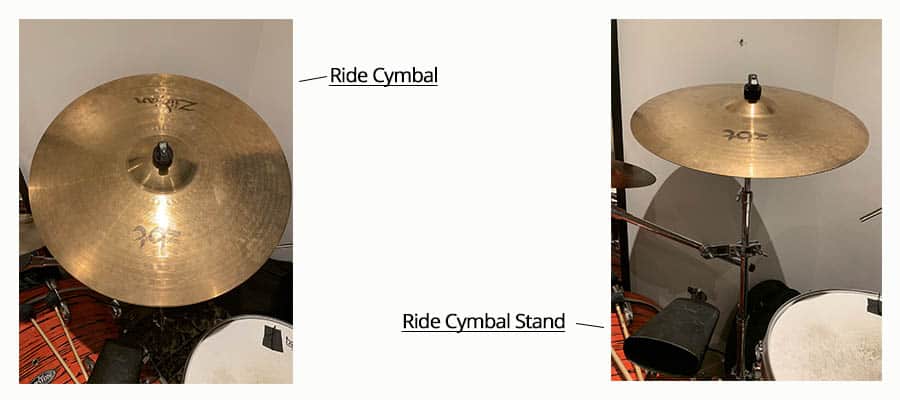
- Ride Cymbal – It is a very sustained cymbal and is used in similar ways that the hi-hat is used for.
- Ride Cymbal Stand – This holds the ride cymbal and usually sits to the right of your drum kit set up
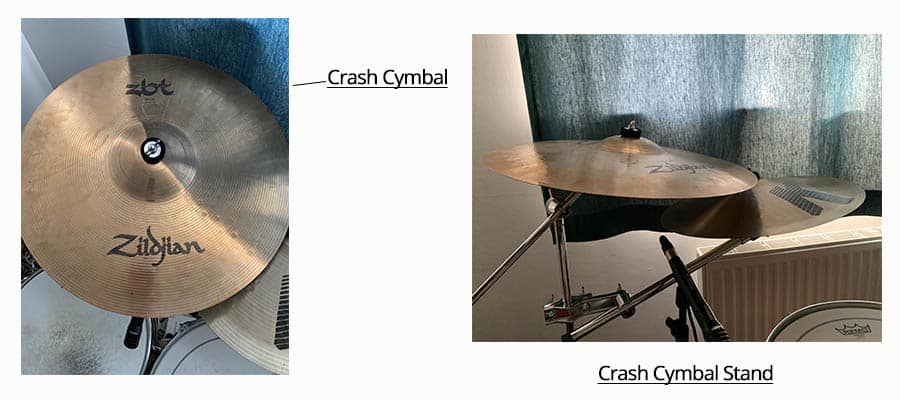
- Crash Cymbal – This is used to create a loud and sharp cymbal noise. This is good for creating impacting and building up the song and for occasional accents
- Crash Cymbal stand – This holds up the crash cymbal and usually sits behind the hi-hat stand. However, drummers can have multiple crash cymbals but usually have only one for the beginning.
All of these elements together make up a drum set, so there are plenty of options to customize to taste! The drums are played with drumsticks, which not unlike the drums themselves, come in many different shapes and sizes. Most drumsticks are made out of hickory and are around 16 inches in length.
The thickness of the stick allows for more power behind the strike, so genres such as rock and pop usually call for a thicker stick. Some sticks also have a nylon coating at the tip, in order to produce a “brighter” or more higher pitched sound.
Setting Up a Drum Kit
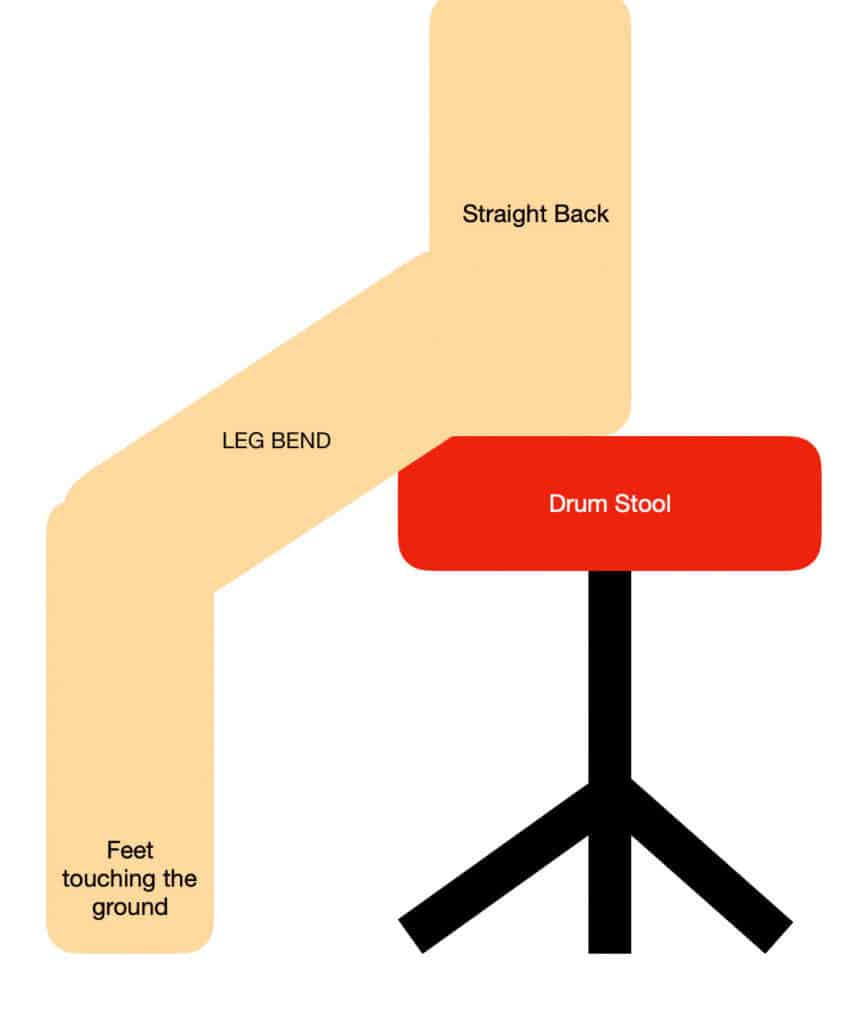
Start with the drum stool/throne. The drum stool is what your whole kit no matter how big or small will be formed around. Adjust your seat height so your feet are touching the ground and I advise you that you have a slight angle down from your thighs to kneecaps to avoid injury for long term drumming.
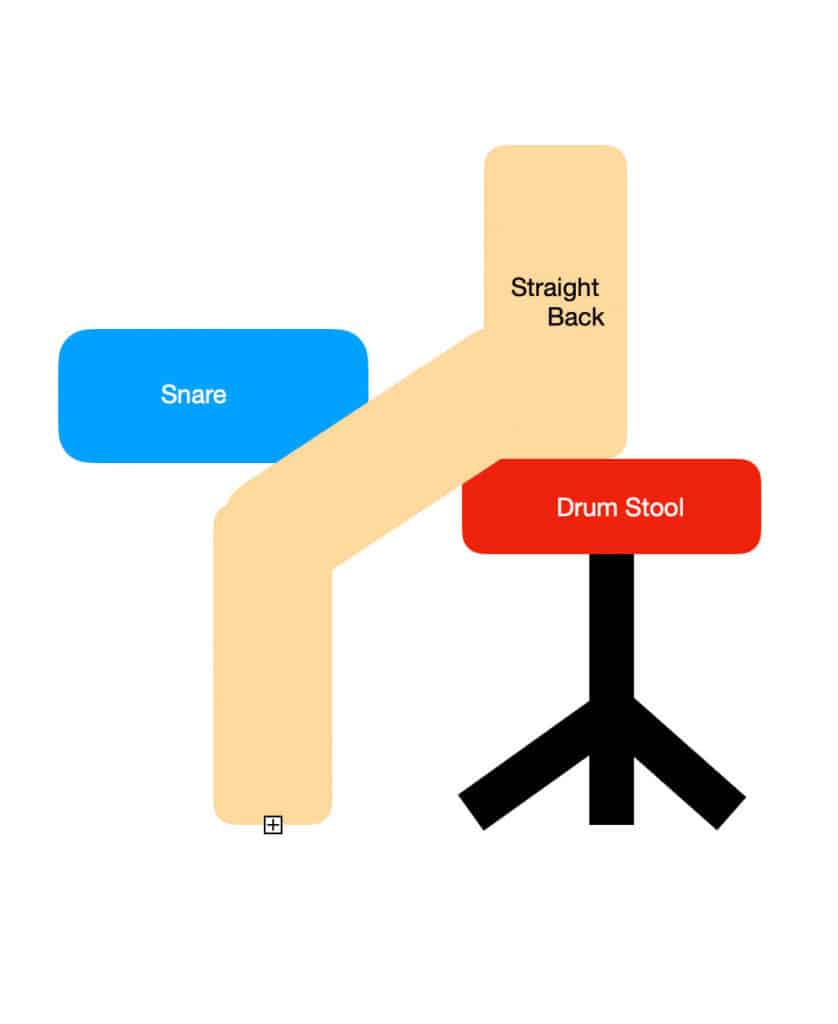
Then take your snare drum. Put it on your stand and adjust the stand height, The top of the snare should be roughly in line with your hips for maximum playability. You can tweak the tilt adjusters on the snare stand however I would not advise any fine tweaking until after you have set up the full drum kit.
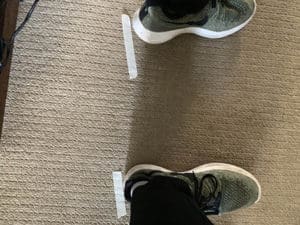
For this next part, I would suggest using masking tape or anything that you can place at the back of your feet’s natural position. Once you have completed this, move the Hi-Hat stand to the marker for the left foot. Also, move the bass drum pedal to the marker of the right foot.
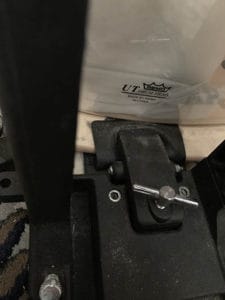
Now move the bass drum into position, connecting the bass drum pedal to the rim of the drum using the tightening mechanism on your bass drum pedal.
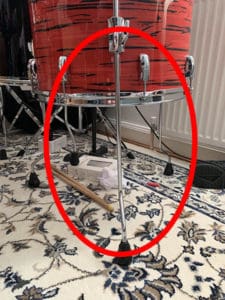
It is now time to set up your floor tom; this is the drum that will sit parallel to the snare drum. Most floor toms come with long poles/feet which allow the drum to free stand.
The next step is to set up your high tom. The most common way to connect them to your drum kit is by using a tom mount. A Tom mount goes into the top of the bass drum. You then slide the drum on to the mount making sure the tighteners are all loose. Then tighten the drum in your desired position, I normally have the drum slightly angled towards me. Now complete the same process for the mid tom.
Next, you have to get the remaining of the stands (ride-cymbal and crash cymbal) into position.
The ride cymbal should come over the right side off the drum kit and crash cymbal should be over behind your hi-hat cymbal and next to your high tom, most commonly like this
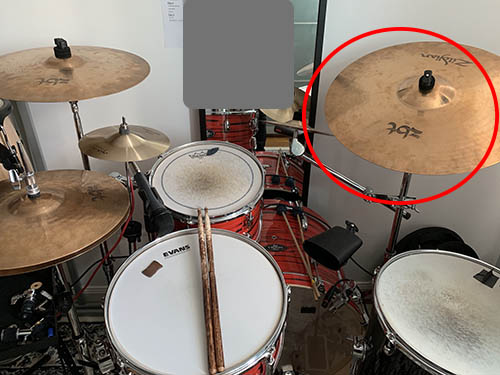
Putting your cymbals on
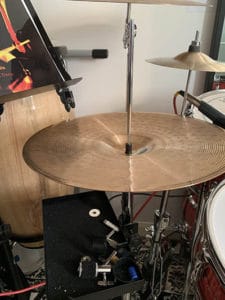
Remove the wing nut from the crash cymbal stand. There should be two pieces of felt on the stand. Put the cymbal between the two pieces of felt and loosely put the wing nut back on, DO NOT OVER TIGHTEN THIS, I hardly tighten mine at all. Your cymbal is meant to move about, don’t worry about it.
Repeat this for the ride cymbal stand.
The hi-hat stand can be the trickiest to understand for a beginner. It has a clip sitting on the pole called a clutch.
The first step – Put lower hi-hat on a stand. There are two hi-hats cymbals, They usually have text saying top and bottom on them somewhere so you know which one to put on first, However, if your cymbals do not have then find which cymbal is heavier and put it on the hi-hat stand making sure there is a felt in place.
Take this clutch off by loosening the tightener
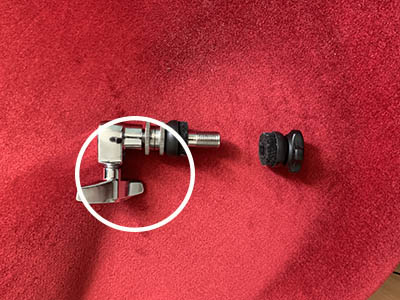
Now grab the clutch and take off the bottom screw and bottom felt. Turn the clutch upside down and place the cymbal on the top felt and place the bottom felt and screw back on making sure not to tighten this too much.
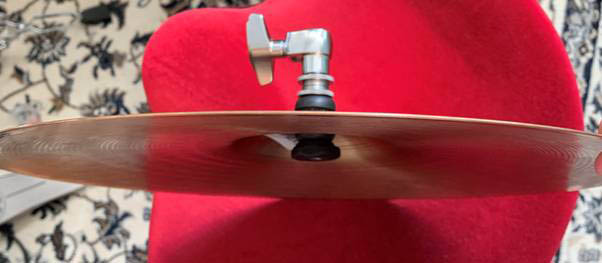
This is the basic setup you should need to get started.
Extra tips
- Stay ergonomic — make sure you have no twists in your body especially towards your lower back. If you have followed the correct setup you should be sitting naturally with a straight back and your shoulders in a relaxed position.
- Do not over tighten any tighteners on the hardware stands as this could cause long term damage.
- A good cymbal height to start is at eye level height.
- Try to listen to your body. If you think your snare drum needs to be a wee bit lower or your tom needs to be more angled towards you then try it however don’t go overboard and move everything far away from each other. Make everything easy to reach so you don’t need to do any awkward stretching.
- You can now do some fine tweaking to your kit. You will eventually know the natural way your body sits at the kit and you will be able to tweak the drum heights and angles.
Playing Drums
When playing the drums, the most important things to be aware are timing and coordination.
At their core, a drummer is responsible for keeping a consistent rhythm. This is done by staying “on time” with the music, or keeping at the same speed without speeding up or slowing down.
It’s harder than it sounds, though! The natural tendency is to speed up with excitement, so often times the timing of the song, or “tempo” may change slightly during a performance. The best way to avoid this is to practice and play to a metronome.
Commonly referred to as a “click,” a metronome is a device that makes a short click or beep sound on every beat of the tempo that it is set to. This provides a guide for the drummer and allows them to stay on the beat (or intentionally go off of it sometimes!).
Coordination is another key component to playing the drums. Since drummers are doing different things with different limbs, drumming is a great mental exercise! For a right-handed drummer, the right foot is playing the kick drum, while the left foot controls two cymbals collectively called the “hi-hats.” The hands hold the drumsticks and play the various aspects of the kit.
Sometimes your limbs will be playing together at the same time, but these variances create different rhythms that add more textures and flavor to the rhythm. In a way, drumming is not unlike the coordination exercise of patting your head while rubbing your belly!
Drum Beats/ Grooves & Fills
The rhythm that a drummer creates can be called several different things, most popularly a “beat.” Much like a heartbeat, the drum pattern should stay consistent and on time.
While a beat can vary widely based on the genre of music played, and the personal style of the drummer, there are generally a few things that are pretty consistent from beat to beat; one hand hits a cymbal while alternating hits between the kick and snare drums using the remaining hand and one foot. Accents are adding on other cymbals or drums, and the number of notes and speed at which they are played can greatly affect the mood of the song.
Common Time
In most common Western music, the music is in 4/4 timing, also known as “common time.” This simply means that if you were to count along to the song on tempo, you would count “one, two, three, four” and then repeat. Each time that you count to four is one measure or bar of time in the song.
In this timing, the snare drum is usually played on beats two and four, while a cymbal would be played on all four beats. The kick drum may be played between the snare drum, on beats one and three, or on all four beats as well.
When the kick drum is played on all four beats, this is known as a ”four on the floor” beat, where the drummer would step on the kick drum pedal all four times in the measure of music.
This “four on the floor” pattern is easily noticeable in dance music, where the kick drum is played on every beat, creating a driving tempo to carry the song. It’s also important to note that the kick drum has a large effect on the movement of the song, creating a strong rhythmic backbone to the song. If you’ve ever bobbed your head along to a song, you’re most likely doing it to the timing of the kick drum!
The snare drum on beats two and four provides consistency from measure to measure and highly influences the perceived speed of the song. Leaving the snare out of one of these beats intentionally is a good way to create rhythmic variation, and placing the snare on beat three instead of beats one and two can make the song sound as if the tempo is at half speed.
The Repetition
Most of the drumming then can be thought of in terms of repetition. We’ve already seen that a standard beat at its core can be thought of inside a one-two-three-four segment of time, and these measures themselves are also usually repeated in sequences of four.
For example, a four bar beat may consist of a beat played the same for four bars, with some slight variation at the end or beginning. This four-bar beat may then be repeated four times during the verse of a song, totaling 16 bars of music.
Repetition is great during a song because the listener becomes familiar with something, which is then played throughout the length of the song. However, doing the exact same thing without changing for an entire song becomes stale and boring, so it’s important to add variations within these rhythms to give them their own identity.
A great way to add variation then is to change the cymbals that are being played or add accents on the crash cymbals. Moving from tightly closed hi-hats to open hi-hats, or from the hi-hats to the ride cymbal is a great way to change not only the dynamics of the beat but to add movement as well. Having the cymbals go from quiet to loud works great to add excitement to sections, especially the chorus.
Adding Fills
In addition to the main beat and adding flourishes on the cymbals, a drummer can also utilize the toms for different patterns. Straying from the main beat and playing something different but still in time, or what’s known as a “fill,” also changes the energy of the song for a short moment, and is another way to add variation. All kinds of drummers will add in fills varying in complexity, no matter what the genre, and are great to add a personal touch to a song.
Drum Tuning
On a standard drum, the wood shell has a plastic drum head attached to both the top and bottom of the drum by metal hardware. The tightness which these heads are attached to the drum determine the drum’s pitch, or how low or high the sound is when struck.
A lower tuned drum will have less of a defined and sustained note but will have more of a “slap” sound to it. A tighter tension on the drum head also allows for more rebound when the stick hits it, so snare drums are usually tuner tighter to allow for drum rolls and to have a more defined tone.
Toms may be tuned either way, with genres like rock preferring lower tunings with lots of slap, and genres like jazz-leaning towards higher tuned, melodic notes.
The kick drum is unique, in that most drummers will put some sort of dampening device inside the drum to cut down on the drum’s sustain. You will often see a pillow or towel inside a bass drum, muffling the drum to have a quick, boomy attack to it, and not ring out for too long.
For the other drums, you will often see smaller dampening devices on top of the drum heads to shorten the sustain, or ringing, from the drum. This may consist of tape, small gel pads, or other sticky material to place on the drum head.
Drum Heads
When tuning the drums, it’s also important to take into consideration the type of drum head that you’re putting on the drum.
A drum head will typically consist of one or two layers of material, known as single ply or double ply heads. A single ply will vibrate more freely, and will generally have a more open, bright sound to it. Conversely, a double ply is more focused in its sustain and has a darker, more full-bodied sound.
In addition to the sound, the number of plies will affect the durability, with a two-ply head being stronger than a one ply head. When playing with larger sticks, a two-ply head may be a better option, as it will offer slightly more protection against the force of each hit.
Drum heads also come in different varieties of finishes, most commonly clear or coated. A clear head, like a single ply head, will vibrate more openly and has more overtones, or additional resonances sounding off the drum.
A coated head, usually white, has a light coating on the head that dampens the sound slightly, eliminating some of the overtones. The texture of the coating is also better suited to playing with brushes when compared with a clear head, as the coated texture catches slightly on the wires while playing.
It isn’t uncommon to see additional features on drum heads as well, included but not limited dampening rings or impact pads. These rings around the outer edge of the drum head serve to further cut down on the sustain and overtones of the drum and make for an even more focused sound. An additional pad in the center can focus the stick attack, and offer increased durability as well.
Cymbals
The cymbals around the drum set provide a very important sound, and drummers will choose their cymbals based on several different factors. A basic cymbal set includes the hi-hats, a ride cymbal, and a crash cymbal or two.
The hi-hats next to the snare drum are where most of the song is generally played, as these two cymbals can be pressed together to various degrees to create a tightly controlled sound, a loud washy sound, and everything in-between.
The ride cymbal is the largest cymbal, which has the most sustain when hit, while the crash cymbals are used mostly for accents. Effects cymbals like the inside-out looking China cymbal and smaller sized splash cymbals may also be added for nice accents throughout the song.
Cymbals, like drums, also come in many different sizes, and will have different sounds depending on several factors. Most important to the sound of a cymbal is the size. A smaller sized cymbal will have a higher pitch and shorter sustain, while a larger cymbal will have a lower pitch, and the sound with decay after a longer period of time.
The thickness of a cymbal also has a large effect on the sound, with thinner cymbals reacting more quickly to a stick hit, and reaching their full volume and sustain faster. Conversely, larger cymbals will do the opposite, and are generally a little louder. For louder music such as rock then, thicker cymbals are generally preferred but may be too overpowering for a lighter R&B song.
Drum Recording
Recording a drum set can be an interesting endeavor, mainly due to the fact that you’re recording several different sound sources at the same time; the drums may have their own individual microphones, as well as microphones set up to capture the entire kit as a whole. As a result, there are many ways to record drums, and they are largely dependent on the final sound that you’re looking to achieve.
In the early days of recording, the sound and energy captured by microphones were recorded on to tape, which was limited on how much audio it could handle. A tape with four tracks available to record on forced musicians and audio engineers to plan out what these tracks would be used for.
Instead of recording only the drums then, the bass and drums may have been recorded on one track at the same time, leaving other tracks like the vocals to be mixed individually. As a result, the microphones had to be placed at a short distance away from the drums to capture the kit as a whole.
Years later when recording equipment allowed for more microphones to be added simultaneously, and to be recorded onto larger formats, room for placing microphones on more parts of the drums opened up. Now a microphone could be placed individually on the kick drum, snare drum, toms, above the drum set, and in the rooms.
This provides more flexibility after the drums are recorded, as the audio engineer can manipulate more of the elements of the drum set separately, and process them independently without affecting the other elements.
Having the individual parts of the drum set recorded separately allows the drum set to be mixed in such a manner that is appropriate for the genre of music being recorded.
Jazz
For a genre such as jazz, the recorded picture of the drum set should sound as natural as possible, which is typically done by mainly using the microphones that capture the entire kit. The overhead microphones, for example, paint an accurate picture of the entire kit and the way the drummer played on the recording, without leaning too heavily on any one particular element of the kit.
The microphones that are placed on the single elements of the kit then also called direct microphones, or close microphones can then be used to slightly bring that drum more forward in the song.
Pop / Rock
For a pop or rock recorded drum sound, all of the microphones may be more closely related in volume. This still gives the listener an accurate depiction of the drum set, but also allows for each drum to be upfront in the final mix, and heard clearly over the other instruments in the song.
The microphones set up in the same room as the drums offer a great way to add size to the recorded drum sound, as they give the listener more of a sense of the size of the instrument. A great sounding example of using the room microphones in this way can be heard on many Led Zeppelin songs, specifically, the song When the Levee Breaks.
Metal
For heavier genres of music like metal, it’s crucial to record each element of the drum set with its own microphone. When done like this, the individual drums can be processed and edited in-depth and with extreme changes without changing the sound of the adjacent drums.
For example, the kick drum may have an overly exaggerated bass sound but still needs to fit in the song with the bass and guitars playing. This same sound wouldn’t be appropriate for the snare drum, which would need more adjustment in the higher pitched treble range.
With all the options available to record a drum set, there are multiple ways to create unique sounds. A great way to get started is to purchase a drum microphone set, which several manufacturers sell, that come pre-made with separate microphones for the different parts of the drum set. Pair those with a computer and audio interface, and you’re all ready to get started!
Wrapping Up
In summary, there are many different aspects of playing the drums, and multiple ways to develop your own style and sound. From the number of drums on your drum set, the selection of cymbals to go around your drums, and all of the different styles of music, drumming is an activity that you can spend an entire lifetime learning about and practicing.
Many drummers do just that, and become experts in their field, while still just scratching the surface of the possibilities and musicianship involved. Although it can be difficult at times, playing the drums is an amazing thing to become involved in and practice on a regular basis.
There are several physical and mental benefits in doing so, and it’s especially fun to play along to your favorite songs! Writing your own music and playing in a band is another great way to share the experience with others, and become involved in a great community of musicians around you.
Now that you know more about the basics, history, and separate elements involved in playing the drum set, it’s great to start playing and learning more!
Fun Fact: Drumming didn’t start quite so complicated! (drum history) Although the drum itself can be traced back to around 8,000 years ago in the stone age, it wasn’t until the mid-1800’s when the concept of a drum set was first invented. Musicians wanted the ability to play multiple percussion instruments at once and came up with creative ways to arrange these instruments so that a single person could play them all at once.
With that mentality, the idea of the modern drum set came into existence. Two cymbals were added to a contraption played by the drummer’s foot, which evolved into what is now known as the hi-hat. Additional drums and percussion instruments (like the cowbell and chimes) were added and removed over time until today’s drum set became the standard.
Recent Posts
QuickTime is a vital app for many Mac users, and if you’ve recently bought a new microphone, you might wonder how to use it optimally. QuickTime cannot record audio content if it doesn’t have...
Every microphone leaves a unique signature on the quality of its output. If you’re a podcaster trying to melt your way into your audience’s hearts, a muddy, distorted recording won’t cut it....
