Photography – both amateur and professional – is a rising passion within so many people across the world. However, with all the equipment necessary to produce the best images, it can tally up to a hefty price. Fortunately, the lightbox is a piece of equipment that you can build yourself, without having to pay a lot of money.
Here’s how to build a large lightbox for photography in just seven easy steps:
- Choose your material.
- Determine your sizes.
- Cut out the windows.
- Cover the windows with a sheet.
- Add strength to your foam board.
- Stick the boards together.
- Install the lighting.
There are many different ways to build a large lightbox for photography. However, if you’d like to know more about these steps to better understand how to do it, carry on reading. We trust that this guide will make you feel confident enough to be able to do it yourself without any trouble.
1. Choose Your Material
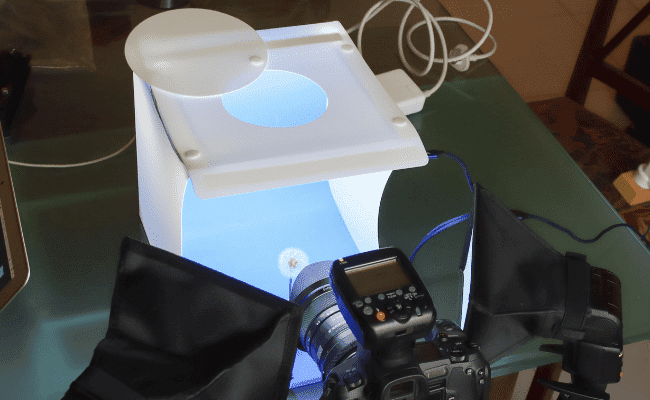
In simple terms, a lightbox is a well-lit mini studio![]()
![]() so that the products you’re shooting don’t have shadows on them. They’re typically white, but you can change the background to match your subject.
so that the products you’re shooting don’t have shadows on them. They’re typically white, but you can change the background to match your subject.
The materials you’ll use to build your lightbox will typically depend on how large you want it.
If you want to shoot small products, such as jewelry, food, cellphones, or shoes, you can use a smaller, less sturdy type of material for the frame, such as cardboard.
However, if you’re shooting larger objects, such as pets, clothes, equipment, or instruments, I’d recommend a more robust material that can withstand weight as you’ll have to drape a sheet over it. For large lightboxes, I’d use foam board or wood as my frame.
Wood is a lot more expensive and heavy than foam board, and since we’re trying to keep costs low, the material we’ll choose for this guide will be foam board. It’s similar to cardboard; however, it’s much stronger.
Your large lightbox needs to be lightweight so that you can move it wherever you want it. Foam boards are durable and sturdy. It’s not going to bend under the weight of other materials nor from a bump or two.
If you work with products that contain liquid, you can easily waterproof your foam board to prolong its lifespan.
Foam board comes in various thicknesses for your picking. They’re available in white, so you don’t even need to paint them!
2. Determine Your Sizes
Foam board comes in many sizes, and you can buy it from Walmart or your local craft or hardware store.
Our large lightbox is going to be square in shape. You’ll need five foam board sheets for this project, and to make it large, make sure your sheets are around 48 x 48 inches (121.92 x 121.92 cm). You may need to cut your sheets if you cannot find this exact size at your store.
You can make your lightbox as large as you’d like. You can use foam board sheets that are smaller or larger than my preferred size.
3. Cut Out the Windows
In order to shine the light ![]()
![]() into your lightbox, you need cutouts or “windows.” However, you don’t need windows on every sheet.
into your lightbox, you need cutouts or “windows.” However, you don’t need windows on every sheet.
Here’s what you’ll need to do:
- Take the two sheets that you plan to use as the sidewalls of your lightbox and lay them out on a flat surface.
- Using a ruler, measure about two inches (5.1 cm) from the corner of the board and draw a point with a pencil or marker. Repeat this until you have drawn a two-inch (5.1-cm) point at every corner around the board. Once finished, draw a line from one point to the other to form a square within the board sheet. Make sure the width is two inches (5.1 cm) all the way around from the square to the edge of the board.
- Cut the square out of the board with scissors or a utility knife.
- Make sure to be gentle when pulling the square piece out, as you don’t want to damage the remaining board.
- You should now have a large square missing from your foam board sheet.
You can decide whether you’d like light to enter your lightbox from the top as well. If you would, you can perform this step on three foam board pieces instead of two.
4. Cover the Windows With a Sheet
Whether your lightbox will have two windows or three, it’s now time to cover them with a sheet. Here’s how:
- Take your sheet and place it over the board with the window.
- Cut the sheet to be a bit shorter than your square but bigger than your window.
- Otherwise, you can measure 47×47 inches (119.38×119.38cm) and cut your sheet into that size square.
- Place the cutout piece of sheet and place it over the foam board with the window.
- Use white duct tape to stick down the sheet onto the foam board. Alternatively, you can use glue to stick the sheet onto the foam board, as this works just as well, but remember to allow time for it to dry.
- You will now have a sheet covering the square cutout in the foam board.
- Follow this step for both (or all three) foam board sheets from which you cut the square pieces.
5. Add Strength to Your Foam Board
If you’re a bit worried that your lightbox will not be strong enough now that it has had a huge square piece cut out of it, simply reinforce it.
Take a thin wooden strip and glue it to the four edges of the side pieces. Wood won’t bend or crumble and is, therefore, a great support to the foam board that you’ve cut.
To make the lightbox look professional, be sure to paint over the wooden strip to match the rest of the foam boards or cover it with white duct tape.
This reinforcement isn’t necessary for the foam board sheets you have not cut because the full foam board sheet is strong and durable enough on its own.
6. Stick the Boards Together
You may need some help with this part due to the large size of these foam board sheets.
- Place your bottom foam board sheet onto the table and place white duct tape along the edge of it, allowing the duct tape to overlap onto the table, leaving a flap.
- Place your back foam board sheet onto this overlapping duct tape and push it against your bottom board, creating a 90-degree angle with the boards.
- Lift the overlapping duct tape and push it against the back of the back foam board sheet, sticking them together.
- Take the side foam board with the window, and duct tape it to the back foam board and the bottom foam board. Repeat this step for the other foam board with the window as well.
- Duct tape the top foam board sheet to the back and side foam boards.
You have now created your large lightbox for photography. All you need now is to set up your lighting.
Changing the Background
At this point, your lightbox will all be one color, typically white. However, it is fun and necessary to occasionally change the background to match the product’s “look” or prevent your photos from looking too alike and unoriginal.
Although you’ve taped your back foam piece to the rest of the box and cannot take it off to swap out, you can still change the background color by using different large color poster boards and binder clips.
Here’s how:
- Place your poster board on top of your lightbox and mark two spots at the backend of the box. This is where you’d want to cut an opening for your binder clips to go through.
- Cut the opening, making it a bit bigger than your binder clip so that it can easily slip through the top.
- Place your preferred color poster board and put it inside the back of your lightbox. Slip your binder clips through the opening at the top and clamp the poster board onto the back foam board of the lightbox.
- By changing these color poster boards, you’ll be changing the color of your background with ease.
If you’re still unclear as to what to do, check out this Youtube video:
7. Install the Lighting
All that’s left is for you to place lights on either side of your lightbox. Make sure that they’re the same distance away from the lightbox on either side.
If you have a top window, place a light above it, also evenly distanced from the box.
It’s essential to keep the lights at a distance from the lightbox so that the material doesn’t get too hot. A reasonable distance is five inches (13 cm) from the lightbox.
If you already have studio lights, just use those to light up your lightbox; otherwise, you can buy a few Cesa Desk Lamps from Amazon.com. They’re great to use for your large lightbox because they can clip on to whatever you want them to, they’re affordable, they rotate 360°, and they offer three different color temperatures ![]()
![]() to choose from, creating various moods or effects in your photos.
to choose from, creating various moods or effects in your photos.
- ★-Quality Assurance: This clip lights for bed is 18 months warranty, free replacement or refund…
- ★-40,000-hour lifespan,this reading lights for books in bed is no need to replace light bulbs
- ★-Save 85% on Energy – This clamp desk lamp Replaces 40W incandescent bulb with 5W LED, This book…
Last update on 2023-09-26 / Affiliate links / Images from Amazon Product Advertising API
If you want to get creative with your lighting to produce the most incredible photos, I recommend the LIFX Wi-Fi Smart LED Light Bulb on Amazon.com, a brilliant smart bulb that gives you an enormous variety of colors. It will also provide you with the brightest whites and the temperatures you require. These bulbs can fit into any standard light or lamp fitting, and so you can pop them into these Cesa Desk Lamp.
- Why Wi-Fi: Control from anywhere. No bridge or hub required. (Use 2.4GHz). Does not support dimmer…
- Full color: 550 billion possible color steps. RGBW LEDs for richer colors and huge 1500-9000K white…
- 800 lumens: Bright! But also dimmable via voice or app.
Last update on 2023-09-27 / Affiliate links / Images from Amazon Product Advertising API
However, if you want the real deal and the best lighting possible, get the Fancierstudio Lighting Kit on Amazon.com. You won’t have to worry about clipping lamps to the desk or balancing lights on tables to get light to shine in from the top of the box (if you chose to make a window on the top of your lightbox) because these lights are tall and professional. As big as they are, you can still fold them up and transport or store them in their carry bag.
- Professional Photography Equipment: photo studio lighting with two 16-Inch x 24-Inch and One…
- Complete lighting kit: softbox lights with 3 x light stands 6′ tall (one boom arm with sandbag)
- Photo and video studio lighting: includes 3 x light heads able to hold 4 bulbs each
Last update on 2023-09-26 / Affiliate links / Images from Amazon Product Advertising API
Lighting Tips
- Make sure the lights are placed behind something so that it doesn’t shine into the camera lens, as this will create a lens flare and will not give you the clear and crisp product image you desire.
- Wear a long-sleeved shirt that is one solid color to prevent your arms from reflecting onto the product you are shooting. It’s terrible when you’ve got the perfect photo, but you can see the reflection of your arms in it. It’s a small detail that you can easily forget, yet it makes your photos look even more professional when remembered.
- You can shine one-directional light onto your subject and create shadows by turning off the other lights and just using the one, depending on your vision for the shoot.
- Adding a top light to your lightbox will eliminate most of the shadows.
- Place the subject in the middle of the lightbox, avoiding any other material, such as cardboard or duct tape. If this is not possible, you can crop the background in edit.
- The closer or further away your lights are will change the lighting effect in your lightbox.
- Don’t use different kinds of lightbulbs as this may change the look of the lighting and make it uneven.
Final Thoughts
Whether you want your lightbox to be large or small, you can follow these same steps; simply adjust the sizes of the boards.
If you decide to build a lightbox bigger than the one in this article, use wood instead of foam board to make it stronger.
You can use lights or lamps that you already have at home to light up your lightbox. If you want to get creative with the lighting, use the LIFX Wi-Fi Smart LED Light Bulb that offers an array of different colors and options.
Sources
- Printmoz: Foamboard vs. Styrene | Pros and Cons For Your Business
- WikiHow: How to Create an Inexpensive Photography Lightbox
- The Phoblographer: Cheat Sheet: How to Use a Light Box for Product Photography
- YouTube: Spyros Heniadis: DIY Light Box For Photography Just $7!
- YouTube: DIY-XYZ: How To Build A Photo Light Box For Less Than $10


