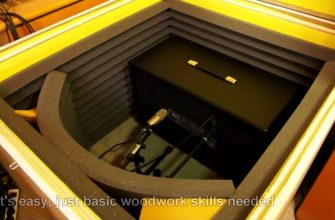
Wondering how you could do acoustic treatment for your home studio or for a dedicated one then, this post will surely give you a better understanding of it.
When I first started I was searching here and there for guides, other effective and cheap ways on how to do it.
And I know you must be doing the same thing, that’s why you are here… right?
The utter truth about it is that – It is quite easy and you can do it easily if you know the basic building blocks.
Don’t get me wrong here, I am not saying that any beginner can do an excellent job at a single try.
On the other hand, it is quite achievable for anyone if you know what goes into it and how you should do it.
- Let’s look at an example
- Summary
- Why is acoustic treatment important?
- Disturbances that you are going to experience –
- How it works? (Short Summary)
- Steps involved in the process
- Step 1 : Isolation of the studio
- Step 2 : Sound Absorption
- Step 3 : Diffusing the Sound waves
- The essential things needed for the treating process
- 1.Bass Traps
- 2.Acoustic Panels
- 3.Diffuser
- Installation of the sound deadening materials
- Step 1 : Install the Bass Traps
- Step 2 : Installation of acoustic panels on corners
- Step 3 : Installation of acoustic panels on the flat walls
- Step 4 : Installing the diffuser
- Different types of treatment
- Some Guidelines :
- How much does it cost?
- Some DIY Acoustic room treatment
- Related posts:
Let’s look at an example
Say you are building a PC from scratch and you are a complete beginner. The first thing you need to know is – the parts needed to build a pc.
You also need to configure these parts according to your needs. Like .. you need a Better GPU if you want to play games.
A processor with more cores and high RAMs will help you render video faster, etc. After this, you have to put them all together.
Lastly, you have to install the OS for your system and you have finished building your PC
Now, you might be saying “What does building a pc have to with Acoustic Treatment?”
Well, see for instance there is the systematic way in building a pc, and like this – the treating process has its own procedure.
Summary
There are things you need to do first before you start the process of sound treatment.
You need to know what type of room or space you are dealing with. Is it for a cathedral, a home theatre, a small room or studio or a mixing room!!
It can go on like this and all you have to know is how to configure for the situation you are dealing with.
The process for treating a large cathedral will be quite different from that of a small studio room.
You must have experienced that cathedrals sound very good and empowering – cause they are made to sound like that.
I will try to explain step by step how to do it from the very basics. I will make it simple as possible and cover as much as possible.
So that you know and get an idea on how to achieve a decent treated environment that is going to suit your situation.
Moreover, you can tweak and make changes to get the desired ambiance from your room.
Coming to the topic, we are going to discuss the acoustic treatment of a home studio.
Here are the main points that we are going to discuss and you can skip to any portion if you already know it.
- Why you need it
- How it works
- What the main steps involved in the process are
- Things needed for the process
- How to do it
- How much it costs
- DIY Acoustic treatment tips
Why is acoustic treatment important?
It is as important as having dedicated microphones to record different types of instruments.
Treating your room is an essential task that you should never leave out while building a studio or home studio.
This is the process with which you will be able to set up the studio room to sound the way you like.
Moreover, you will be able to control the ambiance of the room and set different regions such as the LIVE END DEAD END (LEDE) for specific purposes.
If you don’t take the time to treat your room properly then, I can assure you that the recordings won’t sound good
Even the monitoring and mixing process will be difficult. Every room already has its own ambiance and a natural room suitable for recording is hard to find.
We are talking about a home studio here… So the possibility of the studio is in the basement, garage, or a normal room is quite high.
Disturbances that you are going to experience –
The type of rooms for a home studio as I have mentioned above will be filled with mainly two types of sounds :
1.Sound coming from outside environment – it can be any type of disturbance from the outside world. This is also the first thing we need to prevent.
It will seriously ruin your recording and get in the way of treatment process if you happen to leave this out.
I have two small siblings and the thing with them is that they are all crazy. They will make this loud noise just to disturb me.
And you will get it if you have siblings too. You need to isolate your studio from the surrounding environment to get the best out of it.
2.Unwanted sound inside your studio – This is where the treatment is necessary and it can range from low-frequency sound waves to high-frequency sound waves.
It could be the flutter echoes due to the reflective surfaces inside your room – walls, ceilings, instruments, etc.
According to your room, it may be filled with a lot of reverberations or maybe completely dead on the other hand – which are not suitable for a studio.
You need to control this and make it more or less lively. These are the main reasons why you need to treat your room properly.
After the process has been completed, you will be able to record, monitor, and mix effectively. Plus the quality of the track will be much better than before.
Breakdown of the sound waves present inside your room :
The direct sound waves traveling directly to the recording equipment, the microphone. And this type of waves will maintain it’s characteristics
All the other sound waves traveling in other directions excluding the above will get reflected back and reach the microphone. But, these reflected waves will have different characteristics.
While the changes in the characteristics may be bad or good for your studio… Mostly bad…
Keeping it Simple and Basic while maintaining the balance in absorption, diffusion, and isolation is the key.
How it works? (Short Summary)
It works on the simple principle of removing any unwanted thing till the desired level is reached.
Let’s say you need to isolate your studio more before treating it. Then you go through the isolation process.
This is a process where you limit the movement of sound waves from outside the room to inside and the other way around too.
Next, you are going to check and try to reduce the sound waves that will ruin the recording inside the room using absorbers of the different frequency ranges.
Yes, you are going to need different material absorbers for different sound waves.
Different materials respond very differently to a wide range of sound waves and we need to know what works the best for a particular range of frequency.
We have isolated and reduced the annoying sound waves… Now, we need to tune the reflections to sound more natural.
Therefore, the last thing we need to do is make some of the reflections needed distribute equally inside the room.
Symmetric distribution of the sound waves (rather than in some particular directions) is very necessary for a natural-sounding environment.
Many people think that they can get away without doing it, but the utter truth is that “You Simply Can’t”.
If you are building a professional studio or a home-based studio, you shouldn’t avoid treating the room.
I can guarantee that you will regret it later for not going through the process – cause I have experienced it.
I made this mistake when I first started out and the quality of the track was very bad.
You might be thinking “Oo !! I don’t have the cash for that.” Well, you need to start saving up some bucks if you are serious about this.
And I Know you are….
After all, it all comes down to these things :
- Who are you making the music for? Is it going to be for the public or are you going to keep to yourself…
- You want professional sound quality and plan to release it to the general public.
- Planning on upgrading your home studio to a professional one…
- Or you just want a high-quality track.
Nevertheless, going through the process won’t be a loss to you and your studio.
We should never forget to check the response of the room along the process of creating. And remember not to overdo it.
As it will lead to a completely dead environment, and we don’t want that to happen.
Short Note: To tell you the truth, building a room with great acoustics require a lot of cash and space too. So, what we are going to do is either fake it or tune the reflections of the room to mimic an ideal room.
Steps involved in the process
Step 1 : Isolation of the studio
Many people tend to leave this out and don’t consider doing this .. but you should isolate your studio room before you do anything else.
The isolation process is commonly known as “Sound Proofing”. And as you may know, it’s the process of blocking unwanted noise coming from the outside environment.
Please don’t mix up Sound Proofing with Acoustic treatment, these two are very different things.
On the other hand, they compensate one another and the first must be done before coming to the latter.
While you are doing soundproofing, the thing you should always remember is that “Thicker and more compact the material, more is the sound blocking capacity”.
So, let’s say you have two doors, one is made from thin and light plywood, and the other – a thick solid core door.
The hard solid core door will be better at blocking unwanted sounds. The same goes for your walls too.
I think most of you will have drywall, and I suggest you add another thicker layer to that as an additional one.
You can add acoustic foam as a sub-layer between the walls to make it more effective. Don’t forget your windows and ventilators too.
Look at this article on how to do this properly. We will focus on the two main steps involved in the treatment process below
Step 2 : Sound Absorption
Now, we are going to tune the reflections inside the room according to the level we need.
It’s the process in which sound waves are absorbed and prevented from reflecting back to the microphone which will eventually ruin the recording.
For the info, not all reflections are bad. I am talking about the reflections that have the potential of damaging the record.
Let’s say we didn’t put any sound absorbers inside the room. Then, some of the frequencies of reflecting waves will get amplified or canceled out (in the case of parallel walls)
While there may be annoying flutter echoes inside the room. And on the other hand, some of the low-frequency disturbances will go unnoticed with your naked ears.
But when you hear the recording, it will become obvious and evident. We need to remove those too.
Step 3 : Diffusing the Sound waves
Yes, we need to diffuse the sound waves inside the room too as we are not going to completely absorb the sound waves.
Reflections are also a very necessary thing needed inside a studio to make it sound more natural while recording.
We don’t want a completely dead environment, and it will be a bad thing when you try to record too.
What we want is the right balance of absorption and diffusion to make sound clean and natural.
And in this process, we are going to diffuse or scatter the sound waves uniformly throughout the room.
You should make sure that the absorption part is completed and after that, you should add this according to the amount needed.
As for a small studio, you might not even need it… if the second step is enough for you then, you can stop there.
From my point of view, there should be some amount of diffusion so that there is some natural ambiance to the recording.
Well, the decision is yours to make, and make sure you check as you go through the process if what you are adding is enough or not.
The essential things needed for the treating process
1.Bass Traps
This is the thing meant for absorbing bass frequencies (plus low frequencies) and can’t be done by simple acoustic panels as low frequencies like them are hard to handle.
It’s the thing that you commonly see on the corner of the walls of a studio. The thing that looks fancy and good inside the studio is actually meant for this purpose.
It offers a wide range of absorption ranging from low to high-frequency waves including bass frequencies.
Don’t get me wrong here when I say it can absorb low and high-frequency waves too.
Yes, it can but not to the extent where you don’t require anything more like acoustic panels.
Sometimes, it may be enough but they are meant for absorbing high and low-frequency sound waves.
2.Acoustic Panels
They are main device that will absorb the high and mid frequency signals
These types of acoustic panels should be used after you have installed the bass traps as they are not good at absorbing the lowest frequencies.
They will be helpful in reducing the change in characteristics due to the parallel walls as I have mentioned above (like standing waves).
Hence, the bass traps and the acoustic panels will compensate each other as they will be placed at different positions inside the room.
3.Diffuser
For diffusing the sound waves present inside the room.
Diffusers are generally expensive as compared to others and some people say that it’s not that necessary while others say it is.
And the best know if your studio room needs this or not is to test your room.
After you have added the bass traps and acoustic panels, try recording and look if the recording sounds natural or has a room ambiance to it.
If it’s not to your liking then, you can add a diffuser and see if that solves the problem.
Building ad making a good acoustically treated room will always be a trial and error method. You have to check it as you go through the process.
Installation of the sound deadening materials
The following steps will also give you an idea of how you should do it and where you should place the acoustic foams.
Step 1 : Install the Bass Traps

We are going to place the bass traps at a position where the bass frequencies are the highest.
They also offer a wide range of absorption and therefore it will be best to choose a place where we can effectively absorb all the most frequencies.
And the region will surely be the eight corners of your studio (if it’s a Cuboid shape). It’s the place where all the three walls (three nodes from different dimensions) meet.
I have also shown the positions on the figure with shaded circles, and this is the best place to put the bass traps.
Moving on to the next part of the process…
Step 2 : Installation of acoustic panels on corners

You should also install the acoustic panels on some of the corners (not all) of your studio.
The corners stated here are the remaining corners where the two walls meet. These positions are the second thing you should care about after the first one.
It deals in two dimensions. You can just bend the acoustic panel and install it in the corners. There will be some gap when you install it like this.
And don’t you worry about that cause it will still help in the process. If you don’t get it then, have a look at the diagram I have here.
Now, You have the idea of what I am talking about right… Let’s move on to the next part.
Step 3 : Installation of acoustic panels on the flat walls

We have finished the three dimensions and the two dimensions. Therefore, we are left with the one dimension thing.
And we are going to deal with that in this step.
You are going to install the acoustic panels on the flat walls probably install them on the parallel walls to remove the standing waves caused by them.
When you install them make sure you are installing them in a way that will eliminate the amplification or cancellation of the frequency of the concerned waves.
And be sure to install them in a zigzag manner as shown in the figure for the maximum efficiency with the least amount of panels.
So that one panel isn’t directly opposite to another panel on the other side.
You should do it for any shape of the acoustic panel you are using – it may be square ones or rectangle ones, longer ones, etc.
To the last part of the process ..
Step 4 : Installing the diffuser
When you are installing the diffuser (if you are going to) you should do it in the upper parts of the wall.
Commonly, they are placed at the back of the studio at the live end region to prevent the uncomfortably dead situation due to over dampening.
As I have told you that you can skip this part only if you don’t need it as they are a bit expensive.
Be sure to check if your room sounds dead and less lively. Only then you need to keep some reflections and scatter them using a diffuser.
Now, you know how it works and where to place the acoustic panels, bass traps, diffusers, etc.
Different types of treatment
Yes, you need different types of treatment for different situations. For instance, the treatment for a live room and a control room are different from each other.
For recording, we need a live room that will sound nice, natural, and lively. But for the mixing process, we are going to focus on the accuracy of the monitors.
Therefore we need somewhat that is less lively where you won’t be interfered with by the reflected waves.
The pro studios have separate rooms for each one of them. But, that won’t be the case for a home studio.
I don’t know if you are going to build a recording studio or a mixing studio. Probably, you are going to do both.
So, we are going to do both in the same room and we can achieve this using the LIVE END DEAD END technique.

It’s a simple process of creating two regions inside a single room.
The process will depend on the positioning of the gears inside your studio. For example, you should keep the studio monitors to have a larger space from the wall it is facing.
It’s is to make room for reverberation that we are going to need. Further, we need to place the monitors such that the stereo image is symmetrical throughout the room.
The other thing you should keep in mind – the sitting position should be equilateral with your two monitors as shown in the figure.
Don’t forget to keep some distance between the monitors and the rear walls and also put some bass traps on the walls rear to the monitors.
You can have a look at the diagram and see a rough idea of the room acoustics. You will notice that there are two regions in the same room.
One is a live region and the other is a dead region. And that’s how you do it for a home studio.
And please note that the number of acoustic panels or diffusers you should install will depend on your room.
Figuring that out is your job. By the way, you can test this by clapping your hands inside the studio or saying something like “Hello!!” inside it.
Examine whether the room responds to the way you want. You can even check by doing test records.
Some Guidelines :
Control rooms generally go about with 50% – 60% coverage while doing the treatment process. It can go lesser and more but that’s the average I have seen.
Live rooms can go up to 50% and the lowest around 20% coverage in the process.
Remember it can vary according to your room and you shouldn’t forget to test it along the installation process.
How much does it cost?
It can be expensive if you are going to use high grade commercial materials to do it. It can easily cost you a couple of thousand dollars.
Waitt !! Don’t get carried away with that. For a home studio, you can still manage to do it properly with a low budget.
It can go around from $500 – $1500 depending on the number of materials you use and the size of your room.
There are also packages for Acoustic Treatment, where all the needed materials come in one single package.
You can just buy it according to the dimensions of your studio. If you buy it like this then, you can save some money compared to buying them separately.
Make sure you go through these steps properly and have a look at my post on building a home recording studio from scratch if you are planning on building one.
Some DIY Acoustic room treatment
1.You can use common things such as clothes, pillows, cushions, blankets, etc.
Which are soft but thick and porous in nature as sound absorbers.
Soft and Thick materials are naturally good sound absorbers and you can use everyday common materials that fit the description to absorb sound waves and reduce echoes.
While adding these materials, don’t forget to add them uniformly so that the stereo inside the room is symmetrical in nature.
2.You can use a book shelf and make it do the job of a diffuser.
It can be done by arranging the books in such a way that it will scatter the waves uniformly throughout the room.
You can mimic the shape of the diffuser by filling up one of the compartments for every two.
Disclaimer : It won’t be as good as a dedicated diffuser but it will still help.
3.Another thing that you could use is a reflection filter for your microphones.
When you are recording … and as the microphone is very sensitive they will pick up the sounds coming from other sources too.
This will definitely ruin the recording and this is where the reflection filter is useful – it will block off unwanted sounds from the surrounding.
4.Using one-directional microphones while recording vocals and other instruments.
As one-directional microphones pick-up more sounds in one direction other than the remaining ones, it will help in achieving clear records.
These are for people who don’t have a budget right now and plan to do it later. Hope these tips help you manage some of your problems.