How to SoundProof Your Home Studio On Cheap and Easily
We all know the annoying background noise (that can be heard on the backend of a record) when we try to record something with our microphones or phones, can be anything else.
It can be a bit annoying sometimes if you want to record something in a professional manner. And if you want to do something like Soundproofing Your Home Studio in an easy way – I can bet you that you would love this article. So, hold on a little longer.
Moreover, if you want to get a great quality record with your Home Studio setups, then you really need to cut off all the noise from the outside environment.
Moreover, the sounds from your studio might disturb others too. Especially, when you have a small kid at your home. We had small kid (about 6 months old) and I had to reduce the sounds escaping from my studio as much as possible.
Why You need to Soundproof your Home Studio?
First of all “Soundproofing” is very much different from “Acoustic treatment” , many people get confused between these two and think that they are the same. Let’s have a look into these two.
Soundproofing – It is the process of blocking all the unwanted sound or noise coming from outside environment to a room and also preventing the sound inside the room from escaping.
Acoustic Treatment – It is the process in which a room is set up to maintain a level of reverberations or echo (like a desired level of freedom of these factors) so that the records sound the best in that particular room or studio.
Yes, you need to do both for your studio but we are going to discuss only about Soundproofing on this post. Here is an article on acoustic treatment… if you want to know more
Some Examples : Just open your recording app on your phone and record something inside your room. Now, hear the record for yourself and you will hear all these different types of noises that you never picked up with your naked ear. And that’s the thing we are trying to eliminate here.
Imagine it when you use a dedicated microphone to record the same thing – dedicated microphones are able to pick up even the slightest change in audio signatures and therefore, it will be a mess.
Soundproofing
There are two way you can soundproof your home Studio or your room :
- Hire an Expert and let him do the job for you. It will be expensive too if you go to this route but you can just sit and relax while he does his.
- The Second way is to do it Yourself – you won’t need a large budget and will take a little bit longer as compared to the above. And you don’t need to worry as we are going to talk on how to do it in an easy and effective way.
For more information, check out how to cheaply soundproof a door.![]()
![]()
Some Easy Steps :
1.Fill all those holes and gaps –
Search for all the holes and gaps in every nook and corner of your room as they will be your worst enemy if you move on to other things before you do this step. You can check this out if you want to know how it will affect your records.
Put on some music on your studio or room and hear it somewhere form outside of the room in two different locations – on a place where there is a crack or some opening and the other on the normal wall to your room where there is no gap or openings.
You might not even hear a thing in the Second case if you have a thick wall, while you will surely hear the music in the first case as the sound will travel right through the crack or gap as there is a medium of air in contact with the outside environment.
So, seal up those gaps and cracks before doing anything. And for that, you can buy a Noiseproofing Sealant.
2.Soundproof your Doors and windows –

This is the next big thing you need to consider after completing the first step.
You can soundproof your door in different ways. One of the easiest and inexpensive ways to do it is by using an Adhesive Weatherstrip which you can put under your door. You don’t need anything fancy – just take it off, place it under the door and you have finished installing it. Simple as that.
After that you need to examine the material of your door –if it is solid and thick in nature then there is no problem in it. But, if it’s not that solid and thick you probably have to change it to a more solid one. Having a more solid door will block more sound as compared to a lighter and thinner one.
Now, if you don’t want to get a new solid door or change it you can get a Soundproofing Blanket. Yes, a Soundproofing blanket and hang it in front of the door. You might be wondering “Is it that effective?”, Yes it is effective. I think this is the way to go rather than getting a new door.
- Panels have bound hems, double nickel plated brass grommets 12″ O.C. along top and 18″ O.C. along…
- Double faced material in nominal 2″ thickness, for use as an absorber, or combination…
- Measures 4′ width by 8′ height by 2″ thickness
Last update on 2025-05-23 / Affiliate links / Images from Amazon Product Advertising API
You can also us soundproof curtains but I think it won’t be that effective as compared to the above ones.

Let’s go to Soundproofing the Window part – if you have a window at your studio I suggest you get rid of it (if it’s alright with you). The reason is that getting rid of it will be the more easy and effective way to block the noise from outside.
On the other hand you can use the Soundproofing blanket that I mentioned above to seal window tightly. And Don’t forget to seal all the edges carefully not to leave any small openings when you seal your window. I have read some other articles saying that you could use soundproof curtains too, but I in my opinion I think it won’t be that effective.
If you don’t want to block the light coming from the window then you can use soundproof fibre glass instead of the normal glass for your window.
Find out more about where to put bass traps in your home recording studio.![]()
![]()
3.Soundproof your Ventilators –

After all the process, you need to look into this too if you have one of this. And more importantly you need one too so that you can let air in and out from your studio or room.
Well, get a ventilator on your room if you don’t have one and you can use the Sound maze that is mentioned on the later part of the post (you can just go to the topic if you have only one ventilator).
But if you have more than one ventilators you get rid of all the ventilators and leave only one. After that you can soundproof the only ventilator left. (You can just dry wall all the excess ones).
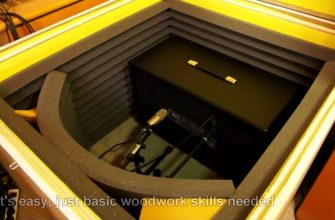
Sound Maze technique – It is the process in which you let the sound pass through layers of zig-zag wooden plates covered with acoustic foam so that the sound coming from outside world is very much reduced when it reaches inside. But Still giving way for the air to pass in and out. Takes a little bit work but will work the best for an inexpensive route.
A diagram representation is given below to describe it more better. When unwanted noise passes through the air vent set up in this manner, the noise gets deadened with the help of the acoustics foams present inside the vent. But Still making way for the air to flow in and out of the vent.
The exciting thing is that you don’t need anything fancy to set this up. All the things you need are some wooden plates, acoustic foams, glues, and a saw to cut it.

4.Dampening your room –
This for the ones who still have issues after all the above steps. The issues may be due to some structural problems with your studio or room.
Something like your walls and the floor vibrates when the kids run around the house, as for your knowledge – sounds travel much faster in solids rather than in gas or solids. So, we have to solve this problem.
We can arrive at a solution for this by the process of “Isolation”. It means to isolate your room so that the vibrating sounds gets dampened when it reach your Studio.You can isolate your room by adding another layer of wall at your room.
I mean another separate layer and not building another layer of wall just adjacent to the initial wall. You will need to hire someone to do it and it will cost a bit too. (You can do it yourself if you have the knowledge).
OR You can Build a second room inside your room to isolate that room from the outside world and achieve the best dampening as much as possible.
As for the Floor you can build a floating surface with the help of wooden beams or PlatFoam and place a sheet above them to create a raised surface. (works in the same principle as above).
Check my post on Sound deadening for walls which further go into details
Conclusion
These are the best and the most affordable way to soundproof your Home Studio that I could come up with. And there are also other ways to do it but would cost more – I will be covering other ways to do it in another article.