Singers, whether professional or amateur, prefer to have a private space to practice their vocals. Specifically, they want a soundproof room in a studio, their own home, or workspace. If this sounds like you, you’re probably wondering how to make a room soundproof for singing.
You can make a room soundproof for singing with professional soundproofing materials like soundproof padding, acoustic blankets, and soundproof floor. You can also use everyday household items like blankets, rugs, and plush furniture to soundproof a room for singing.
There are a number of solutions, each with its own benefits and pitfalls. I’ll cover six soundproofing solutions in more detail so you can decide which one works best for your singing needs. Read on, and you’ll be able to go and start your own DIY soundproofing project!

- 1. Use Acoustic or Moving Blankets
- 2. Install Soundproof Padding
- 3. Seal or Treat Windows
- 4. Decorate With Rugs and Plush Furniture
- Why Rugs Are Good for Soundproofing
- Why Plush Furniture Is Good for Soundproofing
- 5. Add an Extra Layer of Drywall or Fiberglass
- Sound Isolating Walls
- Sound Isolating Doors
- Sound Isolating Ceilings
- 6. Install Soundproof Floor Underlay
- Conclusion
- References
1. Use Acoustic or Moving Blankets
Dense objects like blankets are brilliant for muffling or blocking sound. Acoustic blankets are quilted fiberglass blankets explicitly made for deafening sound in a noisy industrial environment.
They can also be used in recording studios to absorb sound from within or in any other room you want to muffle sound in.
As with all professional equipment, the downside to this is that it doesn’t come cheap. If you find an acoustic blanket is just a little too pricey for your liking, you could try a much more affordable and convenient alternative, the moving blanket.
Moving blankets are thick blankets wrapped around fragile objects that you’re in the process of moving. For example, an antique chair might need a moving blanket for extra protection in a moving van.
There are numerous types of moving blankets, but pure polyester ones are the best for long-term use. Ideally, this blanket will also have batting in the middle. Batting is a thin foam material that makes the blanket even stronger.
These two options don’t totally cancel out sound. However, they do an excellent job at reducing echoes and reverberations and overall deafening sounds in a room.
The heavier the blanket, the more effective it will be at soundproofing a room, so try and go as heavy and sturdy as possible.
Acoustic and moving blankets are pretty simple to install. All you really need to do is drape them on walls and windows using curtain rails, hooks, closets, shelves, etc. This allows easy removal and setup, especially if you’re soundproofing a room in your house.
For a more permanent installation process, you can nail the blanket to the wall or use adhesive velcro strips if you want to avoid holes in the wall.
Amazon has a good selection of moving blankets, such as the US Cargo Control Econo Saver Moving Blankets. They’re cost-effective, versatile, and made of 3.5 pounds (1.59 kilograms) of recycled polyester.
[ amazon box = ‘B00JXP9Z2C’ ]
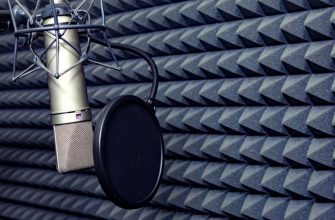
2. Install Soundproof Padding
Soundproofing panels are readily available and reasonably cheap compared to many other soundproofing methods. Like acoustic and moving blankets, soundproofing panels do not eliminate all noise.
Soundproofing panels are best at reducing high and mid-frequency sounds with shorter wavelengths and are less effective at lowering low-frequency sounds like a bass. This is still great for vocals in particular, as most organic vocals are not exceptionally low frequency.
In fact, soundproofing panels are created specifically for acoustic and vocal use. They’re less accessible than moving blankets and not as cheap, but they are still an excellent option if you can get your hands on them.
There are two kinds of soundproofing panel designs:
- Egg crate. The more effective the two, the more expensive; this panel resembles an egg crate in design, like the ones you get at the grocery store. These panels are excellent at keeping sound out but can also be used to insulate sound inside a room.
- Wedge ridge. This square-design panel is often found in recording studios because it manages to deafen sound without distorting it. It’s not as effective at blocking sound, but it’s fantastic for keeping it in.
Though there are many choices regarding soundproofing materials, designated soundproofing panels are made of acoustic foam. These can be made at different densities to block out or keep specific frequencies.
You can find reasonably priced soundproof padding on Amazon. The 24-pack Fstop Labs Acoustic Panels are an excellent choice for setting up your soundproof space. These pads can be moved around, resized, and placed anywhere.
[ amazon box = ‘B08C7ZWR1M’]
3. Seal or Treat Windows
There are two kinds of window soundproofing: reduction and absorption. The reduction ensures sound doesn’t enter a space, whereas absorption ensures sound doesn’t escape an area.
While the reduction is beneficial, absorption is more applicable here, so we’ll explore how we can soundproof glass by absorbing sound.
Seal gaps in the window. Gaps in a window allow sound to escape far easier than if sealed. If your practice space has windows, it’s advisable to fill them with acoustic caulk, polymer sealant, silicone, or white polyurethane.
Glaze or bond window panes. Double or triple glazing windows are a great way to reduce or absorb noise. At least two panes of glass are bonded together over acoustic interlayers. These layers weaken sound as it travels through the glass.
Single panes of glass can also be laminated to make them thicker and more durable, allowing them to dampen sound more effectively. This is a simple way to muffle interior and exterior noise.
Unlike sealing gaps in a window or using furniture, treating glass is not the cheapest method you can opt for. Learn more about the expected cost of using glass for soundproofing here.
4. Decorate With Rugs and Plush Furniture
Rugs are a stylish and efficient way of silencing sound in a room. Anyone with carpeted floors or carpets in their house knows rugs and carpets do wonders for reducing echoes and reverberations![]()
![]() and significantly reducing ambient noise.
and significantly reducing ambient noise.
The thicker the rug or carpet, the less sound escapes. The best rugs to use for soundproofing are shaggy or fuzzy wool rugs. The denser a rug is, the more fibers it has, and the better it is for eliminating sound.
Why Rugs Are Good for Soundproofing
On average, wool rugs reduce airborne noise by 46% by cushioning the impact of footfalls, moving furniture, etc. However, wool rugs are also better at dampening sound because they’re more open and porous, lessening surface noise significantly.
This is why thin, flat rugs will do nothing for soundproofing. Thinner rugs are cheaper and a common choice for living spaces, but they’re pointless when absorbing sound. Investing in a thicker, denser rug for your home or studio makes more sense.
Like the other items on this list, they cannot wholly silence all sound inside or outside a room. But, they make a significant difference when placed in an optimal sound-absorbing space such as the center of a room.
Rugs USA has a stunning selection of shag rugs at an affordable price that would be an excellent addition to your home and/or recording studio.
Why Plush Furniture Is Good for Soundproofing
Plush furniture is another excellent way to absorb sound in a room by reducing acoustics. Upholstered couches and chairs, plush cushions and pillows, thick blankets and throws, and even shelves and plants are a way to soundproof a room using things you most likely already have.
Doing things as simple as placing furniture against a wall and putting more books on a shelf can make a world of difference in absorbing noise while also making you comfortable while you warm your vocal cords.
Adding elements in the center of a room, where the most reverb would happen on the open floor space, or against the walls where sound most often escapes, is the best bet for increasing the soundproof qualities of any room with minimal hassle.
Plush furniture, in particular, is an innovative and simple way to absorb sound. Fabrics like suede, velvet, microfiber, chenille, corduroy, and textured materials like polyester are great sound mufflers.
They work similarly to rugs, dampening airborne, impacting noise, and making it difficult for sound to penetrate their thick fabric. This has an added effect when furniture is placed next to or against the wall.
Rowe Furniture is a company that creates gorgeous handmade sustainable furniture with the perfect upholstery job for your soundproofing needs. Check out their range of products and services on the Rowe Furniture website.
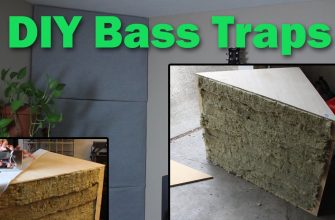
5. Add an Extra Layer of Drywall or Fiberglass
Decoupling and adding extra layers to walls and flooring is a sure way to reduce noise and absorb sound in a room. One way to do this is to add an extra layer of drywall or fiberglass to the walls and floors of your space.
Adding drywall to a room isn’t as easy as the other methods discussed here. You’ll most likely need to hire professional help to make sure the job is done correctly, will last, and will actually serve to dampen sound.
Sound Isolating Walls
This process includes adding sheet block or mass-loaded vinyl to a sheet or section of drywall. Leaving a space between the original wall and this new wall, place the new wall with the vinyl facing inwards.
Adding an extra wall to the walls of your studio for soundproofing is known as sound isolation. There are numerous sound isolation tools, not only for walls but also for doors, floors, and even ceilings.
This should work wonders for the way sound moves in and out of your studio, so you don’t disturb others and will also have reduced noise from outside. Finally, you should secure this new drywall barrier with sound-deadening caulk for an extra airtight protective layer.
Sound Isolating Doors
Most doors in your home, and inside buildings, in general, are hollow. This is more cost-effective when building and renovating, but it’s not ideal for a soundproof room or studio. Luckily, this is a relatively simple fix.
Soundproofing a door simply requires you to insert a soundproof acoustic panel inside a hollow door. You may want to hire a professional to ensure the job is sound, but this is also a project you can undertake yourself.
However, if you feel like you need help with this undertaking, Soundproof Cow offers soundproofing kits and services to help you get your doors, walls, floors, etc., at the right level of soundproofing for you.
After you insert the acoustic panel, you should seal the outside of the door to make sure no sound escapes through any gaps that may still be there. You can do this using aluminum gaskets lined with rubber.
Cut the aluminum gaskets to size and place them with the rubber or neoprene side facing towards the door to create a suction effect that is tight but not so tight that the door is no longer functional.
For those who aren’t overly familiar with DIY like this, watch the video below to see how the process works from start to finish and follow along:
Sound Isolating Ceilings
Fiberglass, drywall, vinyl, and medium-density fiberboard are the best materials to deaden sound in a room using the ceiling. This is quite a big job that requires professional help for the best result.
The job difficulty either increases or decreases depending on if your ceiling is made of drywall or drop tiles. Drop tiles are more difficult to work with in this case, but it’s still possible. Drywall allows more layers to be added easily.
Soundproofing a ceiling using drywall works the same way as soundproofing a wall with drywall. You need to create a new “wall” with a sheet of drywall with sound isolation sheets and place this over your ceiling.
Seal the new ceiling with acoustic sealant to ensure no air gaps are left to conduct noise. When securing the new layer to the ceiling, ensure you do so evenly and include enough fastening tools. For example, bolts or nails can secure the structure to the ceiling joists.
Note that, like the other methods in this article, soundproofing a ceiling does not mean your room will be silenced altogether. The steps you take to soundproof your ceilings deaden and isolate sound and reduce echoes and reverb, which works perfectly fine for a singing studio.
6. Install Soundproof Floor Underlay
Putting carpets and rugs over your floor is one way to muffle the sound. Still, if you want something more permanent, install soundproofing underlays underneath your flooring using soundproof sheets, joist isolators, and more.
Soundproofing floors is a great way to reduce vibrations and impact noise, whether outside or inside the room. You can do this on your own, but if you don’t feel confident removing your flooring, ask a professional for assistance.
Soundproof floor underlays come in the form of acoustic and vinyl sheets or layers of polyethylene foam placed underneath the flooring in a room. This flattens vibrations and stops echoes, making it a good choice for studio soundproofing.
Floor joists are horizontal beams that make up part of a floor’s structure. They hold the flooring together and distribute weight appropriately between beams, walls, and ceilings. They’re integral to the structural integrity of a building.
Floor joists are u-shaped pieces of thermoplastic or foam that you can place over these joists to muffle the sound. Sound travels through gaps more easily, so you have effectively soundproofed your floor by filling gaps in the flooring with soundproof material.
You can also insert aluminum panels beneath your joists for further soundproofing effect, though this is a big job that would mean you have to remove all your flooring. This could be pretty tricky and expensive but worthwhile if you’re willing to invest in a long-term solution.
Conclusion
There are dozens of ways to include soundproofing elements in your studio for all your singing needs. This could be a room in your home, a professional recording studio, an office space, or any other room.
Most forms of soundproofing are also straightforward to install or achieve yourself, so if you’re looking for your next DIY project, this might be the one for you.
References
- https://www.soundproofcow.com/what-is-acoustic-foam-made-out-of/
- https://www.realhomes.com/advice/double-pane-window-cost
- https://www.rugsusa.com/rugsusa/control/search-shag-rugs
- https://www.rowefurniture.com/
- https://www.soundproofcow.com/product/quiet-door-residential-door-soundproofing-kit/
- https://isostore.com/product-catalog/green-glue-compound.html?gclid=Cj0KCQjw_7KXBhCoARIsAPdPTfg0fHibhIO2vdPME5r_g4HlYzI5kBNMJ2Enc_FSgI_tGwZUVq_ZyJwaAgppEALw_wcB
- https://www.soundproofcow.com/product/floor-joist-isolators-case-of-100/