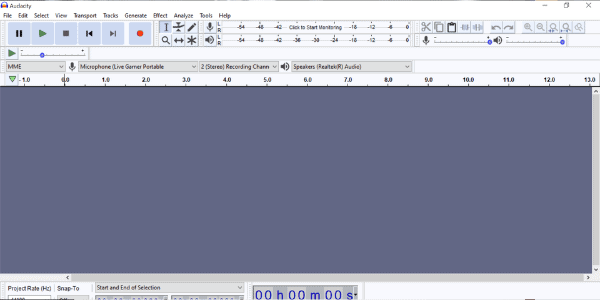
There is nothing more annoying than an unwanted echo when you’re recording a song or a podcast in Audacity. You want to get rid of the echo for good, but how do you do that?
Here are 5 ways to remove the echo from audio in Audacity
- Move closer to the microphone.
- Turn down the gain and use Amplify.
- Reduce ambient echo with Noise Reduction.
- Reduce ambient echo with Noise Gate
- Try a commercial plug-in.
Removing echo from a recording is difficult and often results in unacceptable losses of sound quality. These steps may not remove your echo altogether, but they should reduce it significantly with a bit of luck. Read on and learn how you can fix your reverberant recordings.

1. Move Closer to the Microphone
If you’re too close to the microphone when you speak, your recording will emphasize consonants like “p” and “t” and make “s” sounds uncomfortably sibilant. But if you talk too far away from the microphone, your recording will pick up more background noise, including echoes.
This can become a huge problem if your microphone is closer to a wall or window than it is to your mouth. The echoes are magnified by the reverberant surface, making your words seem unclear and giving them a booming quality.
For the best recordings, you should speak with the microphone 6-10 inches away. At that distance, you can keep the gain at a reasonable level with both your mic and Audacity settings. The lower the gain, the less chance there is of picking up unwanted sounds.
A pop filter like the Earamble Microphone Pop Filter (available on Amazon.com) will keep your p’s from popping and your s’s from hissing when you lean into your mic. You may also find that placing a thick quilt around the back of your microphone and recording in a room full of padded furniture goes a long way toward helping your echo issues.
- 【Two-screen Pop Filters】 The first screen blocks air blasts as any pop filter normally would;...
- 【Adjustable Gooseneck】The pop filter has a flexible 360° gooseneck clip stabilizing arm that...
- 【MULTI-SCENE APPLICATION】:Studio microphone mic wind screen pop filter mask shied is essential...
Last update on 2025-07-12 / Affiliate links / Images from Amazon Product Advertising API
Moving closer to the microphone will also help you use Audacity to correct one of the most common echo sources and other unwanted background noises.
For more information, check out how to make your voice sound better on Audacity.
2. Turn Down the Gain and Use Amplify
Your mic’s gain knob can be used to increase or decrease the microphone’s sensitivity. Raising the gain means your mic picks up sounds it would miss on a lower gain setting.
Using Audacity, you can turn down the gain until your microphone is no longer recording background echoes. You may be disappointed with the results at first, as your voice seems too quiet. But Audacity’s Amplify function can help.
To Amplify your voice using Audacity:
- Select your vocal track.
- Go to “Effect” and choose “Amplify.”
- In the “New Peak Amplitude” window, set your desired setting with 0.0 max. (-3.0dB will generally be sufficient).
- Make sure “Allow Clipping” is not checked, as clipping leads to distortion.
- Click “OK.”
When you click “OK,” you should see your waveform becoming taller. Then, when you play it back, your once-quiet voice should be louder. Note that the volume slider on your playback feature will make your voice sound louder through your headphones but will not increase the recording volume.
You may need to tinker with the settings and undo then reapply the effect multiple times before you get the exact sound you are looking for. But with Audacity, you can set your mic gain low enough to avoid many room echoes without compromising recording quality.

3. Reduce Ambient Echo With Noise Reduction
Noise Reduction is better suited for removing steady and consistent noises like air conditioners. Echoes are particularly challenging as they are very similar to the original signal. Reducing the echo without distorting the desired audio is a tough challenge. However, if you only have a slight echo, Noise Reduction may help tame your problem.
To reduce background echo with Noise Reduction, you will need an audio sample of the echo, which Audacity calls a Noise Profile. This sample must be at least 0.05 seconds long at 44,100 Hz, but you will get better results with longer samples.
To reduce echo with Noise Reduction:
- Select a region of your waveform which contains only the echo that you want to remove.
- Click “Effect,” then “Noise Reduction.”
- Click “Get Noise Profile”
- Select the track or region where you want to reduce the echo.
- Click “Effect,” then “Noise Reduction.”
There are several sliders that let you tailor the Noise Reduction to your needs:
- Noise Reduction (dB): How much you want to reduce the background echo. The higher the setting, the more likely you will see distortion in the remaining audio.
- Sensitivity: How much echo you want to remove, ranging from 0 (none) to 24 (as much as possible). Too low, and you may see distortion in the noise-reduced audio: too high, and you may lose signal along with the noise.
- Frequency Smoothing: This can help reduce artifacts in noise-reduced audio. Settings range from 1 to 6 with a default setting of 3. Lower settings are best for music, while podcasts can use higher settings.
For more information, check out my guide to removing room echo on Audacity.
4. Reduce Ambient Echo With Noise Gate
A noise gate stops any signal below a certain threshold, allowing signals above that level to pass undisturbed. Noise gates can shut out feedback, hiss, and hum, and Audacity’s Noise Gate effect may reduce the volume on your echo.
To use Noise Gate to remove audio echo:
- Select a section of your track that contains only echo.
- Click “Effect.”
- Select “Analyze Noise Level.”
- Click “OK.”
Audacity analyzes the echo as noise, then provides suggested settings to reduce that noise through the rest of your track. Those settings are:
- Gate Threshold: The audio level below which the gate closes.
- Gate Frequencies Above: If set to the default of zero, the gate processes all the audio. When set above zero, it only affects frequencies above a certain Hz (10kHz maximum). This option is useful when dealing with high-frequency feedback and hiss.
- Level Reduction: How much is the signal suppressed if it is below the gate frequency. At 100, the gate stops low-level sound entirely, while other settings simply attenuate its volume even further.
- Attack: How quickly the gate opens
- Hold: How long the gate remains open.
- Decay: How long it takes for the gate to close.
A little bit of noise gating can help make vocal tracks clearer and remove some unwanted reverb. But while Audacity’s Noise Gate can help you reduce echo, you should use it with caution. Overly aggressive gating creates unnatural, abrupt silence between words or musical notes.
For more information, check out my review about Audacity is good recording software.
5. Try a Commercial Plug-In
If all else fails, there are several commercial echo-removing plug-ins that work with Audacity.
However, keep in mind that removing an echo from a track without distorting the original audio is a very tall order. These plug-ins do it well, but they don’t do it cheaply, so you should only opt for this option if you have the budget and are ready to spend.
SPL DeVerb Plus
When producers are stuck with a great track laid down in a bad environment, they turn to SPL DeVerb Plus. This VST plug-in works with Audacity and other DAWs and has a clear and easy-to-use interface. DeVerb Plus will take the echoes out of your recordings and leave you with professional-quality audio.
ACON Digital Deverberate
ACON’s Digital Deverberate uses a deep learning algorithm and statistical analysis to pick out echoes and reverberation and separate them from the signal. Virtual dials let you increase the reverb or signal at different frequencies to give you precisely the mix you want without unwanted reverberation.
While DeVerb Plus and Deverberate are expensive, they may be worth your while when you need to upload your show yesterday, and re-recording is not an option.
Final Thoughts
An unwanted echo can make your audio worthless. Fortunately, there are ways to salvage your track and reduce if not eliminate echo. Best of luck in your recording career!
Sources
Recent Posts
QuickTime is a vital app for many Mac users, and if you’ve recently bought a new microphone, you might wonder how to use it optimally. QuickTime cannot record audio content if it doesn’t have...
Every microphone leaves a unique signature on the quality of its output. If you’re a podcaster trying to melt your way into your audience’s hearts, a muddy, distorted recording won’t cut it....

