Echoes are annoying while streaming as your viewers can’t hear you clearly. Taking steps to eliminate it will improve the quality of your stream. So how can you tackle this problem and ensure your viewers have a wonderful experience?
You can stop a room from echoing while streaming with acoustic panels and sound or moving blankets on the walls. They absorb sound waves, reducing their intensity. Dynamic microphones are helpful as they pick up sounds in the direction they’re facing, making it easier to drown out background noise.
If you want to ensure your viewers have an excellent auditory experience while watching your stream, below is a comprehensive list of what you should do. As you learn different techniques to reduce echoes, try different combinations to see what works for your room.

- 1. Start by Installing Acoustic Sound Panels
- Where To Install the Acoustic Sound Panels
- 2. Hang Sound or Moving Blankets in Your Room
- Where Do You Hang Sound or Moving Blankets?
- 3. Try Out Dynamic Microphones With Cardioid Patterns
- 4. Put a Carpet on the Floor
- 5. Use the NVIDIA Broadcast App
- How To Use the NVIDIA Broadcast App
- 6. Fill Your Room With Furniture
- Final Thoughts
- References
1. Start by Installing Acoustic Sound Panels
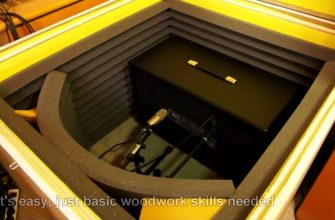
If you follow any popular streamer, you would’ve noticed that most of them use acoustic sound panels with their setup. Generally made from foam, polyester, and rock wool, these panels can absorb sound, preventing echoes from forming inside your room. In the market, they come in all sorts of shapes and sizes, making them easy to mount on various surfaces.
So how can you use acoustic sound panels to stop echoes? Before you go ahead and buy them, make sure you know the dimensions of your room.
Does this mean you have to buy enough acoustic sound panels to fill your room? No, it’s unnecessary, as just 5% – 10% of panel coverage should be enough to ensure you don’t hear your voice echoing.
If you fill your room with acoustic sound panels, it will reach a point of diminishing returns. In other words, after a certain point (i.e., you installed way too many panels), you won’t be able to perceive the difference these panels make. Also, you will spend hundreds, if not thousands, of dollars.
Acoustic panels are fantastic as they can easily match your room’s aesthetics![]()
![]() . They come in different colors, ensuring they don’t stand out or look unpleasant while streaming.
. They come in different colors, ensuring they don’t stand out or look unpleasant while streaming.
The panel material should be porous and light to reduce or eliminate echoes.
Where To Install the Acoustic Sound Panels
Because sound reflects off hard surfaces like walls, it makes sense to install acoustic sound panels on these surfaces. But where, though? You can start with the wall in front of your streaming setup before moving to the one behind you.
Ideally, maintain balance when installing the panels. For instance, if you place a panel on the wall to your left, you must do the same on the right. By following this technique, you reduce the number of surfaces available for sound to reflect and echo.
After each installation, make sure you perform a sound test to see if the panel’s location makes a difference. Continue placing these panels along the walls of your room till you’re satisfied with the results (or you finished installing all of them).
You can also mount these products on the ceiling to improve sound output quality. However, make sure the adhesive is strong enough to withstand gravity. Although foam won’t hurt you when it falls, you don’t want your viewers to see a panel drop from the ceiling during your stream.
If you’re not sure about the strength of the adhesive, you can use double-sided tape.
2. Hang Sound or Moving Blankets in Your Room
If acoustic sound panels didn’t provide the best performance for your money, or you’re looking for more techniques to improve the auditory experience, another way to target echoes and eliminate them from your room is to use sound or moving blankets.
Sound blankets are explicitly designed to absorb and dampen sound, reducing the intensity of these waves. However, they tend to be expensive because they are used for a very specific purpose. Also, it’s not practical to cover your room with these products because they will cost thousands of dollars.
If sound blankets are too expensive, you can try out moving blankets. Moving blankets are used for packing various items, especially furniture, to prevent damage during transportation.
Fortunately, you can use them for sound dampening because of their excellent sound-absorbing properties.
Although they tend to be thinner than sound blankets, you can always find thicker variants.
Where Do You Hang Sound or Moving Blankets?
Glass![]()
![]() is an excellent material for reflecting sound waves, thanks to its smooth surface. If you have windows in your room, you can replace curtains with sound or moving blankets.
is an excellent material for reflecting sound waves, thanks to its smooth surface. If you have windows in your room, you can replace curtains with sound or moving blankets.
However, because of the weight of these products, the curtain rod may collapse or break.
You can still use two more methods to install sound or moving blankets. Rather than sliding the curtain rod through the grommets, you can use screws and nails to hang them.
Although this is an easy technique, not everyone is comfortable hammering screws and nails into their walls, especially in rented properties.
Luckily, you can still hang them inside your room with the help of 3M Command Large Picture Hanging Strips (available on Amazon.com). Depending on your requirements, they can handle up to a maximum of 20 lbs (9.07 kg). They’re affordable and easy to hide from plain sight.
- MAXIMUM FRAME SIZE 24 X 36 INCHES: One package includes eight pairs (sixteen strips total) of the…
- WORKS ON A VARIETY OF SMOOTH SURFACES: X-large wall hanging strips bond to a variety of smooth…
- SURFACE PREP: Clean the desired surface with rubbing alcohol to remove grime and dust to allow the…
Last update on 2025-05-23 / Affiliate links / Images from Amazon Product Advertising API
3. Try Out Dynamic Microphones With Cardioid Patterns
The type of microphone you use plays a significant role in your stream’s audio quality. You can choose from USB microphones, dynamic microphones, and condenser microphones.
But what if your headphones already have a microphone? Although the microphone may be decent enough to play with your friends, they don’t have the audio quality of an external microphone.
Once you notice the difference between the two, you’ll never be able to switch back to the microphone in your headphones.
So which one should you pick as a streamer? Although USB microphones are cheaper than the rest, getting a dynamic microphone is always better (unless budget is a constraint).
Does this mean you get any model and call it a day? Not really, since you have to examine the microphone’s pickup pattern or polar pattern.
Which one you choose determines what sounds your microphone will pick up.
As a streamer, you should go for ones that have a cardioid pattern. But you might be wondering what a cardioid pattern is in the first place?
To explain this concept, place a microphone at the center of a sheet of paper. Draw a circle around the microphone, known as the pickup pattern.
It shows how sensitive your microphone is to sound in different directions.
A cardioid pattern is one where the device has the highest sensitivity at 0° or is right in front of you.
The microphone’s sensitivity reduces as the sound moves away from 0°. At 180°, it has the lowest sensitivity, which is behind the microphone.
When you choose a dynamic microphone with a cardioid pattern and place it in front of you, it will mainly pick up your voice. Although it may pick up sounds from other directions, its lower sensitivity to background noise will ensure your viewers can hear you without echoe or background noise.
While you’ll also find condensers with cardioid patterns, they tend to be more expensive than their dynamic microphone counterparts.
If you’re looking for an affordable and high-quality microphone, the Shure SM48 Cardioid Dynamic Microphone (available on Amazon.com) provides excellent value for its price. It comes from a reputable audio brand. As the microphone is unidirectional when it comes to picking up sound, you won’t have to worry about your voice echoing with this device.
- HIGH-PERFORMANCE VOCAL MICROPHONE – The SM48 is a dynamic cardioid mic that delivers crisp and clear…
- RUGGED CONSTRUCTION – With its shock-mounted cartridge, steel mesh grille, and tough metal…
- IMPRESSIVE SIGNAL-TO-NOISE RATIO – The neodymium magnet and carefully tuned frequency response of…
Last update on 2025-05-23 / Affiliate links / Images from Amazon Product Advertising API
4. Put a Carpet on the Floor
One of the easiest ways to reduce echoes in your room is to place a carpet on the floor. How does this make a difference? Remember, sound needs hard surfaces to reflect and create an echo.
Sound waves easily bounce off your floor when it is made from concrete![]()
![]() , tiles, marble, or any other hard material.
, tiles, marble, or any other hard material.
There aren’t any holes in these materials. As a result, they can’t absorb sound and end up creating echoes.
Fortunately, it’s easy to fix an echo that’s occurring because of your floor since you only need to put carpet on the floor. A rug is excellent when it comes to absorbing high-frequency sound waves. However, it doesn’t do a great job if it’s a low-frequency sound wave.
Although you may not immediately notice a significant difference in the audio quality of your stream (after using the above techniques), the sound will still improve—even if it’s just a little bit.
5. Use the NVIDIA Broadcast App
Now that I’ve covered all the physical changes you can make to your room to reduce or eliminate echoes, let’s look at what you can do from a software perspective.
These days, several tools can help you deal with echoes. I’ll cover the easiest one to use, as you don’t want to spend hours or days tweaking your settings to get the best audio quality.
NVIDIA, a popular hardware company that manufactures computer graphic cards, has a powerful application known as Broadcast.
And they’ve showcased the capability of their hardware through the NVIDIA Broadcast app.
This is pretty nifty software because it can transform any space into a studio with several powerful features.
In this article, I’ll discuss ‘Room Echo Removal.’ Although it is in the beta stage, it’s still a helpful feature you can try using to see how it improves your stream’s audio quality.
With the help of AI (artificial intelligence), the app will remove echoes, ensuring everyone watching your stream can hear you clearly.
It also has a noise removal feature, which you can use to eliminate background noise.
Using both features together should take care of any noise and echo in your room.
How To Use the NVIDIA Broadcast App
Before you download the software, you must ensure that you have a compatible NVIDIA graphics card. At present, you can only use this app with the following hardware:
- NVIDIA GeForce RTX 2060 or higher
- Quadro RTX 3000 or higher
- Titan RTX or higher
You need at least 8 GB (gigabytes) of RAM to run this software. Also, NVIDIA recommends you have an Intel i5 8600 or AMD Ryzen r5 2600 or higher for this application. If your CPU (Central Processing Unit) doesn’t meet this requirement, you should still be able to run the app. However, you may not get the best experience. Also, if you have a non-RTX graphics card, the app won’t install on your device.
- Head to the official website, download the software, and install it.
- You need to restart your system before you can launch the app.
- After launching the app, select ‘Microphone.’
- Under Microphone Source, select your input device.
- Next, select the effect you want to use on your microphone.
- In this case, you want to choose ‘Room Echo Removal.’
- If there’s a lot of noise, you can also add ‘Noise Removal.’
- To run two or more effects, select ‘Add Effect’ and click on ‘Noise Removal.’
- Test your audio and listen to how it sounds.
- Change the strength of the effect depending on your requirements.
- Keep tinkering with the effect and strength until you get the best results.
NVIDIA now allows you to run more than one microphone effect. However, this increases your GPU (Graphics Processing Unit) usage, which can lower the game’s FPS (frames per second).
Also, you can use this effect with other apps like Discord, Gamecaster, OBS Studio, Twitch Studio, and XSplit Broadcaster.
Depending on your streaming software, you’ll have to change the input source from your default setting to ‘Microphone (NVIDIA Broadcast).’
6. Fill Your Room With Furniture
If you’ve ever visited an empty house, you know how much it echoes. Do you know why? This is because there isn’t anything inside to absorb the sound waves. They hit the wall and come back to you.
A simple way to get around this problem is to put furniture in the room you stream from regularly. Any furniture piece with a cushion or mattress will help dampen the sound. However, if it uses hardwood, it may increase the echo intensity.
Due to this reason, you should always test the sound quality every time you move furniture into your room.
Final Thoughts
You can stop your room from echoing while streaming by using anything that can absorb sound. Products like acoustic panels, sound or moving blankets, and carpets work wonders. NVIDIA’s Broadcast app also has software features powered by AI to reduce and eliminate background noise and echoes.
Adding furniture to your setup will make a difference if you have a relatively empty room. Make sure you test your audio quality after each step to evaluate whether it’s working as intended.
References
- https://www.nvidia.com/en-us/geforce/broadcasting/broadcast-app/