Condenser microphones can be challenging to use if you are relatively new to using them. They can get quiet, meaning that the audio being recorded is not audible enough. So how can you make a condenser mic louder?
Here are 10 easy ways to make a condenser mic louder:
- Supply your mic with phantom power.
- Get a preamp.
- Turn up the gain input on your preamp.
- Check your input connections.
- Use the right cables.
- Close the distance between you and the microphone.
- Reposition the microphone.
- Turn off the pad switch.
- Try a silicone condenser mic.
- Get new audio cables.
This article will explore all of these strategies in greater detail. To learn everything you need to know about cranking up the volume on your condenser mic, read on.

1. Supply Your Mic With Phantom Power
There used to be three types of microphones specialized for your specific audio needs. Nowadays, only two microphone types are regularly used: dynamic and condensed.
Dynamic microphones are great for live events like concerts and events. Dynamic mics don’t require a power supply, so they’re more mobile, and they put out the best sound quality at high-volume level events.
On the other hand, condenser microphones are best for smaller environments with more controlled audio settings, such as a recording studio. Condenser mics are the preferred tool for picking up subtle sounds.
Sometimes though, condenser mics aren’t as loud as they could be. Thankfully, there are a few ways to increase the mic’s volume pretty simply.
The first thing to do is make sure that your condenser microphone has a steady supply of phantom power.
Phantom power is a mechanism created inside microphones designed to power them without bulky external methods.
Phantom power transmits the DC electrical current through specific cables referred to as XLR cables.
If you have a condenser microphone, phantom power is essential for functionality. Turn on the phantom power for your condenser microphone, connect the mic to your audio interface, and flip the switch labeled “48V” or “Phantom Power,” depending on your unique set-up.
If your audio interface doesn’t have phantom power, you can purchase a phantom power supply brick to connect your microphone and interface to feed the power source to your mic.
To learn more about phantom power, check out this article from the Geek Musician.
2. Get a Preamp
So, you already know that there are two main types of microphones: condenser and dynamic. And, you know what each is best used for.
Beyond mic types, there are also two subcategories of condenser microphones.
Some condenser microphones have what’s referred to as a large diaphragm. These condenser microphones are usually in a fixed position, typically in a recording booth. Large-diaphragm condenser microphones are best for capturing low-end sounds.
The other condenser microphone type is a small diaphragm or “pencil microphone.” These small, sometimes handheld microphones are usually used from a desktop position or mounted in a recording studio.
Unlike large diaphragm mics, small-diaphragm mics are best used for low-end sounds.
Regardless of the type of condenser mic you have, if your condenser microphone doesn’t seem as loud as it should be, it’s likely because you need a preamp.
Preamps are devices that make microphones loud enough to hear. Most of today’s audio interfaces already have preamps built-in.
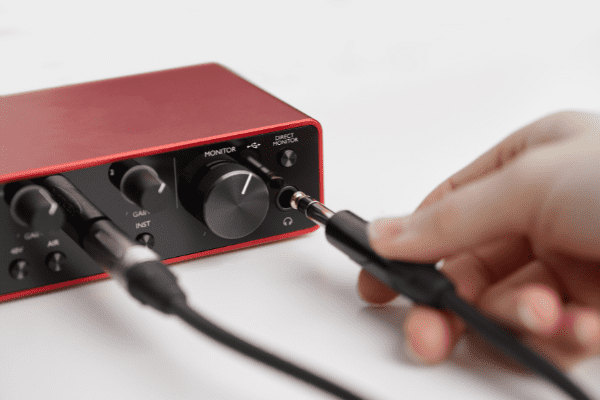
You can quickly check if yours has a built-in preamp by closely examining your mixer or interface. Upon examination, if you see a gain knob, that’s a sure sign that you have a preamp.
However, simply having a built-in preamp doesn’t necessarily solve your volume troubles. If your mic still isn’t belting as loudly as it should, you may need to increase the gain input on your preamp.

3. Turn Up the Gain Input on Your Preamp
Preamps help make microphones auditory for an audience.
Most interfaces and mixers have them built-in, but sometimes, you need to increase the gain input to feel the effects of the preamp on your condenser mic’s audio output.
A gain knob on the mixer or interface is a sign that the preamp is there and already built-in to your interface. This is great because it’ll save you from having to purchase another preamp.
Turn on your condenser microphone to increase the gain input on your preamp. When the mic is in use, gradually turn the gain knob up on your interface or preamp. The VU meter on the device should be green to signal it’s at the optimal level.
A green display on the VU meter means that the signal is loud enough to be further processed. However, the signal may be distorted when the VU meter is read.
4. Check Your Input Connections
If your preamp, gain input, and phantom power supply isn’t the source of your condenser microphone volume issues, don’t distress; you may just have some crossed wires.
Not literally, of course, but sometimes it’s a good idea to double-check the inputs that your cables are connected to. If your lines are inserted into the improper inputs, it could distort the microphone’s audio quality.
First, to check on your cable connections, you must understand the three main input options for your condenser microphone set-up.
Your condenser microphone needs to be input to the correct levels on your audio interface or mixer.
There are 3 main inputs that you need to be familiar with:
- Microphone (mic) level input
- Instrument-level input
- Line-level input
The line and instrument inputs are designed to absorb audio and sound. They bring it into the machine, and it’s converted to an output sound from there.
This means that your condenser microphone should be connected to the mic level input. The mic-level input is the only input that is designed to output rather than intake audio signals. The mic level input may be marked as XLR input on your audio interface.
Not only do you need to make sure that your connections are correct, but you also need to check that you’re connecting everything using the proper cables.
5. Use the Right Cables
Sometimes, it’s not a matter of connection but rather a cable issue creating a quiet condenser mic.
You should ensure the audio interface and mic are connected with the right cables if your condenser microphone isn’t projecting the right amount of sound.
Some cables with your interface are set up to amplify your mic signal, while some won’t.
An XLR cable is perfect for your condenser mic that will transmit the signals to your preamp and produce the sound at the right volume.
The only cable your condenser microphone should be connected to is a balanced XLR. Like TRS and RCA cables, the other wires may have been used for instruments or preamps.
If you’re in the market for a suitable XLR cable for your condenser microphone, check out the Amazon Basics Microphone Cable (available on Amazon.com). It has an 82% five-star rating and is available at an affordable price.
- IN THE BOX: 6-foot XLR male to female microphone cable for XLR-compatible PA systems, speakers, and...
- CLEAR TRANSMISSION: All-copper conductors with inner copper spiral shielding to reduce noise...
- DURABLE DESIGN: Zinc alloy 3-pin connectors with nickeling; protective metal housing and flexible...
Last update on 2025-06-01 / Affiliate links / Images from Amazon Product Advertising API
6. Close the Distance Between You and the Microphone
Sometimes, the answer to your volume issues in your condenser mic is your proximity to the device.
Get close to the mic and test it again. Condenser microphones are designed with a backplate, so if you’re not close enough to the mic, the sound may be fully captured and produce loud audio.
A backplate is a condenser microphones’ design feature that sends vibrations into an electrical voltage. From there, the machine produces audio.
However, if you’re too far away from the mic, the vibrations received will be weak and not produce a loud sound.
7. Reposition the Microphone
Another factor to consider when your microphone isn’t producing high-volume sound is the way you’re holding the mic.
Condenser mics only pick up sounds from particular areas on the surface of the mic. This design feature was made to help the mic pick up the best sounds to produce, but it can limit the volume that’s put out if it’s not held correctly.
If you notice that your condenser microphone sounds off, try repositioning your grasp on it to see if that helps.
Condenser microphones have been around for a long time. They became all the rage in the 1960s and have stayed at the top of the microphone game ever since.
The condenser mic is so popular because of the vast amount of options available. Large and small digraphs are barely scratching the surface of how many different designs there are for condenser microphones.
Check out this article from Audio Technology for more specifics about each type of condenser microphone and how they work.
The diverse array of options can also provide you with your preferred design. For example, some condenser microphones are shaped like a square, others a triangle, and others the traditional circle. All of these receive sounds in varying ways.
Try finding the design that you feel most comfortable with. Then, you won’t need to reposition it as much.
8. Turn Off the Pad Switch
A pad switch, also called an “attenuation pad,” reduces the volume levels of audio produced from a microphone before it’s preamplified in the audio interface.
A pad keeps the sounds produced by your mic and interface from becoming distorted. It does so by putting out the same input signal at a lower frequency, preserving the signal-to-noise ratio.
If the volume on your condenser mic seems to quiet, try turning off your pad switch. This could be the simple fix you needed to turn up the volume. It helps because the mic’s attenuation pad is actively reducing the level of audio signal projected from your microphone.
When you disengage the pad switch, you’ll increase the sensitivity of your microphone.
9. Try a Silicone Condenser Mic
Sometimes a new design is the best solution for your volume issues. Recently, microphone makers have started creating silicon condenser microphones.
These new designs come with an improved diaphragm, which could benefit the audio output in condenser microphones.
Read more about silicone condenser mics here.
The above article describes the process of developing a small, high-sensitivity silicon condenser microphone.
The difference with silicone condenser mics is in the design. They have concave lateral sides and different diaphragms that allegedly increase and improve the sensitivity of the device.
The other novel aspect of silicon condenser microphones is the introduction and implementation of a back chamber.
This paper from the University Kebangsaan Malaysia, the Institute of Microengineering and nanoelectronics, discusses how varying materials and dimensions of the back chamber can increase the sensitivity of microphones.
10. Get New Audio Cables
Lastly, you can try to turn up the volume on your condenser microphone by purchasing new audio cables.
Above, I described some reasons that could be causing the low volume on your microphone, and it was all about the right cables to use and the right places to plug them into.
Well, if your cables are proper and in the appropriate places, but the volume is still too low, it could result from faulty audio cables.
Faulty audio cables aren’t unusual. Unfortunately, just like most material items, lines don’t last forever.
If you’ve had your current audio cables for years, it may be time to get some new ones.
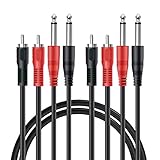
A great, low-cost option I can recommend is the RFAdapter RCA Cables from Amazon.com. These handy cables come in a pack, and are extremely versatile because they can easily be connected to amplifiers, microphones, cameras, and any other audio tools you have.
- Dual 6.35mm 1/4" TS male to dual rca stereo interconnect cable is designed to connect gear with...
- The connector is using top quality oxygen free copper, which can enhanced signal clarity,...
- This cable is perfect to connect any devices with 6.35mm (1/4’’) audio ports to AV receiver,...
Last update on 2025-06-01 / Affiliate links / Images from Amazon Product Advertising API
Just make sure you plug them in the correct inputs and keep in mind proper placement for your main microphone lines.
Condenser microphones have become the top choice for many recording artists, but sometimes they can be tricky to use.
The most common problem among condenser microphones is producing a quiet audio signal that doesn’t make an audible recording.
Make sure to try the above 10 tips and tricks if your condenser microphone isn’t recording high-quality audio.
Sources
- Geek Musician: 8 Reasons Why Your Condenser Microphone is Quiet
- NCBI: Response Identification in the Extremely Low-Frequency Region of an Electret Condenser Microphone
- NCBI: A Review of MEMS Capacitive Microphones
- Springer Link: A Miniature Silicone Condenser Microphone Improved with a Flexure Hinge Diaphragm and a Large Back Volume
- ASA: A High-Quality Digital Radio-Frequency Capacitor Microphone with Improved Dynamic Range
- Hindawi: Design Approaches of MEMS Microphones for Enhanced Performance
- AudioTechnology: Condenser Microphones
- IEEE Xplore: Small Silicon Condenser Microphone Improved with a Backchamber with Concave Lateral Sides
- Google Docs: A Review of MEMS Capacitive Microphones
Recent Posts
QuickTime is a vital app for many Mac users, and if you’ve recently bought a new microphone, you might wonder how to use it optimally. QuickTime cannot record audio content if it doesn’t have...
Every microphone leaves a unique signature on the quality of its output. If you’re a podcaster trying to melt your way into your audience’s hearts, a muddy, distorted recording won’t cut it....


