Logic Pro comes with various easy and intuitive ways to add fade-ins, fade-outs and crossfades to your audio files.
There are a few different techniques for creating fades in Logic Pro, they are:
- Using the Fade Tool
- Adding fades under the Region Inspector
- Crossfades
- Volume automation
- Removing silence
In this article, I’ll go through each method for fading out audio in Logic Pro to give you seamless fades and a mix free of unwanted pops and clicks.

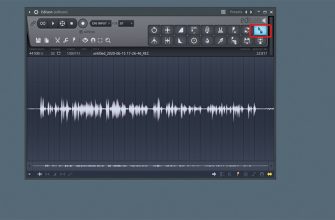
Using the Fade Tool in Logic Pro
The fade tool is the most customizable way to add a fade-in Logic.
Here’s a handy trick: use Click Zones to super-boost your workflow.
– Go to Logic Pro > Preferences > General > Editing
– Enable Fade Tool click zones under ‘Pointer Tool in Tracks Provides:.’

Return to your audio region and hold your cursor over the top left or right-hand corner. The cursor will change to a cross symbol with arrows; you can now click and drag to add your fades.

You can even select multiple audio regions and add the same fade to all of them.

If you’d like to add a curve to your fade, hover the cursor over the middle of your fade, and it will change to a thin vertical line with an arrow on each side. You can click and drag to change the curvature of the fade.

You can also access the fade tool under mouse tools at the click tool menu at the top, but I’d say that click zones are a much faster and more efficient feature.

Bonus tip! You can also change the fade tool to speed up or slow down the audio. Right-click in the area and select either speed up or slow down; the fade will turn pink.
Check out some of my other articles:
- Is Logic Pro Good For Making Beats? Yes, 3 Reasons Why

- How Long Does it Take to Learn Logic Pro?
- How to Make Vocal Chops in Logic Pro
- Mastering in Logic Pro: A How-to Guide
More Precision – Adding with the Region Inspector
Sometimes you need a more precise fade, for example, 10ms. It’s pretty difficult to do this with the fade tool, so instead, we can use the Region Inspector.
Select the region you need and head to the ‘Region’ dropdown on the left (hit ‘i’ if it isn’t there). Hit ‘More’, and the menu will expand to show all the fade tools from the previous step, now in number form.
It’s a great idea to use this to add a slight fade in and fade out to every single audio region in your Logic Pro project. This will prevent pops and clicks as each region transitions to and from complete silence.
Using Crossfades in Logic Pro
When two audio regions are joined together, a crossfade will prevent pops and clicks from appearing where the waveforms don’t match up. This works by fading the next region while the previous one fades out.
To add a crossfade, you can hover your cursor at the top of the join between the regions, then click and drag.

You can also do this in the Region Inspector by selecting crossfade under ‘Type’.
The ‘Drag’ feature in the top right has a handy ‘X-Fade’ mode, which, when selected, will automatically add a crossfade in when a region is dragged into another one.

The other two types of crossfades under ‘Type’ may have caught your eye. The equal power crossfade (EqP) prevents volume dips between audio regions, creating a more even crossfade in scenarios where the regions have different volume levels. There is also the s-curved crossfade (X S), which, as the name suggests, adds an S curve to the fade.
Using Logic Pro’s Volume Automation
If you’re working with something other than an audio region (such as a MIDI region), you cannot use fades. Instead, you can use volume automation.
Volume automation allows you to add detailed automation to a fade instead of a straight line or curve. This is perfect for staggered fade-outs at the end of a song.
To open automation, just hit the ‘A’ key. Ensure your automation parameter on the left is set to ‘Volume’ (a yellow line). You can click anywhere on the line to add an automation point and drag it wherever you like. To remove a point, select it and hit backspace.

If you have some hardware with a physical volume slider on hand, you can use the ‘Latch’ automation mode (on the left-hand side) to record your volume adjustments while the track plays. Play your track and move the volume slider up and down as feels natural. This is a fast and intuitive way to add tiny volume automation details. Don’t forget to change it back to ‘Read’ afterwards!

Remove Silence in Logic Pro
If you have one long audio region from the start to the end of a track (for example, a one-take vocal recording), you need to be able to add fades at the beginning and end of each musical phrase as remove any noise in between phrases.
To do this, select your region and hit Control + X. This brings up the remove silence window where you can adjust the silence threshold and minimum time to accept as silence.

A longer pre-attack time is a good idea for instruments which enter gradually, like vocals or strings. A longer release time is helpful for instruments which fade out gradually, such as cymbals or those with long reverb tails.
Once you hit ‘OK’, you can select your new audio regions and use the Region Inspector to add fades to all of them.
Conclusion
Removing excess noise and smoothing over transitions is vital for a clean and professional sound, and this can easily be achieved with Logic’s versatile tools for fading and removing silence. By enabling click zones, the Fade Tool becomes easy to use for fades and crossfades. The Region Inspector offers the same parameters in number form for smaller and more precise fades. Volume automation can be used instead when working with MIDI regions or when creating volume changes other than one line or curve.
References
Apple Support (n.d.) Remove silent passages in Logic Pro. Available at: https://support.apple.com/en-gb/guide/logicpro/lgcp86ee7672/mac
Apple Support (n.d.) Edit fades in Logic Pro. Available at: https://support.apple.com/en-gb/guide/logicpro/lgcpf7c0cd53/mac
Chris Vandeviver (2017). How to Get the Most out of Logic Pro X’s Fade Tool. Why Logic Pro Rules. Available at: https://whylogicprorules.com/logic-pro-x-fade-tool/