Logic Pro has a fantastic plugin with the perfect setup for making vocal chops: the Quick Sampler. Introduced in the 10.5 update in 2020, this plugin lets you quickly create sampler instruments with just a single audio file.
So how do you make vocal chops in Logic Pro? To make vocal chops in Logic Pro, these are the steps:
- Choosing a vocal sample
- Setting up Quick Sampler
- Processing vocal chops
- Piano roll and step sequencer
- Editing in Quick Sampler
- Layering and arranging vocal chops
- Fix mixing issues with vocal chops
In this article, I’ll show you the complete beginning-to-end process for incorporating vocal chops into your track in Logic Pro.

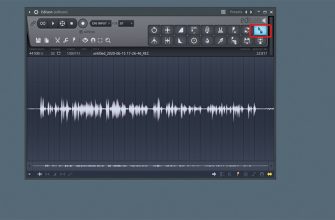
Choosing a vocal sample
First, let’s pick out a vocal to chop.
An a-cappella sample would be the ideal choice for vocal chopping. An isolated vocal is much easier to chop, pitch manipulate, mangle around and add instruments to when compared with a sample of a full song.
If you want to avoid using obvious pitch manipulation on your vocal chops, you may want to find a sample which is in the same key as your track. Although it is not compulsory, we can easily pitch a sample up or down with Quick Sampler’s pitch controls to get it where it needs to be.
Apple Loops has a decent selection of vocal ad-libs and lyrics if you’re stuck on where to look. Look out for loops with ‘lyric’ in the title to find samples with actual words in them.
Check out some of my other articles:
- Is Logic Pro Good For Making Beats? Yes, 3 Reasons Why

- How Long Does it Take to Learn Logic Pro?
- Why Logic Pro is the Best DAW
- 6 Best Logic Pro X Plugins For Vocals (Stock and Third Party)
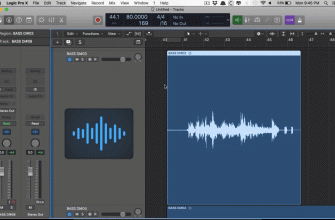
Setting up a quick sampler
Start by dragging your audio file into the track header area and create a new track with Quick Sampler optimized. The optimized mode will automatically put it in ‘Slice’ mode, add the slices and map it to your MIDI keyboard. (If you don’t have a MIDI keyboard to hand, you can hit Command + K to open Musical Typing and use your computer keyboard.)
The first thing to do will be to adjust the sensitivity slider and move the slice positions around until you have some nice vocal chops to work with.

You can also change the ‘Polyphony’ mode to mono so your notes won’t overlap.
It’s as simple as that! Before you start creating a melody, you might want to add some processing to your vocal to give it a more exciting sound.
Processing vocal chops
Compression
It needs some compression for your vocal chop to remain consistent in the mix. We are treating the vocals like an electronic instrument here, so the compression doesn’t necessarily need to sound natural.
You can use any compressor you like for this – I went for Logic Pro’s Vintage Opto in this example. I’ve got a fast attack and medium release, so the compression lasts the full length of each note.

This vocal was already quite consistent, so there is just a couple of dBs of gain reduction. You’ll also notice I’ve put on soft distortion, which brings us to the following processing step.
Saturation/distortion
Using saturation and/or distortion gives your vocal chop a lot more energy, excitement and presence. As we’re going for a more electronic sound here, you won’t need to worry so much about going over the top with saturation. I was satisfied with the grit added from the Vintage Opto, so I haven’t added any additional distortion.
Reverb/FX
When it comes to effects, reverb is definitely the preferred choice. A delay can cause some messiness with fast-paced melodies, while a decently subtle reverb will add a complimentary wash of sound. I’ve chosen a room reverb in ChromaVerb.

To prevent your reverb from swallowing the vocal and clashing with the rest of the mix, make sure you set it towards mostly late reflections, a shorter decay time, a lower wetness and add some pre-delay.
Logic Pro has some great options for effects like modulation and pitch shifting: chorus, ensemble, flanger, phaser, tremolo etc. This flanger adds amazing width and a cool electronic sound, while the pitch shifter blends in an octave-up version.


If you’re a fan of the autotune sound, Logic’s pitch correction plugin with a response time of 0ms will be the solution for you. You can use it chromatically or tune it to the key of your track.

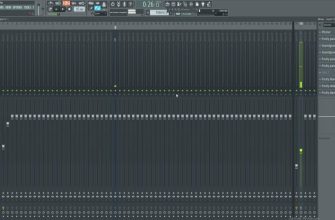
Using piano roll or step sequencer
Now onto creating the melody itself. You can use either the piano roll or step sequencer for this.
Step sequencer has a workflow similar to a drum machine, where you can create a workspace of up to 64 steps with equal length notes. This would be perfect for creating a more rhythmic drum-like vocal chop. If you have a pad-type controller, you can hook this up to work with a step sequencer.

You can use the trusty piano roll with or without a MIDI controller for more melodic lines.

Editing in Quick Sampler
Returning to Quick Sampler, there are a variety of tools already within the plugin which we can use to manipulate our sound.
It has two identical LFO units which modulate other parameters such as the pitch or filter cutoff. Once you set a modulation target, the part that is being modulated shows a moving white dot, with an orange line showing the range of the modulation.

There is a rate knob which sets the speed of the oscillation in hertz. You can also time to the tempo of your track with the button next to it. You can set a fade-in or fade-out time for the modulation, but this won’t be very useful as vocal chops are usually fast-paced. The phase parameter is also not much use as we aren’t using polyphony (multiple notes at once). Finally, we can also choose a type of waveform, an amount (the orange line mentioned before) and a target.
If you’re a fan of using hardware controls like a MIDI keyboard, you can use the Mod Matrix to control things with information from the keyboard.
The pitch controls can be used to tune your audio file up or down, either in semitones (coarse) or in the smaller increment of cents (fine).

The filter section allows you to remove frequency content from your vocal chop, either below (HP or high pass), above (LP or low pass), outside (BP or band pass) or in between (BR or band reject). You could use this to remove the lower frequencies of your vocal to make it sound thin and airy, or use it to remove the higher frequencies to make it sound dull and muffled as if it were under a blanket.

It has a couple of other knobs for adding tonal effects. The ‘Reso’ knob boosts frequencies to the side of the filter cutoff, making the filter sound more pleasant. The ‘Drive’ knob adds some distortion, just in case you didn’t add enough earlier!
The final section just controls the panning, volume and number of voices. We are working with vocals here, so we want them to be front and centre; I’d leave the panning well alone (unless you want to modulate to move side to side in the stereo field).
After thorough tweaking, it’s probably time to move on and think about our arrangement.
Layering and arranging
Once you have a vocal chop melody, you might want to layer it with a synth or other sample instrument. Adding a second sound underneath will thicken up your melody and help it add fullness to a sparse mix or dominate in a busier one (we’ll look at more mixing tips later).
To build tension in your arrangement, you can use automation on any of the previous effects you added. Head to your track header and turn the automation mode from ‘Read’ (green) to ‘Latch’ (orange). When you play your track, any changes you make to effects will be recorded in real-time. You could add increasing pitch shift, a sweeping filter, changing distortion levels etc. Don’t forget to change it back to ‘Read’ once you’re done!
Fix mixing issues with vocal chops
Masking
The number one mistake when working with vocal chops (or any vocals for that matter) is masking, where another instrument covers up the vocal. Here’s how to avoid it.
Vocals are usually most present around 2-3kHz, so pay attention to anything else which might be present in this area of the frequency spectrum.
To find out what’s causing the issue, listen to your track and mute each channel one by one until the vocal suddenly pops out. The channel you’ve just muted is your culprit. Use Logic Pro’s Channel EQ to add a little notch-shaped boost of 1-2dBs in a pleasant area on the vocal. Then, copy-paste it to another EQ on the masking instrument and flip it to remove the same amount.

This little EQ trick makes a massive difference in masking without ruining tone. If you have multiple instruments masking the vocal, add the same EQ cut onto them as well.
You can also use sidechain compression to push the offending instrument out of the way while the vocal does its thing. Add any compressor onto the instrument and change the side chain input from internal to your Quick Sampler instrument in the top right-hand corner. The compressor will now compress the masking instrument to match the vocal chops. A subtle 1-2dBs of gain reduction is needed for this trick unless you’re after a heavy pumping effect.
Over-processing
When we have so many tools at our disposal to process a vocal, it can be easy to overdo it. Sometimes, less is more. If your vocal chops start sounding flat, harsh or annoying, it’s a clear sign that something needs dialling back (usually distortion or compression).
There are several ways to reduce harshness: EQ and de-essing. You can use a low-pass filter to remove some brittle frequencies at 8kHz or above. If the letters’ s’ and’ t’ sound harsh, then the problem is a little lower down, usually around 6kHz. You can use a de-esser to solve this.

Logic Pro’s de-esser comes with a handy ‘Filter Solo’ button. Turn this on and search around with the frequency knob until you find the problem area. Please turn it off again and adjust the threshold, so only the problem sounds are affected. Finally, adjust the max reduction to control how strong the effect is. You might need two or three de-essers at different frequencies to fully manage the issue.
An example of vocal chopping
As a little bonus, here’s an interesting video I found earlier with a visualization of how globally-loved producer Porter Robinson made vocal chops for his track ‘Musician’ from the album ‘Nurture’.
To Wrap it Up
Having reached the end of this article, you’ll have all the knowledge needed to make awesome vocal chops in Logic Pro and navigate their new Quick Sampler plugin.
The beauty of vocal chops is just how easy they make it to create a catchy and unique melody with all the interesting pitch and timbre variations of the human voice. Their human-ness grabs the attention of listeners and adds presence and fullness to your track in a way which any other instrument could not.
Have fun exploring all the ways to chop up and recycle your vocals!
References:
Alami Younes (2020). Making Vocal Chops: The Complete Guide. Skilled Producer. Available at: https://skilledproducer.com/how-to-make-vocal-chops/#Layering_Vocal_Chops
Apple Support (n.d.). Quick Sampler overview in Logic Pro. Available at: https://support.apple.com/en-gb/guide/logicpro/lgcp5af33756/mac
Eli Krantzberg (2021). Create Vocal Chops with Logic’s Quick Sampler. Production Expert. Available at: https://www.pro-tools-expert.com/production-expert-1/quick-and-dirty-vocal-chops-with-logics-quick-sampler