Lighting is everything for a good video. It can make or break the video’s success. With poor lighting, you could end up with an amateur looking video. So, how do you professionally light your video studio?
To professionally light your video studio, you’ll need to choose the best location, select the number of lights you want to use, and position them just right. You’ll want to make sure you use soft light instead of harsh. Also, don’t over-light the area or your subject will end up washed out.
Let’s take a closer look at each step and go over some tips to keep in mind.

Why is Lighting so Important?
Having great lighting in your videos will improve the overall quality of them. In fact, with poor lighting, your videos (no matter where you stream them) will get less attention. Lighting matters, and good lighting matters even more.
With poor lighting, your subject could be cast in shadow. Or they could be too exposed. Both scenarios are distracting for the viewers, causing your overall message to be lost on them.
Despite the distractions, poor lighting can cause, the biggest reason it’s so important is that the lighting sets the mood of the video. If your video is too dark, your viewer could interrupt the scene as a serious one. If there is too much light, it could be viewed as light-hearted or comedic. Your lighting is an aid to the storytelling of your video. It’s important to match them.

How to Professionally Light Your Video Studio
There are really only three steps that you need to keep in mind when lighting your video studio. Location, the number of lights used, and their positions will make or break your video studio. Luckily, these are all easily controlled. Take a closer look at each step in the list below.
If you want to find out how to set up a video studio in a small room, read this article to find out more here!
Choose the Best Location
Location can be as crucial to your video as the lighting is. In fact, location can often play a major role in the lighting of the video. When deciding your location, you want to choose a place that gives you the most control over the lighting.
This will allow you to manipulate the entire aspect of the lighting in your studio. This is why so many filmmakers will shoot their films in windowless rooms or warehouses. It allows them to have complete control over their light setup.
While natural light is ideal in many situations, it isn’t something anyone can control. In less than a second, the perfect lighting you had from the sun could change the moment it disappears behind a cloud. That small shift could cause the entire scene to change its tone and mood. Which isn’t likely going to be something you want.
If you’ve chosen a studio location with a lot of windows or uses a lot of natural lighting, this doesn’t mean you’ve chosen a bad location. In fact, if you can control the flow of light from them with the use of blackout curtains or shutters, it could be the best location possible for you. You would be getting the best of both worlds.
Select the Number of Lights You Want to Use
There are several lighting combinations that you could use for your video studio, so finding the one that works best for you is important. If your studio is small, you could get away with just using two lights. However, the usual setup for lighting is to use three lights. If your studio is larger, you may need to bump it up to four.
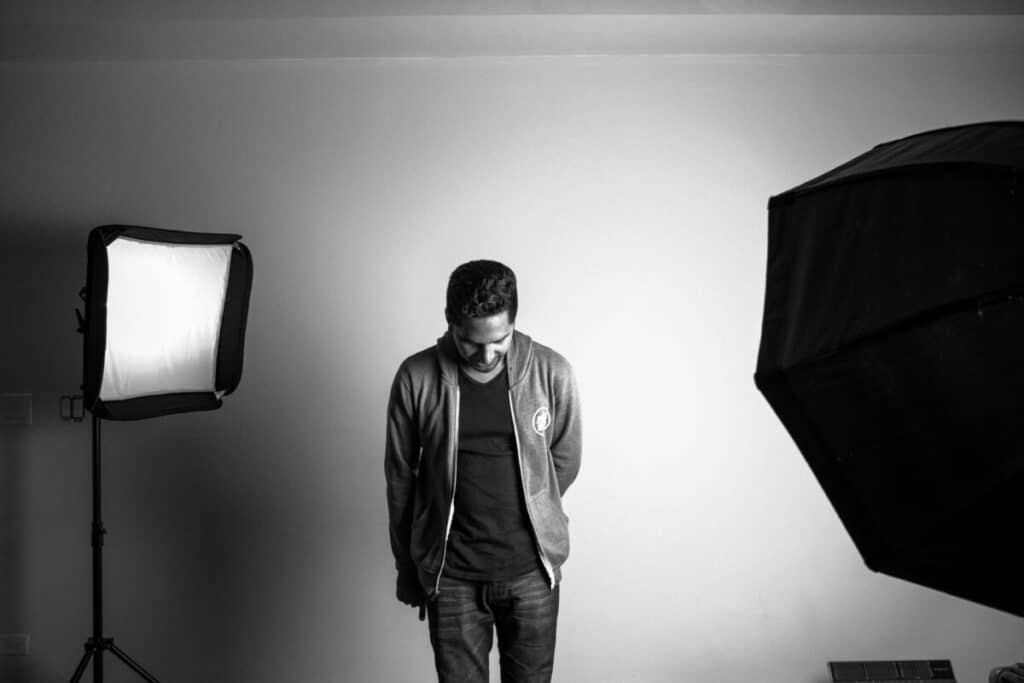
A three-light setup is going to have three different types of lights. You’ll need a key light, a fill light, and a backlight. Each type of light is going to serve a different purpose for your overall video.
- Key light
– This light is typically the brightest and strongest light in your setup and generally provides the most light in the entire studio.
- Fill light
– The fill light is meant to fill in any shadows on the face of your subject. It’s going to be a softer light, about half as strong as the key light.
- Backlight
– This can sometimes be known as a rim light. This light is going to give your video depth and gives the background a nice glow.

Position Your Lights Just Right
As mentioned above, you’re going to have different types of lights providing different kinds of lighting effects on your subjects. What’s important to know is where these lights need to go. Placing the lights in the wrong places can result in shadows in the wrong places or harsh lines on your subject’s face. Let’s take a look at the positions you’d need for a typically three-light setup.
Where you place the key light will directly set the tone of the scene you’re filming. If placed too low, the scene could convey a dramatic element you may not want. Placing the key light low will produce more shadows and create an ominous mood throughout the shoot. Typically, you’ll want to place the key light about 45 degrees above your subject and 45 degrees to their left or right.
The fill light is going to work against your key light. You’re going to want to place it directly opposite where you place the key light. This light is going to fill in the shadows that your key light creates. If you placed your key light 45 degrees above and to the left of your subject, place your fill light 45 degrees below and to the right. It’s also important to remember that your fill light should be half as bright as your key light
.
Finally, your backlight is another important part of your lighting setup. You’re going to want to place this behind and above your subject, away from the camera. This will give your background some light and provide depth to the overall video imagery. Without the backlight, your subject risks looking flat in your end result, especially if the background is darker
.
Five Tips to Know
Now that you know the three steps to professionally light your studio, here are five tips you’ll want to keep in mind as you set up.
Use Windows As Much as Possible During the Day
During the day, try to use the windows as much as possible. Now, if the sun is flooding the window too much, it could wash you out and make filming difficult if it’s too bright. For brightly lit windows, try blinds that are only half open, especially if they’re white. The blinds will reflect the light and soften it while also providing an even balance over your subject.

Adding a Touch of Color
While regular lighting is important, sometimes adding some color to the lights will help as well. These colors can add to the tone and mood of the video. To accomplish this, you’d want to use color gels. These are often sheets of thin plastic that go over the lights. You can get them in packs, and they come in a variety of different colors.
Find out more about which color temperature is best for lighting a video studio in this article here.
Stick to the Same Lighting
You’ll find that you could end up with mixed lighting if you’re using a lamp for one light source and natural light for your second. This can cause some complications with your camera. It’s always best to stick to the same kind of light.
Don’t Over Light Your Studio
While lighting is crucial to your video studio, having too much light can be a bad thing too. Having more light than needed can cause the subject to appear washed out on screen. If you’re using any kind of green-screen effect, too much light can make this obvious to your viewers.
Change Harsh Light to Soft Light
One of the quickest ways to soften a harsh light is to use a white shower curtain. Place the curtain in front of your light and let it shine through onto your subject. The white of the curtain is perfect for allowing just enough light through, and it removes the harsh lines on your subject. Another way to do it is to bounce the lights off the walls of the ceiling.
Summary
There you have it. Lighting your videos is an important part of having a professional studio.
If you want to be serious about your hobby, or career, you need the best lighting possible.
That doesn’t always mean spending thousands of dollars, though.
Hopefully, this article has helped you learn how to professionally light your own video studio.
Along with lighting, choosing the right lens is super important to help capture the lighting and footage. If you want to find out more, read this article I wrote about the best lenses for low light video recording!
Sources
- Sheffiel Dav: Importance of Lighting in Videos
- Tech Smith: How to Get the Perfect Lighting for Video
- Biteable: The best video lighting kits to make your videos look pro
- Wikipedia: Key Light
- Format: Key Light Photography: A Beginner’s Guide
- Expert Photography: How To Use a Fill Light for Perfect Photos
- Master Class: What Is a Fill Light? Learn About 7 Types of Fill Lights and the Best Ways to Use a Fill Light to Achieve Mood
- Contrastly: How To Effectively Use Backlighting In The Studio
- Learn Worlds: How to Choose the Best Lighting Setup for your Videos [Guide]
- Master Class: What Is Backlighting in Photography? 8 Easy Tips for Shooting the Perfect Backlit Photographs
- Picture Correct: 3 Ways to Backlight a Model for Studio Portraits
- Bomb Bomb: The Seven Best Video Lighting Tips
- Wikipedia: Fill Light
- Wikipedia: Backlighting (lighting design)
- Social Media Examiner: 3 Ways to Create a Video Studio on Any Budget
- Photography Tutsplus: How to Set Up Lights in Your DIY Video Studio
- Evergreen Profits: How To Create A Professional Video Studio
Recent Posts
QuickTime is a vital app for many Mac users, and if you’ve recently bought a new microphone, you might wonder how to use it optimally. QuickTime cannot record audio content if it doesn’t have...
Every microphone leaves a unique signature on the quality of its output. If you’re a podcaster trying to melt your way into your audience’s hearts, a muddy, distorted recording won’t cut it....
