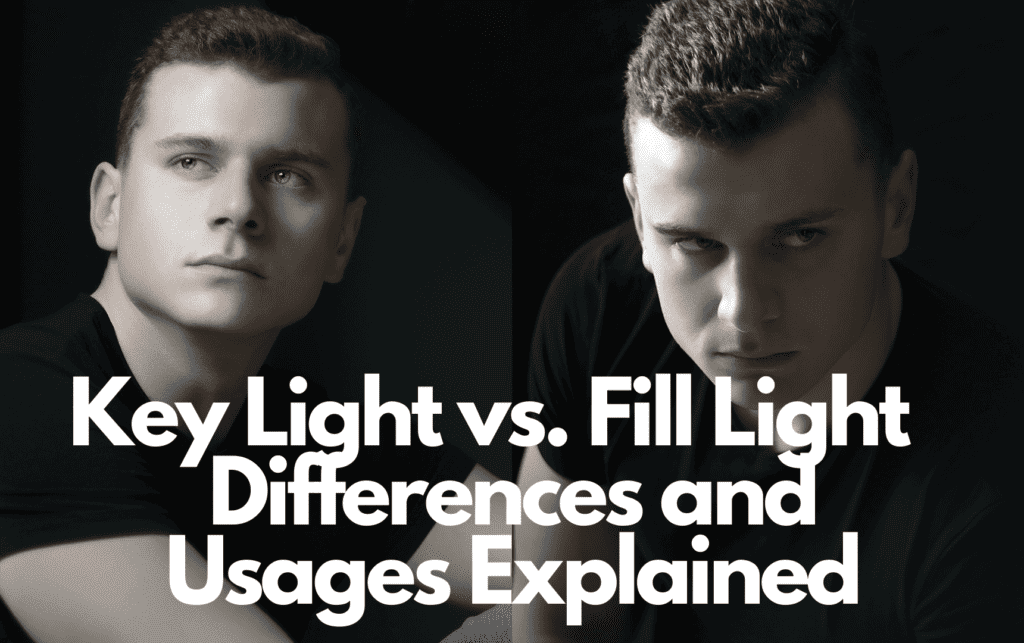
Lighting is an essential factor in cinematography and photography. Your subject won’t be seen clearly without light, and your image or film will come out grainy. By using lights and correct placement, you can set the mood and atmosphere of a photograph or film.
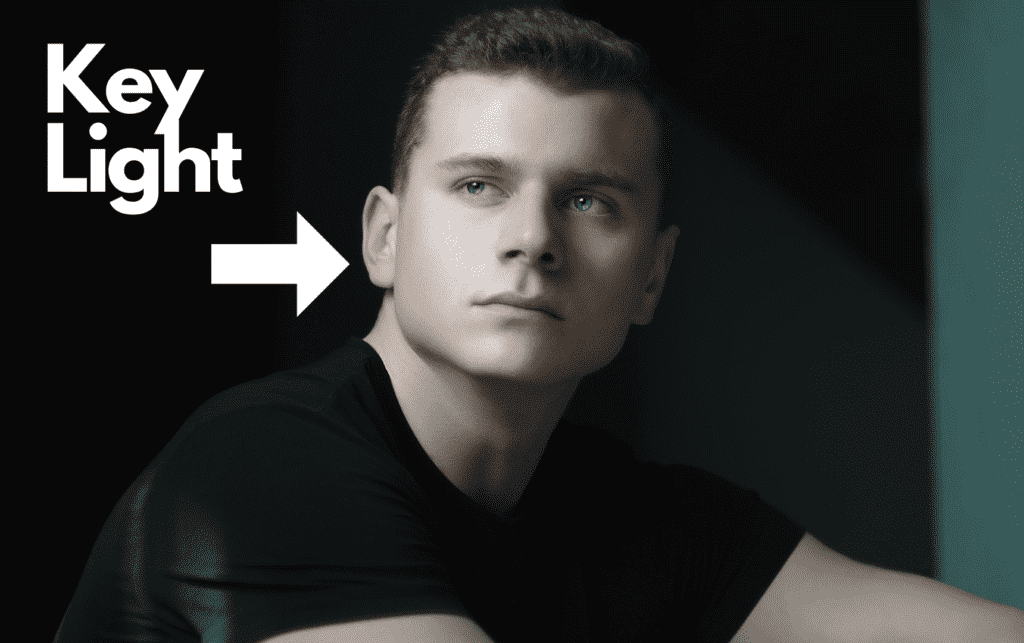
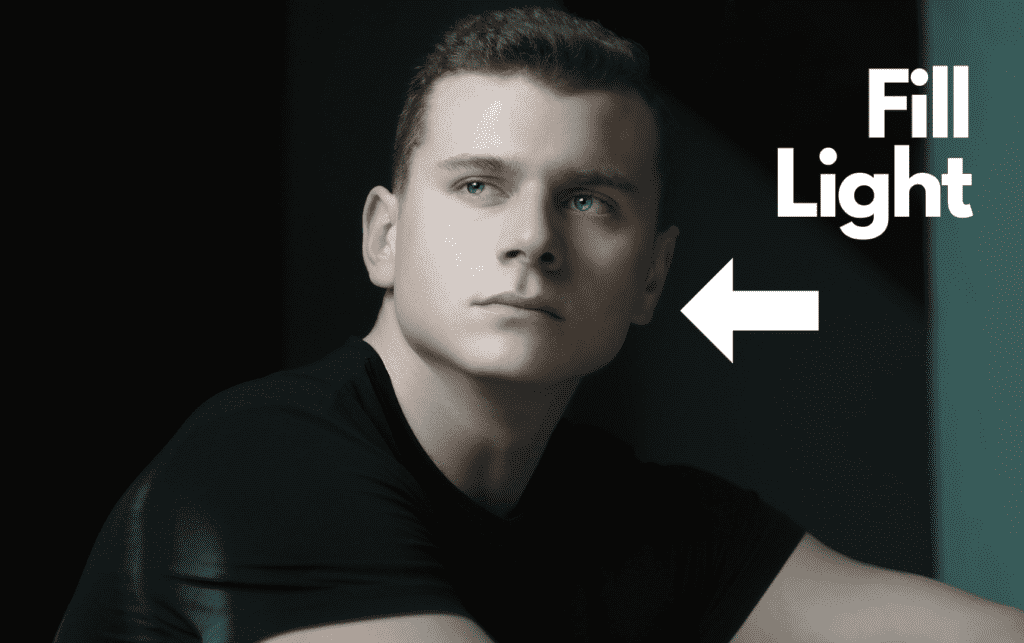
The key light is the main and most intense light used on a set, while a fill light is added to remove any shadows from the subject. A key light directly lights up the subject and is set up before bringing in any other light. A fill light doesn’t have to be a separate light but can be a reflector.
In this article, we’ll discuss the differences and similarities between key light and fill lights, what key lights and fill lights are, the different types of each, and how you can use each light.

The Main Differences Between Key Light and Fill Light
- The key light is the primary light source in a film or shoot, whereas fill light is the secondary source.
- The key light is the most intense light, whereas fill light is softer and more diffused.
- There can only be one key light, whereas there can be multiple fill lights.
The Main Similarities Between Key Light and Fill Light
- Both lights can either be from a natural or an artificial light source.
- Both lights can either be white light or colorful light.
- Light sources found in your home, such as bulbs, candles, flashlights, white foam board, etc., can be used for both key lights and fill lights.
What Is Key Light?
The key light is the primary light used in a film or photoshoot to light up the subject, and it’s the most intense. How key light is positioned, angled, colored, dimmed, or intensified creates the mood and sets the scene in a film or photograph.
The type of light used isn’t what determines what a key light is. You can use an LED light, lamp, or any other light of your choice as your key light. Even if you have added other lights to reduce shadows, the key light will be positioned first and have the most significant effect on the subject.
The main light used in photography or cinematography is only referred to as the key light if you use other lights with it.
Key lights were first used in cinematography but are now used in photography as well.

High and Low Key Photography
Using key light isn’t a style of photography, but you can use it in both high and low key photography, which are both styles of photography. The way the key light is balanced or unbalanced with the other lights has a significant role in the mood and style of the photograph.
In high key photography, you’ll use a lot of lights, but you need to start with your key light. With this type of photography, you need to balance out the light ratio best you can; otherwise, you’ll have shadows.
You can add in your other one or more lights after you’ve targeted the key light on the subject. These added lights need to be at a lower intensity to the key light to balance the light out and reduce the shadows cast by the intense key light.
High key photography creates light, happy, sterile, or airy moods. You’ll see this type of photography most commonly used for advertisements.
In low key photography, you’ll again start with your key light as your main light source, but this time the light needs to be dimmed, and you’ll add fewer lights. This style of photography focuses on contrast and uses shadows to create a moody and dramatic look.
In low key photography, your goal is to balance light and darkness. Your light source can either be natural or artificial.
Types of Key Lights
There is no rule saying that a key light has to be this or that. The light source you use is up to you and can include a candle, lamp, flashlight, and even your phone’s torch.
1. The Sun
A free light source that photographers commonly use in photography is the sun. For it to be the key light, you’ll need to add in fill lights. Your fill light can be soft or diffused, or it can be a reflector.
The reflector will bounce the sun onto the subject, adding a softer light and reducing shadows. The direct sun will be the key light because it’s the greatest and most intense light source being used.
2. A Reflector
We’ve just discussed using a reflector as a fill light, but you can also use it as the key light.
If your model is in the shade, and you’re standing in the sun with your reflector, you can bounce sunlight onto your subject. Although the sun would naturally light up your subject, even in the shade, the reflected light will be the most intense, resulting in it being the key light.
In this scenario, the sun is no longer the key light but rather the fill light.
3. An LED Light
The key light is the most crucial light in a shoot. Although you can use many types of light sources, getting an LED light will give you the best results and the freedom to get creative with your shots.
The Viltrox LED Video Lighting Kit
from Amazon.com has adjustable stands, allowing you to adjust the height of the light, which will create different effects on and around your subject. It’s durable, lightweight, well-priced, comes with diffusing plates and a remote control. It also allows you to adjust the color temperature from 3300K to 5600K, allowing a range of temperature to play with when shooting.
- ★2.4GHz Wireless Control:The 2.4 GHz wireless Bluetooth control system of the LED Video Lighting...
- ★ LED Video Light:The video light made of 192 low energy consumption and stable color temperature...
- ★Dual Power Options/HD LCD Display:Power with AC/DC Adapter (Included) or NP-F550 NP-F970 Li-ion...
Last update on 2025-07-11 / Affiliate links / Images from Amazon Product Advertising API
4. A Flash
You may be surprised by this one, but you can use your flash as a key light. You can use it mounted onto your camera or unmounted and positioned where you want it. Although you probably use your flash as a single light source, it’s the key light if it is brighter than any other light used.
Depending on the time of day, if you take a photo outside with the sun shining, your flash will be the key light because it’ll be closer to your subject, and it’ll be the brightest light source.
If you’re in the studio, your fill light would typically be a softbox. A softbox is diffused and, therefore, less intense than your flash. Softboxes are great fill lights because they don’t create shadows but rather help reduce them from your subject.
The Neewer TT560 Flash Speedlite from Amazon.com is a great flash to use mounted onto your camera’s hot shoe or unmounted and positioned as close or far from your subject as you’d like. It’s compatible with most DSLR cameras
, has vertical and horizontal rotation, and has an easy on and off power button.
- 【Flexible Angle Adjustment】 Vertical Rotation Angle: 0~90 degrees, Horizontal Rotation Angle:...
- 【Wide Compatibility】 This camera flash light for photography is compatible with Canon compatible...
- 【How to Charge】 Switch to the ON, the flash will start charging (the charging indicator is dim)
Last update on 2025-07-11 / Affiliate links / Images from Amazon Product Advertising API
What Is Fill Light?
Fill lights are secondary lights in cinematography or photography. They are used to reduce the shadows that the key light casts. Fill lights are softer lights than key lights, and you can diffuse them to prevent them from causing their own shadows.
A fill light should be near half of the key light’s intensity.
If a fill light casts a shadow, it’s too strong, and you’ll need to decrease the intensity. If the light is too intense and doesn’t have settings to reduce the intensity, you’ll need to swap it out with a softer light. You can also diffuse the intense fill light by covering it with a sheet or parchment paper.

Types of Fill Lights
1. LED Lights
You can adjust the light intensity with most LED lights. You can use LED lights for both a key light (with higher intensity) and a fill light (with lower intensity). LED lights give you freedom with color temperature, bringing warm or cool tones into your image. Having a set of LED lights will help you produce the best films and photos without unwanted shadows.
2. Reflectors
A fill light doesn’t have to be a light at all. You can use a reflector as a fill light to bounce light onto the subject to reduce shadows.
You can use household materials as a reflector, such as white foam board, cardboard covered with aluminum foil, and even a silver or gold windshield protector.
A gold reflector will bring warm tones, while a silver reflector will bring cool tones into your image.
Walls, clothing, fabrics, and water are other reflectors that you can use as fill lights.
The Westcott 5-in-1 Collapsible Reflector from Amazon.com is of excellent quality and affordable. It’s collapsible, lightweight, and easy to carry from one location to the next. It comes with different surface colors that can create various effects throughout your photoshoot.
Using materials you already have at home will save you a lot of money; however, reflectors don’t always provide enough light to reduce shadows sufficiently. You’ll have to gauge and see when a reflector will be enough and when it’d be better to use an LED light instead.
- Westcott Photo Basics 40" 5-in-1 Collapsible Reflector
- 2 Pack.
Last update on 2025-07-11 / Affiliate links / Images from Amazon Product Advertising API
Key Light and Fill Light Uses
The key light can be close or further away, on the subject’s side, above, below, etc., to create different effects on the subject.
Side Lighting
Side lighting is when the key light is at the same height as the subject’s face but slightly off to the side. This positioning allows the light to light up only half of the subject’s face.
A face that is dark on one side and lit up on the other creates a dramatic feel and adds a three-dimensional look while adding depth and shape to the photograph.
The fill light brings detail to the image. Without it, the detail on the subject will be lost in the shadows.
With side lighting, you can place the fill light in front of the subject. The subject will still have a shadow on one side of their face, but it will show more detail than without the fill light. The more detail you want to be seen in the photo, the more you should increase your fill light’s intensity.
Frontal Light
Although your key light will cast a lot of light onto your subject when placed in front of it, it will also cast shadows down, under the subject’s eyes, nose, and chin. The key light needs to be higher than your camera lens to avoid it obstructing your view.
To fill the shadows out, place your fill light at a lower angle and directly in front of your subject. You’ll counteract the shadows caused by the key light and get a clear shot by doing this.
Background Light
You won’t commonly find a key light behind a subject, but it achieves certain necessary effects in photography.
To rid the image of shadows, you can place your fill lights in front of the subject, above and below your camera’s lens.
Color Bulbs
I love playing with color when I take photos of my subjects. Often, I’ll use one color for my key light and various other colors for my fill lights. By doing this, I can create emotional depth and help the viewer feel the emotion in the photo. I can also make a photo look more playful by using bright colors.
Bulbs that I use and have found to be reliable and diverse are the Lifx A19
bulbs. These bulbs offer almost any color that you can think of, are voice-controlled, dimmable, have a range of cool and warm tones, are easy to set up, and can be fitted into most lamp fixtures.
With the Lifx A19, you can make your key light bright while lowering the fill lights’ intensity. These bulbs are everything you need to create a masterpiece.
- Works with Amazon Alexa to support dimming, shades of white, and color settings through voice...
- 16 million colors and warm to cool whites. Temperature : 2500K to 9000K.Beam Angle:120 degrees
- Easy to set up, built in wifi - no hub required
Last update on 2025-07-11 / Affiliate links / Images from Amazon Product Advertising API
Conclusion
The key light is the main light source in a film or photoshoot, while a fill light is a secondary light source that is used to remove shadows from the subject caused by the key light.
LED Lights, reflectors, camera flashes, and other household items such as candles, flashlights, lamps, and a phone torch can be a key light or fill light. You can also use the sun as an inexpensive, natural light source.
Different angles and light positioning creates different moods and effects. Only using a key light on a subject will bring a strong contrast with shadows, but using a fill light will still allow contrast with the shadows (depending on its intensity) while showing detail on the subject.
Sources
- Expert Photography: How to Use a Key Light
- Expert Photography: The Easy Guide to Shooting High Key Photography
- Expert Photography: What Is Side Lighting in Photography (And How to Use It!)
- MasterClass: What Is a Fill Light? Learn About 7 Types of Fill Lights and the Best Ways to Use a Fill Light to Achieve Mood
- MasterClass: What Is a Key Light? Learn How Key Light Creates Different Cinematography Effects
- MasterClass: Key light vs fill light: What’s different and how to use?
- Adorama: Lighting Positions & Fill Lights – OnSet ep. 61
Recent Posts
QuickTime is a vital app for many Mac users, and if you’ve recently bought a new microphone, you might wonder how to use it optimally. QuickTime cannot record audio content if it doesn’t have...
Every microphone leaves a unique signature on the quality of its output. If you’re a podcaster trying to melt your way into your audience’s hearts, a muddy, distorted recording won’t cut it....


