We all know how to simply record the instruments and vocals with the gears we have. This is a common thing.
And what we are looking for is to effectively record a band live in a room and in a systematic order to get the best out of your gears.
There are some things that you need to take care of before we start recording. One thing is obviously the gears needed.
Waitt!!! You might be thinking “Well, I have the gears!!”, but there might be some important piece of the puzzle that you have left out.
Before we get to that part, I wanted to let you know that the article is going to be divided into three main parts. And so it is easier to understand and get to the points.
As I have mentioned above we are going to it order and this is how I am going about –
- Gears that are needed and some brief descriptions on them.
- How we are going to record in an easy and systematic way.
- Some common FAQs
Now, let’s get to the first part of the process
What are the things needed to record a band live?
I think you will know all the basic gears that are needed to start recording music inside your room or studio.
Even so, some of the basic gears needed are Audio Interface, DAW (Digital Audio Workstations), Headphones, cables, microphones, keyboards, guitars, amps, pc or laptops, etc.
It’s safe to say that you will probably have most of the gears that I have mentioned here as these are all the basic ones.
We will go further into details about the above gears and other additional gears that I think you need to know before you start recording.
Take care for these things with your Basic gears –

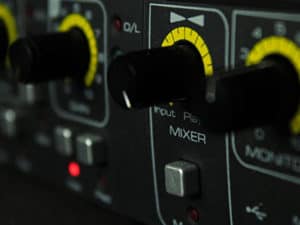
1.Audio Interface: This is a simple gear and the most important thing that you need if you are recording using your pc or laptop or without it.
Make sure you have all the adequate inputs and outputs for all of the gears that your band is going to use.
If you are going to record a band live, then you need to have the minimum IP and OP on your interface. This is because you are going to record several instruments simultaneously.
So, make sure your interface can handle all the inputs and outputs.
You can check out our recommended interfaces
Note: On the other hand, you can record some instruments at a time and the other remaining at a second time if you don’t have the kind of interface. (though it would lead to complications)

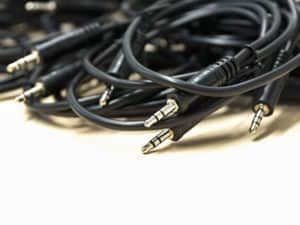
2.Cables: Do your cable management correctly and make sure the right cables are connected to concerned inputs or outputs.
What I would do is stick some sticky tapes with different colors on different wires so they don’t get mixed up. And I could sort them out easily too.
You can buy Snake Cables too and it would certainly help your cables from getting messed up all around your room.

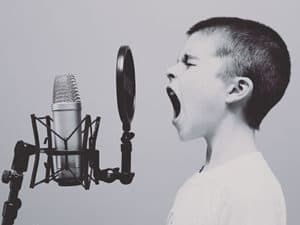
3.Microphones : You can’t use the same type of microphones to record all the different types of instruments for your band.
There are different types of microphones for different purposes. For example – Large Diaphragm Condenser microphones are best for recording vocals as they are very sensitive.
While Dynamic Microphones are used to record high-frequency audio from guitar amps, drum kits, etc.
You are going to need dynamic mics to record from your amps too. So, you better check out the concerned microphones before you start anything.
You can look up other related articles for more info on microphones and their uses.
Our favourite m
icrophones
for a home recording studio
Additional Gears
1.DI boxes: It is used to convert unbalanced signals to balanced signals. DI boxes will convert a high-level instrumental signal to a low-level signal which can be directly fed to a mixing console.
It can split the outputs to one low level and the other at a high level. So, they are commonly used in live concerts and gigs. The best part is that it will remove the humming and buzzing effects.
These effects are from the electromagnetic interference of the live wires of your gears.
Therefore for a small piece of the box, it is quite helpful for recording live bands.
2.Power Conditioners: You should use this so as to protect your gears from spikes and surges in the power supply. If you don’t this then, this will seriously damage your audio devices.
It will also filter out the electromagnetic interference and radio frequency interference from the power source which could create unwanted noises in your records.
3.Power Attenuators: This is an important thing if you are using amps and you are using a poorly treated room.
As your electric guitars and all will annoy your neighbours and family members. This device will help you reach full tonal potential while keeping the volume lower.
Riveria Rockcrusher is one of the most popular Power Attenuators.
To the next part……
How to record the band live?
Before we get into it, if you don’t have all the gears and the right setup – you can just go to a professional studio and rent it for your project.
1.Create a Scratch Track: You need to create this basic thing called the scratch track or guide, this will be the guide for all of your tracks.
You can create this as tempos or drum loops which will act as the guide track for your band. This is where it all begins and make sure you put in the work on this part too.
It’s alright even if the guide track is not that perfect, but try to make it a good one. Always good to have a better one.
2.Positioning: Position all the band members with the right amount of distance from each other. Keeping them at a distance from each other is very important.
This will ensure that the sounds from different instruments or amplifiers don’t get picked up by the microphones of other instruments.
And the best position for your band members is to spread out all-around a particular point, something like a semi-circle.
You should also make sure that any of the amps are not directly facing each other.
3.Start Recording: You can start recording now with the scratch guide you created before. Do some warm-ups together with all your bands.
Build up that feeling and the vibe you want your music to vibrate, then do some takes with it. I would suggest you do some duplicates and some final takes.
My preference is to take 2 duplicate takes and 3 final takes. (“Takes” mean records)
These additional takes will surely help you while mixing and editing your records or mixes. Even if you do your best, there will always be some mistakes.
And those mistakes will be filled up by those additional ones.

4.Vocals later: You should record your vocals later. This will be the best for your situation as you are recording your vocals inside your room.
The condenser mics are very sensitive and they will pick up all the sounds from other instruments very easily. And you need to avoid this at all costs.
You can work with your vocals after you have finished recording all the instruments. Hearing a piece of well-tuned music while doing vocals will give an emotional boost to the vocalist.
After all, music is about bringing out emotions. You could do as many takes as you like too.
You can check my article on Recording a Song from Scratch if you like to know more in detail about this part.
5.Monitor Your Live records: If you could – you should always have someone to monitor while your live recording session is going on.
It is to ensure that there are no mistakes with the cable connections that could potentially ruin the take.
It can be any distortions in the sounds, unbalanced signals, signal bleeds, etc. These types of errors can be prevented easily if someone is monitoring them.
Can you record a band live in a small room?
Well, to tell you the truth – I really can’t say the exact thing here. It’s because I don’t know how small of a room that you are talking about.
If it’s too small or you don’t have enough space for the sound waves to reflect in a natural way, then you won’t be able to record a live band.
All the reverberations from the walls of the room will get mixed up, creating standing waves and other disturbing sound waves.
This will lead to various complications while recording.
Where can you record the band live?
When you don’t have a dedicated studio room – the most suitable and probable place where you can record is in your room or at the garage.
If your room is big enough to compensate for the right amount of space for the band to record effectively (as I have mentioned above), then go for it.
Let’s say you have enough space inside your room, then you should treat your room before you record inside it.
Basically, treating has two steps – Sound Proofing and Acoustic Treatment.
Wait!! Don’t sulk when I say something technical like this. It’s not that difficult to do and you don’t need to be a pro here.
You can soundproof your room in an easy way and this is the first thing you should do. After that, the acoustic treatment process
should be done.
When should you treat your room?
The first thing you should ask yourself is that – for whom are you producing the music?? Are you going to release it in the public or is it only with your friends and family?
If you are doing it for your friends and family, then you really don’t need to go that far with treating and all. You can do it if you want to produce high-quality tracks.
Otherwise, this is a must. It will not only improve the quality of the music that you are producing, it will also save you a lot of time.
So, the choice is yours.
My last recommendation is to pick a room that you can do the treatment easily and where you can do upgrades later too.
Recent Posts
QuickTime is a vital app for many Mac users, and if you’ve recently bought a new microphone, you might wonder how to use it optimally. QuickTime cannot record audio content if it doesn’t have...
Every microphone leaves a unique signature on the quality of its output. If you’re a podcaster trying to melt your way into your audience’s hearts, a muddy, distorted recording won’t cut it....
