Whether you’re setting up a home studio or just want to reduce background noise, you might have hopped on Amazon thinking you’d buy some acoustic foam and found yourself overwhelmed by how many different types you can choose from. Luckily, this guide is here to help you navigate the process a bit more confidently.
Acoustic foam comes in 3 available thicknesses. The correct thickness for your application will depend on the natural acoustic properties of the room, the frequencies you are trying to control, and the density and material of the foam you are using.
This is a simple explanation for what is usually a complex undertaking. When it comes to choosing an acoustic foam that fits your requirements, there are also other factors to consider, like the profile of your acoustic foam and how that will influence its effectiveness for your application. Keep reading to learn more.

- Acoustic Foam Explained
- Acoustic Foam Thicknesses
- How Acoustic Foam Works
- Noise Reduction Coefficient
- Testing Acoustic Foam
- Independent Ratings
- Acoustic Foam Profiles
- Acoustic Foam Materials
- The Acoustic Bell Curve
- Interference Explained
- Primary Sound Source
- Background Noise
- Primary Reflection
- Flutter Interference
- Applying Acoustic Foam
- Safety First
- Consider All Alternatives
- Consider the Cleanup
- Final Thoughts
- References
Acoustic Foam Explained
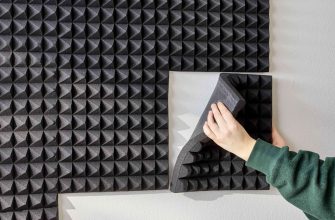
First up, it helps to understand the benefits of installing acoustic foam![]()
![]() . You probably already know that it can help improve the acoustic properties of a room and even prevent sound from escaping or entering it, depending on what it is you desire.
. You probably already know that it can help improve the acoustic properties of a room and even prevent sound from escaping or entering it, depending on what it is you desire.
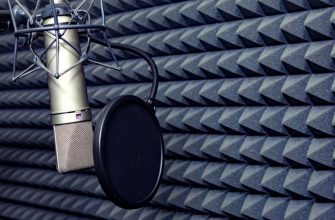
Acoustic foam is soft and, as such, absorbs the sound rather than reflecting it as a hard floor or wall would. The foam’s type, thickness, profile, and density all affect how much sound is absorbed. The amount you use also influences its effectiveness.
You could use items like blankets and carpets in a pinch, but there is no substitute for purpose-made acoustic foam.
Acoustic Foam Thicknesses
You may have hopped on Amazon thinking you’d just order some foam and found yourself completely overwhelmed with options. From packs of tiles to aesthetically pleasing panels and everything in between. To make it a little easier, here are the 3 available thicknesses of acoustic foam and their general applications.
- 1 Inch Foam (2.5 cm) – Thin foams best help dissipate low-volume, higher-pitched sounds. Let’s say you’re working from home, and the barely audible whine of your washing machine is breaking your concentration. A few squares of thin foam might be enough to shut it up.
- 2 Inch Foam (5 cm) – This middle ground foam is best applied to mid-range frequencies, such as the drone of your colleague’s voice that carries through the wall disturbing your thoughts.
- 3 Inch Foam (7.5 cm) – This thick foam is ideally suited where the volume is too high or the frequency too low for thinner foams. You might need this to cancel out the grunt of any diesel engines your mechanic neighbor is working on.
This is just the start of it all. Not all thicknesses of foam are cut in the same way, nor are they all of the same density or material. A professional 1-inch foam may offer superior performance to a 3-inch foam of dubious origin cut with an aesthetically pleasing yet inefficient profile.
How Acoustic Foam Works
It might seem confusing that a 1-inch foam could offer better performance than a foam 3 times as thick. It helps to understand how acoustic foam works in the first place and how all the factors that go into the design will determine your results.
Acoustic foam dissipates sound energy, thereby reducing interference and noise. This makes for higher quality recordings and can prevent sound from escaping or entering a room.
The amount of noise and frequency that dissipates depends on the foam’s thickness, profile, and material. This value is known as the Noise Reduction Coefficient.
Noise Reduction Coefficient
This value indicates a material’s ability to absorb and dissipate sound. Some esoteric calculations are required to derive this value for material, taking into account the density, thickness, and profile.
The Noise Reduction Coefficient defines how much sound is absorbed. A coefficient of 1 means that 100% of the sound is absorbed, while 0 means that everything is reflected.
Testing Acoustic Foam
A reputable manufacturer of acoustic foam should be able to provide consumers with independent test results confirming the performance of their product. Commercial foams should also offer some fire safety information.
Independent Ratings
Make sure you get what you pay for by looking for independent test results defining your noise reduction coefficient. If you don’t, you could end up with an inferior and ineffective product.
Research the product you are buying and look up any standards the manufacturer is referring to. There are too many to cover satisfactorily in this article, and the ratings used may vary by region.
Manufacturers tend to inflate the results when using internal processes to test their products, and some even refer to government standards for using foam in seats and mattresses, making customers think they are getting a decent product when in reality, what they have bought does not perform as required.
Acoustic Foam Profiles
You might have noticed that acoustic foam is available in not just a variety of thicknesses but also in various shapes and sizes. This further complicates matters. Trying to describe each is a task not suited for the purposes of this article, but the general considerations are as follows:
Different acoustic foam profiles will each dissipate sound in their own unique way. Many cuts of acoustic foam available today are decorative and don’t perform as advertised.
Ensuring you buy a professional quality foam fit for your purpose will ensure that it performs as desired.
Acoustic Foam Materials
A few different kinds of materials are used for commercial acoustic foam. You must remember that each type has different properties and will perform better or worse depending on how you apply them.
The density of the material is the main factor that affects its ability to absorb and dissipate sound. Ideally, you’ll want a material that is soft but also dense.
For this reason, you will notice kitchen sponges and foam mattresses typically do not have the same density or mass as acoustic foam. After all, they are designed to absorb soapy water or the weight of a seat’s occupant rather than dissipate sound. It also stands to reason that those offcuts of leftover foam will be of any use when washing dishes.
The Acoustic Bell Curve
The acoustic bell curve is a mathematical graph representing the effectiveness of your acoustic foam at reducing noise in relation to the area you are covering.
As you add more acoustic foam to a wall, you will get increasingly better noise reduction. At a point, you will start getting diminishing returns where adding more foam has no noticeable effect.
To put it practically, you can start with a few panels and slowly add more until you get the optimal effect. What this means for those installing acoustic foam is that there’s a cost/benefit ratio to consider. You really have to weigh your options – you might save money by investing in a high-performance foam, even if you have considerably less coverage.
Interference Explained
Would you go into battle knowing nothing about your enemy? You can’t hope to reduce interference if you don’t understand what it is. To help you with this, I will discuss the different types of interference, how they are caused, and the general considerations for dealing with each.
Primary Sound Source
This isn’t interference but rather the desirable sound that you want to either hear or record without any interference. This can be an instrument or speaker, and you can have multiple primaries that may interfere with each other.
- Direction – the angle at which a sound is projected towards a surface will affect how it interacts with that surface.
- Frequency – Sound is a wave and, as such, has a frequency or pitch measured in Hertz (Hz).
- Volume – How much of a sound there is. This can also be defined as the amplitude of a frequency. Higher amplitudes inherently have more energy.
When you hear someone talking about the acoustics of a room, they are referring to how sounds travel and bounce around within that space. The rate at which sounds bounce off a surface is called reverb, which is helpful for an orchestra that wants to excite a room with sound waves but can cause an annoying echo and make spoken words unintelligible.
Background Noise
Background noise is any frequency generated from a source other than the primary source. These undesirable frequencies can be quantified similarly to the primary sound source.
You can eliminate background noise by selecting a purpose-made acoustic foam that targets the specific frequency you want to stop. The effectiveness of the foam will depend on how loud the background noise is.
It can be challenging to eliminate background noise entirely. In worse cases, you may have to consider simply moving to somewhere quieter if this is an issue.
Primary Reflection
When the sound from your speaker or instrument reaches a hard surface, it gets reflected in much the same way as light. Think of Primary Reflection as if you’re shining a torch directly at yourself in a mirror – you probably can’t see much, and similarly, these reflected sound waves will affect the quality of what you hear.
The rate at which primary reflection waves dissipate is known as reverb decay. A higher decay rate is desirable for clarity and intelligibility when recording spoken words, while a lower reverb decay rate is helpful for classical music.
This initial reflection is the most powerful. The reflected sound can be reflected again, but a direct reflection refers only to this initial bounce. If you can stop this in your tracks, you’re on the right track to solving your problems.
Flutter Interference
This type of interference is caused by sound waves reflecting between 2 parallel surfaces. These sound waves are not as strong as primary reflection but will affect the clarity of your sound.
Flutter interference is caused by the physical properties of a sound wave interfering with itself as it bounces between 2 parallel surfaces. Specific frequencies will be amplified, while others will be canceled out. The effect can be subtle but will become more noticeable at higher volumes.
Acoustic foam reflects sound at different angles, eliminating the problem of parallel surfaces. For it to be effective, it has to be of the appropriate design and thickness. You can’t just put any old foam on your wall and expect results.
Applying Acoustic Foam
Regardless of what foam thickness you use, you will eventually have to apply your squishy soundproofing. There are a few ways you can do this, depending on your budget and the type of foam you have procured.
Safety First
When you apply acoustic foam to a surface, you are essentially changing the physical properties of that surface. By extension, this can be considered a significant alteration to a room or property, so take care not to rush in.
Quality acoustic foam will have been tested to ensure that it is safe to use as a wall covering and meets specific standards for soundproofing because it poses a fire hazard.
Necessary precautions should be taken, up to and including contacting your landlord if you are renting or your insurance as a homeowner, to ensure this does not affect your policy in any way. Installing foam can also become a very complex undertaking.
Consider All Alternatives
Some adhesives release highly toxic fumes, so care should be taken when working with them. If things go awry, you can also ruin the installation and have panels falling down.![]()
![]() It can turn into a real mess; you can even tear some thinner foams quite easily.
It can turn into a real mess; you can even tear some thinner foams quite easily.
Take a moment to assess the complexity of your installation honestly, and either contact a professional to do it if it’s too complex or consider alternatives.
It’s entirely up to the individual to assess what will work for them. You might have your heart set on a particular aesthetic, only to find it isn’t going to do the job. It might also end up not being as cost-effective – no need to soundproof an entire room when you can get results with just a few panels.
Consider the Cleanup
It might not be the first thing on your mind when installing acoustic foam, but you might have to take it down someday. In some cases, this will leave you with a horrible mess that costs you even more money to get repaired – drywalling might need to be replaced or brickwork replastered and painted.
Thicker, denser foam tends to be easier to remove from walls when it has been applied using a contact adhesive or industrial strength tape. Thick foam is naturally more robust than its slimmer counterparts and will be less likely to tear as you pull it off.
Put your glue tin down if you’re renting – alternatives like mounted wall panels might save you a lot of trouble and even your deposit. You may not get the exact desired result, but this is another cost/benefit consideration. Even if you’re not renting, you could pay more for the repairs than the installation if you decide to move your studio.
Final Thoughts
Sadly, choosing an acoustic foam is not as simple as selecting its thickness. Many options are available, designed to suit every budget, but like anything, you tend to get what you pay for. A purpose-made acoustic foam with defined properties applied correctly will yield the best results, but they can be prohibitively expensive.
It’s not all doom and gloom, though. Soundproofing is rarely total or perfect, but you can usually silence undesired background noises by targeting those specific frequencies you want to eliminate. It’s more about controlling noise than anything.
References
- https://www.audimute.com/nrc-ratings-noise-reduction-coefficient
- https://support.presonus.com/hc/en-us/articles/210045793-Reverb-Decay-#:~:text=Decay%20is%20the%20time%20required,effect%20from%20a%20mono%20source.