If you are a budding videographer but don’t have the budget to work from within an actual or professional recording studio, the only option you have is making a video studio out of your own space. The most prominent YouTubers started small – not just in terms of views and subscribers, but also with regard to the place they initially made their videos from. In other words, you don’t have an excuse.
To make a DIY video studio in a tiny room, get the basics of a video recording studio right – lighting, soundproofing, background, etc. Next, focus on your shooting gear and audio recording equipment. Also, set them all in place semi-permanently for easy and quick access for subsequent recordings.
Having a capable camera handy is just one aspect of shooting quality videos. The studio lighting, design, overall setup, etc., matter equally, if not more. Continue reading to learn everything to know about setting a video studio in a tiny space and more.
Light Up Your Space
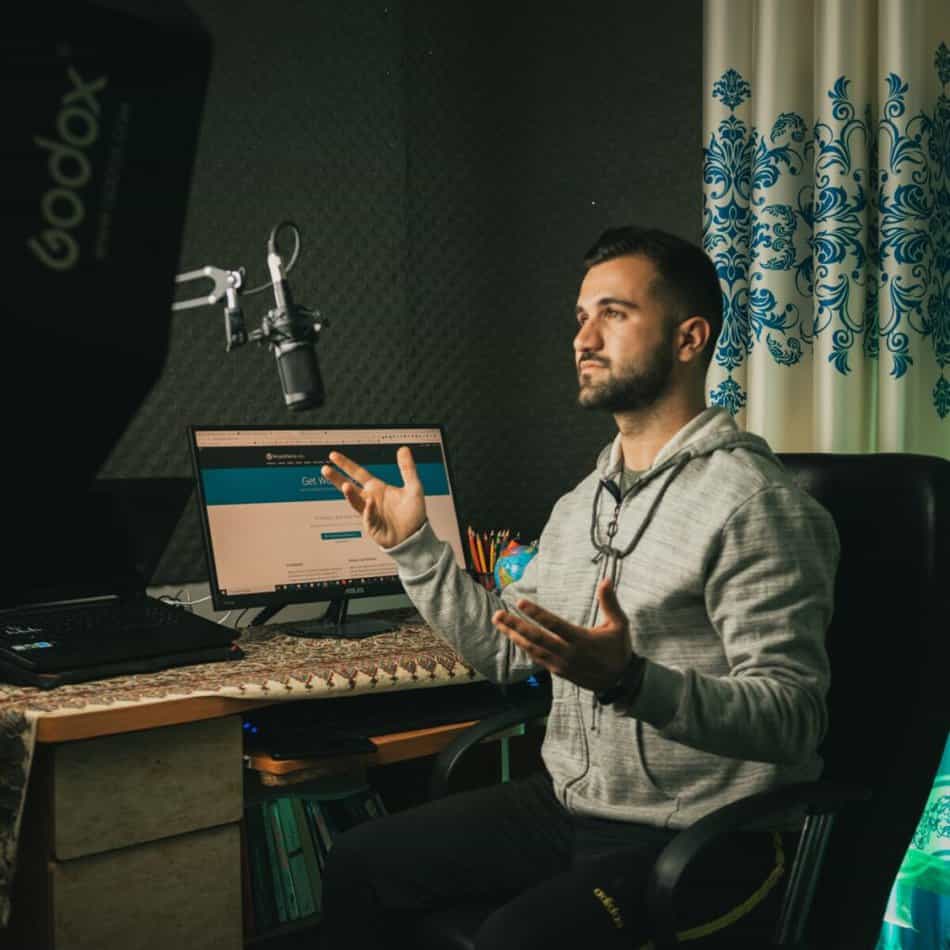
Your small space is unlikely to have proper natural lighting. Even if it does, you may not know how to use it to your benefit. To set up a video studio in a tiny space, therefore, you need proper lights that you can directly control.
If you’re new to video lighting, start with the three-point lighting setup. The particular lighting arrangement entails placing a couple of lights on the subject’s left and right sides at a 45-degree angle. The third light goes above or behind the subject.
If one light is a diffused light source or comes with a softbox, you may set it to the side slightly close to the camera to create the desired diffused lighting scheme. Both the individual lights and softbox can bounce off the ceiling or a wall. To ascertain the right lighting setup for your room, you may have to resort to trial and error.
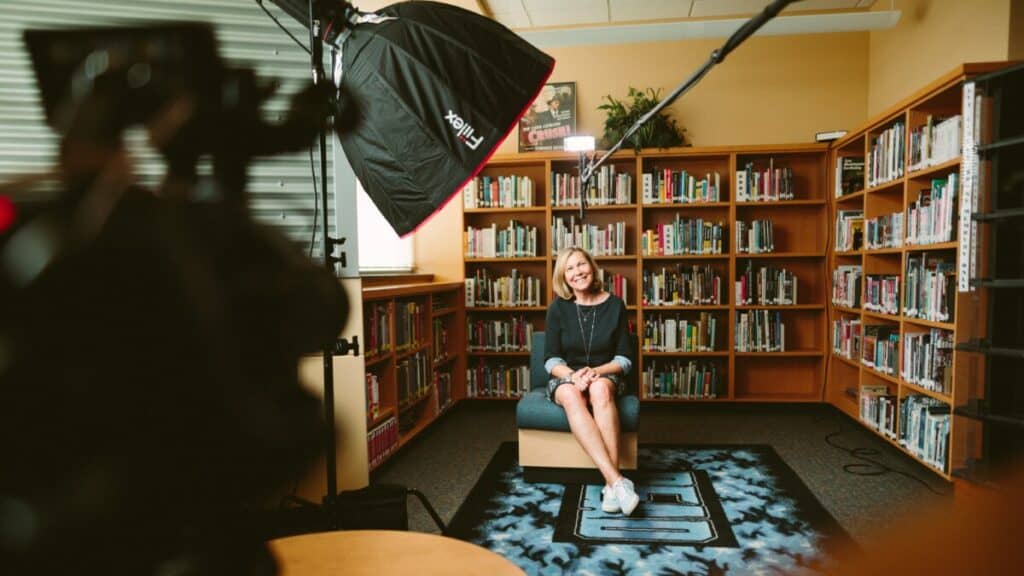
Irrespective of how you position or direct the lights, isolate the subject from the background in a way that eliminates shadow. Also, test the exposure levels or the level of illumination you need. Move the lights back or forward based on the amount of light required. Once you’ve found the sweet spot, mark the exact location or floor area with some gaffer tape for future lighting convenience.
As far as the light type goes, you may opt for different varieties.
Incandescent and LED Lights
Also called incandescent light globes, incandescent lights are electric lighting solutions with a filament that’s heated until it starts to glow. Incandescent light is the first of its kind and cheaper compared to LED lights
.
Though slightly expensive, LEDs are a consistent and stable light source and with no significant heating issues. Heat can be a major concern with incandescent light bulbs, by the way. However, if the light intensity is too much with an incandescent, you may use dimmers to manage it. The light intensity can also be altered by physically moving the lights.
LEDs are ideal not just because they generate less heat and are more flexible, but they also come with dimming built-in. They have much better shock resistance, too, and are more durable or unlikely to be damaged when you’re moving them around in your space.
Tungsten Light
Tungsten lights are another option and are quite commonly used in photography and videography. But they too present heating concerns like incandescent bulbs. These are technically incandescent bulbs. However, they differ with the glass envelope (or bulb) structure and the gas within the envelope. Tungsten lights produce a reddish or warmer color.
Fluorescent Light Strips
Fluorescent strip lights are ideal for lighting backgrounds or to provide ample lighting in small areas. These lighting strips must be mounted or solidly attached to the wall. If your tiny room has low-lying ceilings, too, and raising lights or putting them on a pedestal is not an option, these light strips will come in handy.
Lightboxes
Controlling LED or incandescent lighting in a small space could be challenging. A lightbox can help address such a situation. Lightboxes are coverings that go atop a light with tiny space between the box’s front and the light source to let the diffusion material spread out the light.
A lightbox offers light with a broader range of cover and eliminates the sharp shadows direct lighting usually produces. On the flip side, the contrast levels created with light from a lightbox is low and should be compensated for with other lights, if needed.
Powering the Lights
When working with multiple lights, make sure you are not burdening a single AC (alternating current) power by plugging all the lights into the same outlet. Use a surge protector
, such as this GE 6 Outlet Surge Protector
, to spread out the load. Also, use good-quality extension cords for a stable and safe connection. The UltraPro 25-ft Black
and the GE 12-ft 3 Outlet Power Strip
are great extension cords.
- Expand Your Power – 6 grounded and protected 3-prong outlets provide power from a distance –...
- Versatile Cord – Extra-long 10ft. power cord comprised of 14-gauge SJT cable housed in a durable...
- Protection – 800 Joules protection rating safeguards your electronics from harmful voltage spikes
Last update on 2025-05-30 / Affiliate links / Images from Amazon Product Advertising API
- Specifications – This grounded three-wire, 16 AWG extension cord is rated for 125 VAC/13 A/1625 W...
- Heavy-duty – Double-insulated cord and one-piece molded plug provide extra durability; heavy duty...
- Extended reach – Extra-long 25 ft. cord is great for tools, such as hand drills and jigsaws,...
Last update on 2025-05-30 / Affiliate links / Images from Amazon Product Advertising API
- Expanded Power – Each extension cord comes in a white finish and features three polarized AC...
- Versatile Power Cord – 12 ft. power cord is strong enough to last a lifetime and pliable enough to...
- Extension Cord Safety – Patented Tamper Guard twist-to-close rotary safety outlet covers help...
Last update on 2025-05-30 / Affiliate links / Images from Amazon Product Advertising API
Find out our top 5 tips on professionally lighting your video studio in this article here!
Eliminate Noise
Sound vibrations and echoing can be an issue in any space. In other words, remove extraneous items from your room. Such cleaning would also tidy your room and would reflect well in your videos. When trying to move things, look for the ones that reflect sound. Dense items, such as couches, usually absorb sound.
To dampen sound reflections, carpets are essential. The number of rugs you’ll need would depend on the area of flooring you’ll need to cover. You need not cover the entire space with carpets to get the desired effect, however. If you have a limited number of mats to work with, experiment with their positioning and check for the results. Keep changing the carpet placements until you get the kind of noise reduction/elimination you desire.
Sounds can also be muffled by weatherstripping around doors and windows. Furthermore, blocking or closing any vents or holes will work.
Sounds in Apartments
Removing unwanted sounds from your room could be a bit trickier if you live in an apartment or a shared space. Noises your neighbors make could be controlled by asking them to keep things down, at least when you are shooting for a video.
You may also plan to shoot during specific periods of the day to cut out outside noises. Shooting late in the evenings, for instance, can pretty much ensure minimal internal noise concerns. Street noises would be minimum or non-existent (depending on the area you live in) at night.
Sound Absorbing Panels
Sound absorbing panels (acoustic panels) help add the finishing touches for your ideal aural environment. However, these panels won’t make much of a difference if the aforementioned basics have not been taken care of.
An acoustic panel works like the pads that go under a subwoofer or speaker to silence the audio. They attach to the wall to reduce the sound that reflects off it. The shape and size of your room ascertain how many panels you’ll need for the job. The placement, however, is significantly more important than the total number of panels.
There is no standard number or method for working with these panels. You will have to go the trial and error route as you did to get the rugs right.
To scientifically check the impact the panels create on your room’s auditory response, use digital sound level meters such as this BAFX Products BAFX3370 Decibel Meter
. If you need to match your room’s acoustic environment to the audio response required for your video, audio meters help a ton.
- FEATURES - Automatic backlit display for easy visibility in dark situations. MAX/MIN hold feature...
- EASY - Super easy and simple to use. All readings are measured in dBA, the most common decibel...
- AFFORDABLE - Our sound meters are designed with the general consumer in mind, made with the features...
Last update on 2025-05-30 / Affiliate links / Images from Amazon Product Advertising API
Invest in a Microphone
To turn your room into a recording “studio,” the sound is as important as video. And eliminating the extraneous or unwanted sounds is only half the job done. For your audio to truly shine, you must also invest in a quality microphone. Your camera’s built-in mic, irrespective of how expensive the camera is, will always trail a purpose-built microphone. Therefore, buy an external microphone.
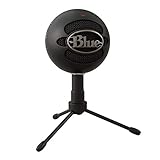
There are different types of external mics, and how you use the mic will determine which kind to opt for. For example, if you’re planning to position the mic on your table, visible to your viewers, the Blue Yeti Nano Premium Mic is the segment’s default choice. Another mic to consider in the same category is Yeti’s younger sibling, the Blue Snowball iCE USB Mic
.
- Perfect For Podcasting, Game Streaming, Skype Calls, Youtube Or Music
- No-Latency Headphone Output, Headphone Volume And Mic Mute
- Standard Threading For Radius Iii Shock Mount And/Or Compass Boom Arm
Last update on 2025-05-30 / Affiliate links / Images from Amazon Product Advertising API
- Custom Condenser Capsule: Powered By Blue’S Custom Condenser Capsule, Snowball Ice Microphone...
- Cardioid Pickup Pattern: Captures Your Voice With Clear, Focused Sound For Streaming, Podcasting,...
- Stylish Retro Design: Record Or Stream In Style With A Classic Recording Equipment Design That Looks...
Last update on 2025-05-30 / Affiliate links / Images from Amazon Product Advertising API

Shotgun
If you need a microphone to place near the camera and outside the frame, the Movo VXR10 Universal Video Microphone is a reliable option. These shotgun microphones
connect to your camera via a socket. If you would like to learn more about how to attach and set up a shotgun microphone to your DSLR, watch this video:
Shotgun mics are ideal if you are directly talking toward a camera and do not want the microphone to capture surrounding noises. If you are podcasting and want audio to be captured from multiple sides, a condenser microphone like the Blue Yeti would be perfect.
Lavalier
If you are not a fan of big, bulky mics and need a mic setup that gets the job done, look at lavalier mics. These mics are placed on the person talking and are less noticeable (almost invisible if you set them right). The mic is comparatively cheap, with prices varying based on the brand and features. A recommendation for this is the Professional Grade Lavalier Lapel Mic by PowerDeWise
.
- 100% WIRED. Always ready to use. Stable communication without radio interference in any place. Never...
- UPGRADED 2022. Professional Grade Lavalier Microphone has new fully shielded cord that makes your...
- UNIVERSAL COMPATIBILITY. For Android, GoPro, Cameras, Camcorders, Audio Recorders, Tablets, Laptops...
Last update on 2025-05-30 / Affiliate links / Images from Amazon Product Advertising API
Make Sure Your Background Is Not Distracting
The background of your video is as essential as its foreground. When working on the background for your video, make sure it’s not distracting, at the least. If there are posters, furniture, family pictures, etc., in the back, get rid of them or throw a screen before them. If, however, they are way behind in the back, or you can defocus them to the point of being indiscernible, let the items remain.
Plain
Generally, a plain background with a gradient effect is recommended. You could achieve the result through lighting. If you’re not sure how plain video backgrounds should look or you need some inspiration for setting one up, view this video UnboxTherapy Marques Brownlee
video:
Not Plain
If, however, you need your background to add to your video, set your background accordingly. For example, if you do beauty and makeup videos, having posters of some of your favorite cosmetic brands in the background would only help. Just make sure you’re not overdoing it.
Multipurpose
If you need a background that showcases your creativity, you may set up one accordingly. Grab some paper roll and set it up using curtain rods. The paper could be white or any color of your choice. Just make sure it’s not too overpowering or contrasty.
Once set up, cover, and strewn the paper with some balloons, fabric pieces, or any item you think will go on the paper and suit the video’s purpose or theme. The goal is to achieve a completely different background. So, go ahead and try out things.
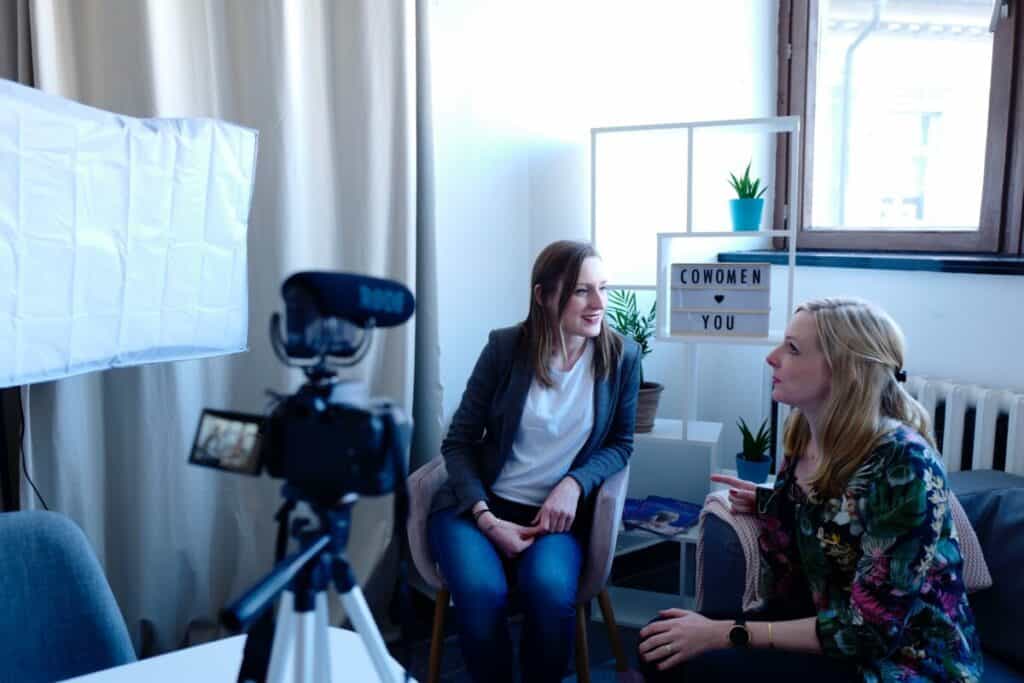
Virtual
For a virtual background, use a green screen.
Green screens come in different types. The variety can be in terms of the screen’s material, installation, etc. As far as green screen materials go, fabric-based screens are quite common. Paper is another option. In large sizes, fabrics are easier to handle. However, fabrics tend to wrinkle. If not ironed out, those wrinkles would cause irregularities during the lighting.
Regardless of the material you opt for, make sure the color you pick is chroma-key green so that you have no issues during compositing
. With a green screen, editing tools let you insert your choice of background in the final video. The background you throw in could be anything – a white wall, a movie scene, window view, etc.
Get the Right Shooting Gear
A video recording studio is not worth its while if you’re not going to shoot in the place. And to make videos, you need the right gear and some basic understanding of how to handle a camera.
Even though most smartphone cameras are good enough to shoot quality videos, they cannot replicate or replace a DSLR (digital single-lens reflex) or mirrorless camera
. The flexibility and options dedicated cameras offer for shot composition
and a host of other things cannot be reproduced by even the latest and greatest iPhones
. Even your camcorders
may not cut it.
Once you’ve understood the reality of shooting professional videos from a tiny space, it’s time to learn how to shoot the videos. The following are the hardware and software aspects of shooting a video to consider:
Camera
If you’re on a budget and the space to work with is small, too, a DSLR or mirrorless camera is ideal. Though there are other camera options, such as cinema cameras and prosumer camcorders
, you need not go that route. A camcorder is acceptable only if you are on a too-tight budget.
Compared to camcorders, DSLR and mirrorless cameras have larger sensors and lenses. The camera manufacturers also make telephoto or wide-angle converters to attach to the lens front better. If the range of zoom isn’t wide enough, the converters come into play. DSLR and mirrorless cameras are, therefore, better for “cinematic” shots and low-light shooting.
Check out why we think the Nikon D3200 is great for YouTube here!
If you’d like to learn more about how to choose the right camera for your shooting requirements, watch this video:
Lens
The lens is arguably the most crucial accessory for any camera. A camera doesn’t “need” a lens as such since it can capture images without one. However, to shoot detailed, high-resolution shots and get them done fast, a lens is critical. A camera can focus and amplify gathered light to a particular area in a scene with a lens.
There are different types of lenses, and the prices can vary (significantly) accordingly. Since you’re dealing with a small studio setup, look for a wide-angle to telephoto lens. In other words, look for a versatile lens that has a wide zoom range – something like a 24-120mm lens.
Make sure the lens you buy is compatible with your camera. Also, if you’re using a gimbal (for those selfies or vlog-style recordings), some lenses may be too big or bulky for the gimbal to handle. Be wary, therefore.
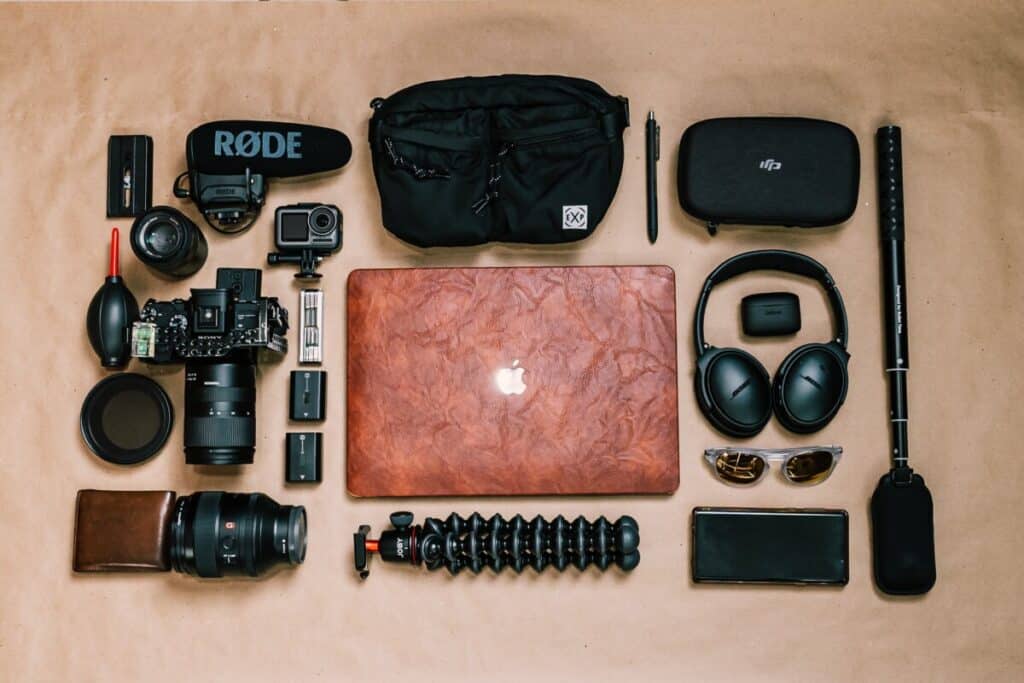
Sensor Type
Another thing to consider when shooting in a small space is the camera sensor type. In other words, go with a full-frame sensor if you want maximum coverage without necessarily having to augment the distance between the subject and the camera. A crop sensor camera
will not be able to achieve this, on the contrary.
A crop sensor is, as the name suggests, the cropped version of a full-frame. A full-frame camera sensor will help with maximizing your frame coverage. A wide-angle lens used with a full-frame sensor will get you a wider frame when used with a crop-frame sensor to give you a better perspective.
As far as the options for cameras with full-frame sensors go, there are more than a handful – both in terms of brands and the camera type. Both DSLR and mirrorless cameras are available with full-frame sensors, in other words. The brands that make these cameras include the likes of Canon, Nikon, Sony, etc.
Exposure
Exposure is the amount of light entering your camera sensor. Since you’d be working in a small space with artificial lights, setting the exposure right is imperative to get the brightness of your shots right. You can darken or brighten your shots during video editing, but that’s additional work you can eliminate at the camera-level.
Getting the right exposure for your shots is all about balancing three settings on your camera: aperture, shutter speed
, and ISO
. The larger the aperture you set on the camera, the brighter the picture. Similarly, the faster the shutter speed, the less blur will be in your shots.
ISO too plays a role in lighting up your shots, but it’s not a part of “exposure” per se as it doesn’t ascertain how much light enters your camera sensor. It instead brightens the shot in-camera after the light has already hit your camera sensor. When you’re looking to brighten up your frame, raising the ISO levels helps. That said, don’t push the ISO levels too far up, as grain and pixel discoloration could then become an issue.
There’s no correct or best ISO level as such. Since you’re shooting indoors and have an ample amount of light to play with, an ISO slightly higher than 100 would be fine. ISO 160, 320, 640, 1250, or up to 2400 is serviceable.
Shallow Depth of Field
Another aspect that most videographers look to imbibe in their videos, particularly when focusing on a subject, is a shallow depth of field.
When the subject is in focus, and the background has the “blurry effect” going, the video looks a lot more professional and well-made. And the onus of creating this effect is mostly on the camera. How you place the subject in relation to the background also matters.
In other words, make sure the background is as far away as possible from the subject. Next, widen your aperture using a neutral density filter. Also, extend your focal length – zoom in to the subject and go back a few steps. Small apertures (such as f/11 or f/16) provide a larger depth of field. Large apertures, such as f/2.8 or f/1.4, help capture a thinner field depth.
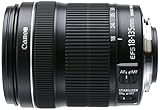
The lenses mentioned above can also be used to great effect. The 50mm focal length lens, for instance, is small, light, and perhaps the most comfortable lens for achieving the shallow depth in your shots. A universal solution or lens would be to use an 18-135mm lens for all the space issues and depth of field requirements. The Canon EF-S 6097B002 is a solid 18-135mm lens for the job.
- Inner focusing system
- With one UD and one PMO aspheric lens
- Zoom ring lock even prevents the lens from accidently extending
Last update on 2025-05-30 / Affiliate links / Images from Amazon Product Advertising API
Shooting in a Tiny Space – Other Things to Consider
Besides the aforementioned, the following are a few other things to focus on when shooting videos from your tiny video studio:
Natural Light
If you’re planning to use your lights, cut out natural or external lights. Merging artificial and sunlight is possible, but that is something only the professionals can pull off properly. Therefore, cut out lights you cannot directly control.
Windows should have blinds, masks, or curtains that mitigate any light from coming in. To seal the edges of the window so that light doesn’t seep in from there, apply black fabric to the windows directly. A temporary tape, such as painter’s tape, would be ideal as it won’t damage any material or pull up the paint.
Closed doors do not obstruct external light completely. Therefore, place a thick towel at the base to prevent light leakage from below the door. A more permanent solution is using a light-trapping, dark material to make a skirt. Hang the skirt down from or near the door’s bottom.
Studio Items
The items that will show up in your videos should be picked with care and thought. For example, if you’re planning to sit behind a table in your videos, make sure the table surface is not reflective. The chair or seating equipment you use should also be simple or not garner unnecessary attention.
Steer clear of anything that is or has chrome. The table, chair, and other kinds of furniture can be wood or anything non-reflective. Moreover, the chairs and furniture you incorporate into the frame must have a neutral hue and zero discernible patterns.
If your shots capture the floor too, ensure it is clean, tidy, and neutral. If you have colored or plain white photographic paper rolls hung in the background, extend it down to the floor for continuity. Do not use the same roll for all your videos, as it could have gone dirty during the previous video.
Shot Composition
Shooting full-length body shots won’t be possible in a small space. Half-length is, therefore, the norm. For instance, you may set up a table and sit behind it, with your arms resting on it – like how television newscasters do. Not to mention, if you’re clear in your head about the shot composition, you may even get away with not tidying your room.
The shot must be set in a way that looks pleasing and not compromised. In other words, do not crop the major joints. For instance, if you would like to show up in the video from your torso and up, make sure your sides are not cut or fit in well with some space to spare. Your three sides of your body – headroom and sides – should be comfortably within frame.
Talking about headroom, don’t leave too much space above your head. It would not just look weird, but that space could have been used to accommodate more of your lower body instead.
Conclusion
Having a dedicated video shooting setup is not mandatory but essential to affirm your videos’ sophistication and professionalism. If you keep changing your shooting spots or shoot from any random place, you may not be able to build a connection or sense of familiarity with your audience.
You may alter your shooting environments every once in a while for the sake of variety but keep it true to your style. Complete overhauls are fine, but only if you are shifting places. Do not unnecessarily splurge. In other words, do not fix when it’s not broken.
Check out the 4 best rugs for recording studios here!
Sources
- Videomaker: Create a YouTube studio in your home
- PremiumBeat: Production Tip: 5 Tricks for Filming in Small Spaces
- Videomaker: Depth-of-Field in small offices/spaces
- Learn About Film: How to Choose a Camera for Low Budget Filmmaking
- Photography Life: What is Exposure? (A Beginner’s Guide)
- Nikon: Video Composition Rules: Establishing, Medium and Close-up Shots
Recent Posts
QuickTime is a vital app for many Mac users, and if you’ve recently bought a new microphone, you might wonder how to use it optimally. QuickTime cannot record audio content if it doesn’t have...
Every microphone leaves a unique signature on the quality of its output. If you’re a podcaster trying to melt your way into your audience’s hearts, a muddy, distorted recording won’t cut it....


