Soundproofing has become an enormously popular way to remodel. Whether it’s mothers working from a home office, bands practicing in their basement, or just someone trying to get quality sleep, everyone is soundproofing.
Soundproofing is done by choosing a combination of various soundproofing materials and compounds that affect the soundwaves through dampening, absorption, and deflection of the sound vibrations. The materials affect the sound waves as they pass through the material.
In this article, I’ll cover all the ins and outs of soundproofing. We’ll go over what it is, how it got started, and how you can do it for your space too. Let’s jump in!

- Understanding the Process of Soundproofing a Room
- Soundproofing Methods Available in the Market
- Sound Absorbing Material
- Soundproofing Compounds
- Soundproofing by Combining Materials and Compounds
- Why Does Soundproofing Work?
- Soundproofing a Room From Beginning to End
- 1. Strip Your Space to the Bones
- 2. Seal in All the Cracks
- 3. Begin the Insulation Process
- 4. It’s Time for Drywall
- 5. The Final Step – Decorating With Extra Soundproofing Panels
- Final Thoughts
- References
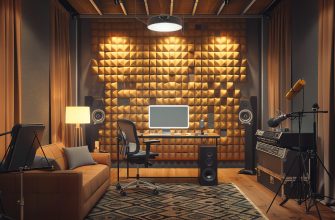
Understanding the Process of Soundproofing a Room
Well, soundproofing a room![]()
![]() can be done in many different ways. It seems like every day, there’s a new method of soundproofing that gets put on the market. Here are the basics.
can be done in many different ways. It seems like every day, there’s a new method of soundproofing that gets put on the market. Here are the basics.
Soundproofing works against two different types of noise – airborne noise and impact noise. So what is airborne noise versus impact noise?
Airborne noise is the noise that travels through the air. You’ve heard people speak of “airborne diseases.” Airborne noises are just the same. It simply means it travels through the air to get from one place to another. Some examples of airborne noises are talking, a radio, and television.
Impact noise, on the other hand, is the noise that happens when an impact is created and the vibrations travel through an area. You may have experienced impact noise when listening to someone walking heavily on the floor above you or if someone is hammering in the other room.
Some soundproofing methods lessen the sound of airborne noise. Some lessen the sound of impact noise. However, most work to dampen both types of sounds.
Soundproofing almost always does one of the following:
- Increases the distance between you and the loud noise. Hey, if you’re farther away from the noise, you can’t hear it either.
- Creates a room inside of a room. Roomception. Kidding, but basically, this method forces soundwaves to travel through multiple barriers to reach you, thus lessening the amount of noise you hear.
- Deflects the sound waves. With this method, the sound waves bounce off the soundproofing material and are directed elsewhere.
- Dampen the sound waves. Most soundproofing materials work to dampen, even if they do other things too. Dampening just means that the sound is being smothered like a giant blanket is going over it.
- Absorb the sound waves. This material acts like a sponge, taking in the sound vibrations and trapping them.
Soundproofing Methods Available in the Market
Welcome to the beautiful world of soundproofing techniques! There are several different ways to soundproof![]()
![]() , so let’s get started.
, so let’s get started.
Sound Absorbing Material
Sound absorbing material includes soundproofing methods, including soundproof blankets, curtains, and sound-absorbing panels. Let’s look briefly at each of these materials and how you can use them to start soundproofing your space.
Soundproofing blankets are enormously versatile. They can be placed practically anywhere. Many people use soundproofing blankets to cover windows![]()
![]() that let in excess noise. They can also be hung on the wall to help absorb sound from recording studios or other noise-making.
that let in excess noise. They can also be hung on the wall to help absorb sound from recording studios or other noise-making.
Soundproofing blankets work best to help absorb some of the sounds that are inside the room rather than to block outside noises from entering the room.
Soundproofing curtains work similarly to soundproofing blankets, except that this material is specifically made to go over your windows. Remember that thinner soundproofing materials will absorb significantly less noise than thicker materials.
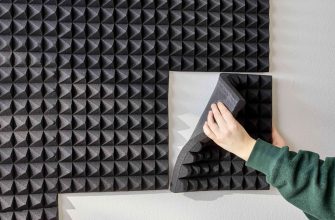
Speaking of thicker materials, let’s also cover sound-absorbing panels quickly. Sound-absorbing panels work a lot better than sound-absorbing blankets or curtains because they’re thicker. Sound absorbing panels also come in all kinds of fun designs to make sure that the room you’re in is true to your style as well.
The panels usually come in squares or rectangles and can be hung on the wall wherever it best suits you. Typically, people will cover an entire wall with them. You could even cover your whole room in them if you wanted.
Soundproofing Compounds
Soundproofing compounds are concoctions that have been put together that you can place in between drywall sheets or gaps within the room where excess noise is coming through. An excellent example of a soundproofing compound is green glue, a type of acoustic caulk.
Soundproofing compounds are most often used when rebuilding a space from scratch. While you can use them to fill in the gaps, for example, between your ceiling and wall or gaps between the window and wall, they aren’t made to be aesthetically pleasing. It is caulk, after all.
Instead, place these compounds in between sheets of drywall and then screw them together for moderate sound dampening.
Soundproofing by Combining Materials and Compounds
As mentioned, soundproofing comes with a lot of options. While we aren’t going into detail about every method, I do want to run through them quickly.
If you’re starting from scratch, you can build your room however you want. One of the best ways to completely soundproof a space is to build a room within a room. This is done by starting with an exterior space and placing moderate amounts of insulation and soundproofing materials throughout the exterior.
Overall, keeping your soundproofing materials at six inches or less from the wall surfaces is best.
At this point, you would start installing your drywall over the soundproofing materials. The drywall forms the interior part of your room within a room. As you place the drywall, you would want to add green glue or a similar compound on the drywall pieces, layering them upon one another to create more mass.
Afterward, you can expect to have almost a completely soundproof room. Combing materials and compounds is a great option when starting from scratch. This method is especially helpful because you can add in however many sound absorbers and dampeners you want to get to the exact effect you’re going after.
Why Does Soundproofing Work?
To answer this question, we first have to identify what sound is and how it travels because while we all hear sound every day, most of us don’t fully understand what it is.
Let’s start at the beginning. Sounds are vibrations that move through solids, liquids, or gas. The sound vibrations travel through various materials and the air, all the while hitting air molecules and causing a chain reaction. This produces vibrating waves, which is where we get the term sound waves.
When these vibrations reach our eardrums, they interpret the vibrations as sound. Stronger vibrations equal higher decibels and vice versa.
So, why does soundproofing work? It works because it stops the sound vibrations from continuing to travel. It does this by either completely absorbing the sound or by changing the way the sound vibrations are moving so that they halt and convert to a different energy source, such as heat.
The more barriers you have in place for the sound waves to encounter along the path, the lower the vibrations will be when they finally reach you, that is, if they reach you at all. This means that with enough soundproofing measures in place, you can live your life in complete silence until you have to leave your silent sanctuary, of course.
Soundproofing a Room From Beginning to End
Alright, how do you soundproof a room from the beginning to the end? Well, I’m here to tell you. We’ll run through a quick step-by-step guide on how you can soundproof any room and feel confident doing it.
Let’s get started!
1. Strip Your Space to the Bones
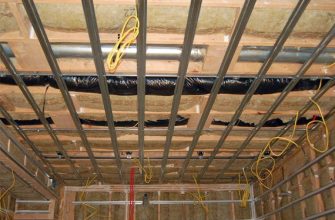
This is the beginning. Whether you are starting from a room that is already built or building from scratch, the room needs to have all the foundations exposed for soundproofing to be at maximum effectiveness.
This is because you’ll be adding your insulation, foam, and so on to the walls.
This process will be extremely messy if you start from an existing built-up room. You are remodeling your room, after all. Try not to be disheartened; you’ll soon have a soundproof room!
2. Seal in All the Cracks
This step is time-consuming, but it’s essential to the process if you want a fully soundproof room.
Because sound is nothing but vibrations, it can enter everywhere. If there’s even a single crack or crevice, it will allow sound through, so it’s imperative that you try to seal in every gap. You will typically do this with green glue.
Place the green glue in every crack and crevice that you can find. You can expect there to be quite a few throughout the space. Most of the gaping occurs where two parts of a room meet. This would include where the ceiling and floor meet the walls and where windows are placed.
3. Begin the Insulation Process
Here’s where the process becomes more fun – insulating. When you think of insulating, you may only think of temperature control, but insulation does much more.
You can insulate with traditional insulating materials, and you will want to, but you can also place additional soundproofing materials in the walls during this time.
You can use acoustic panels for this, mass-loaded vinyl, soundproofing blankets, and whatever else comes to your mind to include. Even regular insulating materials such as fiberglass work as sound reducers. The more insulation materials that you can include during this time, the less sound will come through.
It doesn’t really matter how it looks as long as it’s functional. No one is going to see it once you add the drywall.
4. It’s Time for Drywall
The drywall is what eventually becomes the wall that you see. This gets added on top of the insulation and foundation of the room. Here, you would begin to combine soundproofing compounds with soundproofing materials.
Typically, drywall will come in large rectangular sheets, and you’ll hang an entire sheet at once. You should be aware that drywall can be fragile, so you’ll want to be gentle with it when hanging, especially once you start adding screws. If you need more information on how to hang drywall, check out this article.
You can hang as many drywall sheets as you’d like, but most people don’t hang more than three layers. Be sure to screw in each sheet of drywall well so that everything is secure. If you’re using green glue during this process, ensure that each sheet is coated fully before hanging and give the green glue adequate time to dry afterward. I recommend about twenty-four hours.
5. The Final Step – Decorating With Extra Soundproofing Panels
If you’ve already placed some soundproofing materials inside the walls, then this is just an extra step to ensure that no sound is getting in or out of your room.
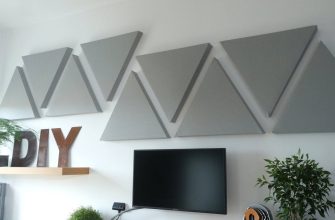
You’ll want to add acoustic panels as the final step once the room has been put back together, apart from moving in furniture. You can hang them on any wall, and they’re best grouped together over the wall’s surface.
The good news is that this will likely be the easiest and most fun part of the soundproofing process. Acoustic panels come in so many different kinds of designs that there’s no reason you can’t fully decorate your space with them.
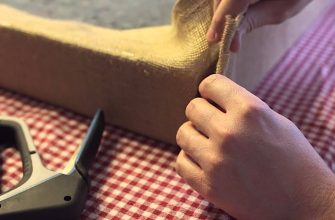
To apply the panels, simply peel plastic on the back and stick them wherever is convenient for you.
You can even make your own acoustic panels if this is something you’re interested in. Here’s a helpful article on how to make your own and ways that you can hang them for maximum effectiveness.
Final Thoughts
Sound is produced by vibrations moving through the air or through other materials. There are two types of sound – airborne and impact, and each reaches your eardrums differently.
When soundproofing a space, whether for filming videos or recording music, your best option is to start from scratch and work your way up, but there are different ways to go about it. If you don’t want to start over, you can simply put sound panels on the walls to dampen the noise.
References
- https://www.thisoldhouse.com/walls/21016619/how-to-hang-drywall
- https://weekendbuilds.com/diy-acoustic-panels/