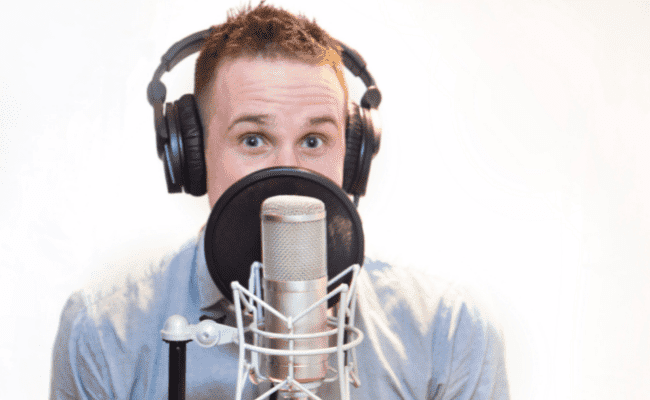
Having a home recording studio allows you to create professional voice-overs. It gives you the prospect of starting a successful voice-over business from home.
Here’s how you can build your own home recording studio for voice-overs:
- Find the perfect space for your home recording studio.
- Soundproof your home recording studio.
- Invest in good quality voice-over equipment.
- Find the best voice-over recording software for you.
After reading this article, you should have a good idea of how you can identify the perfect space for your studio and the best ways to soundproof it. You’ll also have a good understanding of how to choose the best voice-over recording equipment and software for your needs.

Find the Perfect Space for Your Home Recording Studio
It doesn’t matter how large or small your home is because chances are, you should be able to find a great place to dedicate to your home recording studio.
Many voice-over artists have custom-built studio booths, but this is very costly as they need to be constructed from scratch.
A walk-in closet, space underneath a staircase, or a small room in your home can function very well as a home recording studio.
The space should be comfortable and have enough room to stand and walk around a little. Ideally, it should be as quiet as possible to avoid unnecessary noises on your voice-over recordings. Therefore, the fewer windows and doors the potential studio has, the better.
Consider the following when choosing a space for your home recording studio:
- What’s the space’s shape? Square spaces aren’t ideal for recording purposes. The sound waves
bounce off each other and take on greater amplitudes
to produce echoes. A triangular-shaped voice recording space is perfect as this decreases echoing and booming.
- Are there enough power points in your space? You’ll need at least one plug point in the area to power up your computer and recording equipment. Using extension leads may be inconvenient if the space doesn’t have plug points.
- Is the space close to any noise-producing areas or equipment in your home? Bathrooms and kitchens can be notoriously noisy places and can interfere with your recordings. Consider the proximity to household appliances, HVAC systems, and plumbing. Remember that the louder the area around your home studio, the more work you’ll need to soundproof the space.
- How insulated is the room to the outside? If the space has large windows that aren’t well insulated, outside sounds (such as traffic, weather, people, etc.) could affect your home recordings. For instance, you might want to consider a room facing your backyard instead of a front-facing one as it’s likely to be quieter.
- Is there sufficient ventilation? If you plan on spending a lot of time in your home recording studio, good ventilation is vital.
Check out my best products for home recording studios
Soundproof Your Home Recording Studio
Soundproofing your home recording studio is the most critical step. It prevents unwanted noises from entering the space and ensures no sound escape from the studio.
In addition, soundproofing helps absorb sound waves instead of reflecting them, preventing echoing and your voice from sounding flat.
Soundproofing may sound like a costly exercise, but this is only true if you hire professionals to do the job. Fortunately, it’s possible to soundproof your home recording studio yourself, very often with materials you already have at home.
Below are ways you can soundproof your home voice-over recording studio:
Use a Heavy Door
The entrance to your home studio is a weak spot as it can easily allow unwanted sounds inside.
This is why it’s an excellent idea to use a good quality, heavy door. If you can’t afford an insulating, heavy door, buy the heaviest and best quality door you can afford and then soundproof it with fabric or carpeting.
Even when the door is closed, unwanted sounds can still enter through uninsulated cracks around the door. To prevent this, you can buy door insulating tape from your local DIY store and easily attach it to the edges of your door.
This Keliiyo Indoor Weather Stripping Seal (available on Amazon.com) is a multi-function self-adhesive foam strip that isn’t only highly rated for its insulating capabilities but it’s also a good option for soundproofing your door.
- 【Multi-function】This indoor weather stripping with strong resilience after extrusion, good for...
- 【Package content】2 rolls D type window seal strip, bottom size approx. 0.354 x 0.295 Inch (9 x...
- 【High quality】This window door seal strip equably foamed by EPDM, same smooth interior and...
Last update on 2025-07-03 / Affiliate links / Images from Amazon Product Advertising API
Insulate the Walls, Windows, and Doors
Insulating your walls, windows, and doors can be done in several ways using many different materials.
Below are the most popular ways in which to soundproof your walls, windows, and doors:
- An extra layer of drywall
. Adding another layer of drywall can make a massive difference to the sound quality in your home studio. You can purchase drywall from a DIY store and, as long as you follow the instructions on the package, you can install it yourself.
- Carpeting. Thick carpeting makes an excellent sound absorber and works well as an insulator when installed on the walls, ceiling, or floor.
- Fabric paneling. Using heavy linens, quilts, drapes, padded mattress covers
, or blankets on the walls, you can soundproof your home studio inexpensively.
- Cork. Cork is an excellent sound absorber and helps prevent external sounds from entering a home studio. It’s cost-effective and can be bought from most craft or DIY stores.
- Consider installing PVC piping
along the edges of your studio to absorb sound. PVC piping is inexpensive and straightforward to install.
- Foam. Widely available at most DIY and big box stores, you can buy foam sheets to help soundproof your studio.
- Upholstered furniture. If you’re on a strict budget and can’t afford extra materials, you may want to consider placing large pieces of upholstered furniture (such as couches) along the edges of your home studio. Mattresses pushed up against studio walls also work well for sound absorption.
Once you’ve soundproofed your home studio, an excellent way to check its effectiveness is to perform the clap test. You likely need more soundproofing if you hear any echoing or booming sounds when clapping your hands.
Install Thick Carpeting on the Floor
Just as it’s vital for your home studio’s walls and ceiling to absorb sound waves, the same is true about the floor.
The softer and thicker the flooring, the better it will help you achieve good sound quality in your voice-over recordings.
Thick, plush carpeting is best, but this can be expensive. If you’re on a tight budget, you may want to consider using free carpet offcuts from your local carpet store. It won’t help with the attractiveness of your home studio, but it’ll function well as a sound absorber.
Hardwood or tile flooring should be avoided, but consider buying a thick area rug if you can’t afford to carpet your studio.
Invest in Good Quality Voice-Over Equipment
An essential piece of voice-over equipment you’ll need is a good computer or laptop, as this is where you’ll store your recordings.
Remember that the older your computer is, the more likely it’ll produce sounds that can interfere with your recordings.
Your computer should have enough storage space to accommodate recordings. Alternatively, you can use an external hard drive, USB flash drive or store them remotely in the cloud.
In addition, the computer should have a fast processor and vast RAM memory. Most voice-over software programs require computers to have at least 2 gigabytes of RAM. The more RAM your computer has, the faster and more efficiently it’ll use the software.
Other essential equipment you’ll need is as follows:
Microphone
Your voice-over microphone can be either an analog or digital USB
kind.
If you’re concerned about sound quality, analog would be your best bet. However, you’d need to buy a sound card or audio interface as well.
Most large recording studios use studio condenser microphones that have an XLR connection. Condenser microphones are very sensitive and can effectively capture the nuances in your voice.
Digital USB microphones aren’t as costly and are simple to use. They don’t require extra accessories, and you can plug them directly into your computer.

Audio Interface
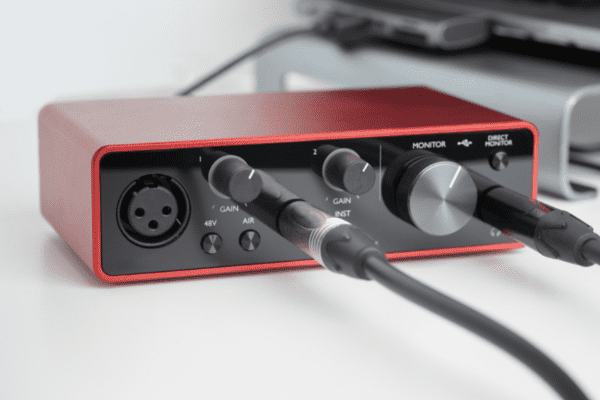
Another vital piece of equipment is a good audio interface. This transmits signals from the microphone to your computer and helps to improve the sound quality.
When choosing an audio interface, look for a powerful built-in microphone preamplifier system. This gives the sound an added boost and improves your microphone’s signal strength.
Headphones
Most voice-over professionals don’t recommend noise-canceling headphones as it’s important to hear any movement, background noises, or frequency changes while recording voice-over content.
When selecting headphones for your home studio, remember that you’ll likely wear them for long periods, and comfort should be an essential consideration.
Pop Filter
Microphones tend to pick up too many sibilant and plosive
sounds when recording voice-over material.
Sibilant sounds create a hissing noise when you pronounce an “s,” while plosive sounds cause the “p” sounds to make a popping sound.
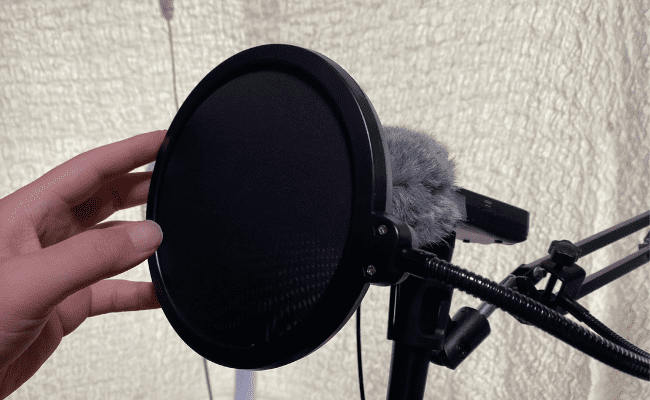
A pop filter functions as a screen that filters sibilant and plosive sounds. This helps them to sound softer and more balanced.

For more information, check out selection of the best microphone isolation shields.
Find the Best Voice-Over Recording Software for You
Software for voice-over recordings (also known as a DAW or a Digital Audio Workstation) helps voice-over artists record content, edit work, and fine-tune recordings.
The right voice-over software can help you create an impressive portfolio and produce high-quality work.
There’s a wide range of voice-over recording software from which to choose. Some software is free of charge and fulfills basic voice-over recording requirements, while others have additional features and are more costly.
Below are the most popular software options for voice over work from home:
GarageBand
Mac computers are equipped with GarageBand and in-built audio cards, making this a convenient and free option if you own an Apple computer.
Although GarageBand was designed to produce music, it can still be used for voice-over production, is easy to use, and has many attractive features.
You can effortlessly record customized voice-overs and choose from thousands of templates, allowing you to get creative with your work.
GarageBand may not be the best option for complex work as it doesn’t offer high-level mixing features.
Audacity
Audacity is incredibly popular as it’s free to use and works on both iOS and Windows software. It’s also straightforward to use and has plenty of helpful voice-over features.
Many beginners enjoy using Audacity as its interface allows you to edit your work easily before exporting it. You can also analyze the sound frequency and import video clip sounds.
This software is suitable for those who create recordings for voice-overs, vlogs, and podcasts as it doesn’t work well with creating multi-track beats.
Adobe Audition
Adobe Audition has been around for many years but is still considered one of the best software solutions for voice recordings.
It offers a wide range of professional features including, sound design, waveform editing, spectral, and frequency editing. Since it has in-built AI automation and integrates voice-over content seamlessly, it eliminates the need for costly plug-ins.
Adobe Audition is ideal for those who want to produce professional-quality voice-over work and are willing to spend a little money each month for Adobe Audition’s subscription cost.
Pro Tools
The Pro Tools platform is complex and well-suited to those who enjoy learning new software programs. It takes a while to get used to the technical layout, but you can create studio-quality voice-overs once familiar with the software.
Professional recording studios widely use this software as it can fulfill any voice-over recording need.
Pro Tools users can choose from a range of packages, and they offer an excellent entry-level subscription at no cost. This is an excellent option if you’re just starting out as a voice-over artist, as you can easily upgrade your package when needed.
For more information, check out which is better: Pro Tools vs Adobe Audition
Final Thoughts
Creating a home recording studio for voice-overs is a multi-step process, and fortunately, it doesn’t have to cost a fortune.
Once you’ve identified the ideal space for your studio, you’ll need to soundproof it with the suitable materials.
Next, you should kit your studio out with the best recording equipment you can afford and consider the most suitable voice-over recording software for your needs.
Sources
- Voices: How to Build a Home Recording Studio
- Whisper Room: Recording Booths
- NASA: Sound Waves and Units of Measurement
- Wikipedia: Drywall
- Computer Hope: Sound Card
- Britannica: Amplitude
- Argos: What is a Mattress Topper?
- Voices: What is the Best Voice Recording Software?
- DIY: Door Insulation and Seals
- College of Contemporary Music: What Does an Audio Interface Do?
.
- Sound Guys: What is a sound card?
- College of Contemporary Music: What is An Audio Interface and Do You Need It?
- Wikipedia: Cork
- Neumann: What is a Condenser Microphone?
- Wikipedia: XLR Connector
- Crucial: What is Computer Memory (RAM)?
- Shure: Analog vs Wireless Microphones
- Britannica: Sibilant
- Wikipedia: Plosive
- Voices: What is a Pop Filter?
- Wikipedia: Central Processing Unit
- Practical Music Production: When to Use a USB Microphone
- Jabra GN: Noise Cancelation Headsets: What Exactly Is It?
- Lesso: Everything You Need to Know About PVC Pipes
- Wikipedia: Digital Audio Workstation
Recent Posts
QuickTime is a vital app for many Mac users, and if you’ve recently bought a new microphone, you might wonder how to use it optimally. QuickTime cannot record audio content if it doesn’t have...
Every microphone leaves a unique signature on the quality of its output. If you’re a podcaster trying to melt your way into your audience’s hearts, a muddy, distorted recording won’t cut it....

