When you’re recording your voice for any reason, you want it to sound professional! It’s aggravating to re-record an entire interview, podcast, or another recording because of background noise or insufficient volume. How do you make your voice sound better post-recording instead of having to re-do the whole thing?
To make your voice sound better in Audacity, you can use the noise reduction, compression, and equalization effects in the drop-down menu. These steps and several other editing effects will increase your vocal quality and give your recording a professional feel.
In this article, we’ll explain the most beneficial effects of post-recording editing that Audacity currently offers. We’ll also talk about making your voice sound better and more professional and even how to create a command chain to make the editing steps easier for the next time you record or edit.

How To Make Your Voice Sound Better in Audacity
When you aren’t happy with your recording but don’t want to start over, the effects that Audacity offers can help to correct the minor flaws and make your voice sound better and cleaner. Of course, the best way to make your voice sound professional on a recording is to record well.
It’s easier to touch up a recording than it is to fix something poorly recorded.
To ensure that your recordings are of good sound quality, set up your microphone somewhere quiet and insulated from outside noise and ambient noise (such as fans or air conditioners). Keep your mouth about a hand width away from the mic, and speak clearly. If you can’t avoid background noise, you can invest in a dynamic microphone, which will pick up your voice and drown out the ambiance.
Even with all of these steps, Audacity can improve the sound quality of your recordings. Whether you’re putting together a podcast, an audiobook, or recording music, you can use some (or all) of the effects in Audacity to make it sound great.
Audacity Effects to Make Your Voice Sound Better
Audacity offers a wide variety of effects. If you’re new to the software (and even if you’ve been using it a while), it can be a bit overwhelming. Each of the following effects is focused solely on the vocal track, usually the main recorded track. You can use whichever of these to improve your audio and make your voice sound the way you want it.
Background Noise
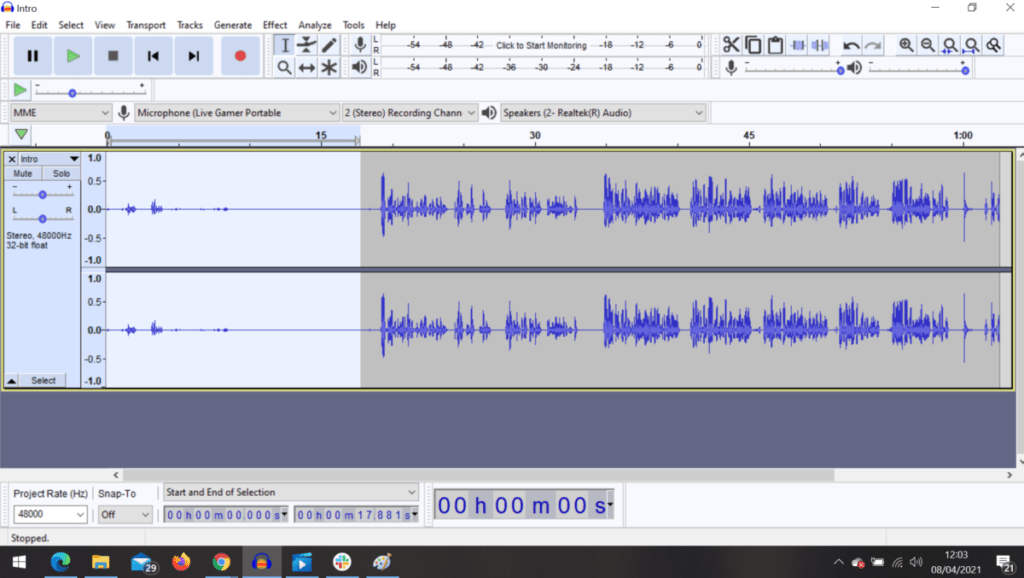
A crucial step to make your voice recording sound more professional is to get rid of background noise in the recording. You should have a few seconds of silence at the beginning of your recording to set the “room tone” for the audio. With this, you can reduce distractions from your voice and keep the background calm and quiet.
- Highlight the blank audio at the beginning of your recording.

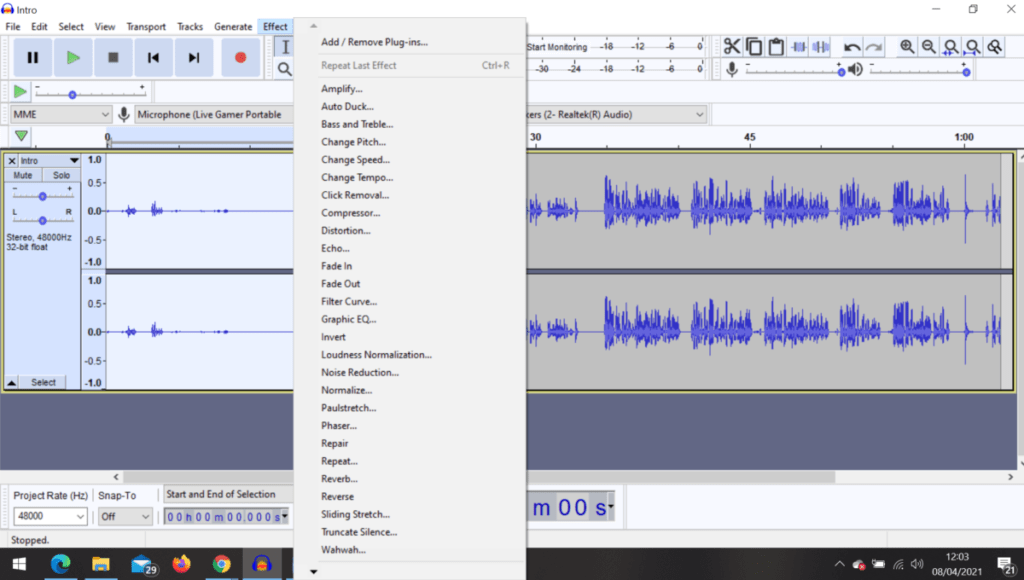
2. Press the “effect” button.

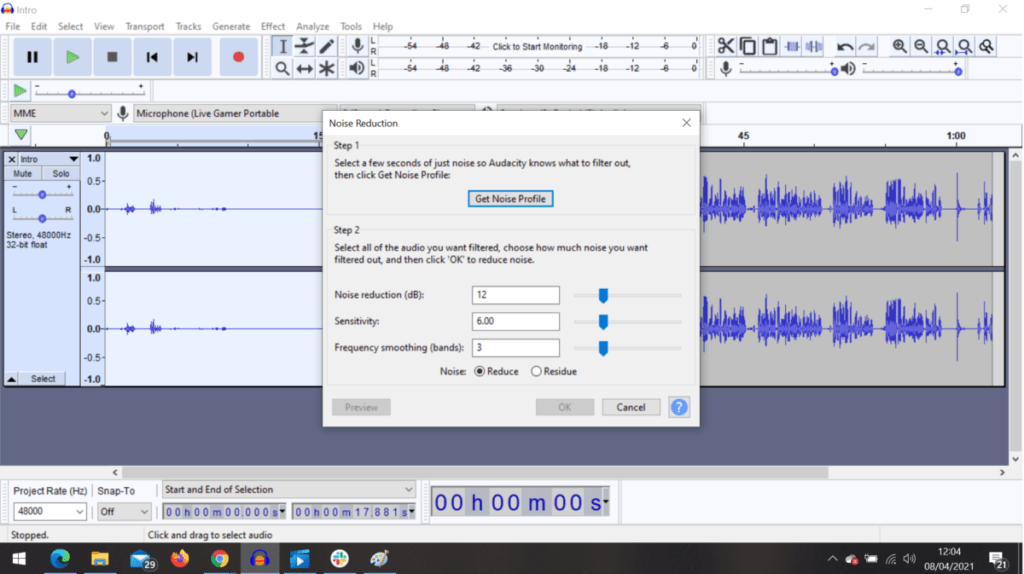
3. Click “noise reduction” on the menu.

4. Highlight your entire audio block (make sure it’s the whole track).
5. Click “noise reduction” again to match the background noise.
Compression
Compressing your audio will lower the overall dynamics in your recording. Compression is helpful when you have a variety of volumes or are using a low-quality mic. When you compress the audio, it takes out these extremes and makes it easier to normalize the audio later on. For the simplest way to compress your audio, go to your effects menu, select “compressor,” and press “okay.”
Bass and Treble Boost
Bass and treble boost are both helpful to isolate the sounds of your voice. Boosting the treble makes your voice stand out more in the recording. If you want your voice to sound lower, you can also increase the bass, but the treble is generally more helpful for audio quality issues. On the effects menu, find “equalization” and click “bass boost” or “treble boost.” Press “okay” to complete the boost.
Normalizer
The normalizer is another essential effect for balancing vocals. It’ll make quiet voices louder and reduce the volume of louder sounds. Unlike compression, normalizing doesn’t cut down the overall dynamics – it brings different sounds to the same volume level. You don’t have to do anything extra for this one – find “normalizer” on the menu and make sure it’s set to “default.”
Amplifier
If you recorded too far away from the microphone or are a soft speaker in general, the amplifier will be a helpful tool. It brings the entire recording’s volume level up (you should reduce background noise before using the amplifier because it will also get louder). Find “amplifier” in the effects menu and turn it on to use it.
Equalization
Equalization works similarly to the treble and bass boost. If you don’t want to deal with both treble and bass boost or are unsure which your vocal track needs, equalization can take care of your voice’s proper isolation. You can also play around with the sound levels to make your voice clearer or lighter.
To use the equalization effect: find it in the effects menu and look at the different sound frequency levels (Hertz or Hz). When you adjust the levels, only adjust in small amounts and test the volume as you go. Do this until you’re happy with the quality of the sound. Look out for these levels of sound to identify which levels you need to adjust:
- If the frequency is at or below 60Hz, minimize it (this further reduces background noise).
- If the frequency is around 150 Hz, adjust by increasing it slightly.
Truncate or Compress Silence
If you have several gaps of silence in your recording, you can go through manually and delete the seconds. However, you can also use the “truncate silence” effect in the menu to automatically take out quiet periods longer than a second or two. You can adjust the silence threshold and the minimum and maximum duration of silence before you allow it to change your entire recording.
Another way to get rid of extra silence is to compress the silence. This will take a silent period and cram the seconds together at whatever ratio you choose (for example, a 4:1 ratio will squeeze every four seconds of silence into one second). You can set the balance under “Compress Silence” in the effects menu.
Double Audio Track
If you want to play around with different effects and see which ones change your track too much, you can double your audio track. This is essentially a copy and paste function – you end up with two separate audio tracks of the same recording. It will double your voice, so it’s essential to delete the one you don’t want when you’re done editing.
Check out these other articles:
- Are Shotgun Microphoness Good for Voice-Overs?
- Should Vocals Be Louder Than the Beat?
- Making Your Voice Sound Better
Create an Effects Chain
If you have a similar microphone and recording setup for everything you record, you might have a few of these effects that work well together. It’s not difficult to set up an effects chain in Audacity. The chain will be added to your effects menu and will perform whichever effects you add to it, which is a great way to save time on future projects.
To set up an effects chain in Audacity, you need to go to File and click on “Edit Chains.” You can then add steps one at a time in whatever order you wish. Make sure to save your progress, and next time you edit, the chain will be ready for you to use! You can make multiple chains for different effects as well.
For more information, check out this article about the best apps for recording ASMR.
Final Thoughts
With the effects in Audacity, your audio can sound however you want it. It’s easy to normalize your volume, erase background noise, and compress the audio for a more professional sound. You can record with ease, knowing that you will be able to edit and polish the audio later and don’t have to re-record!
Check out why your mic is so quiet on PC.
Sources
- Instructables: How to Improve Vocal Quality in Audacity
- Sonix: How To Make Voices Sound Better In Your Audio For Free
- Learn Upon: Audacity Audio Quality
- Microphone Basics: How To Make Your Voice Sound Better In Audacity
- Audacity: Home Page
- Wikipedia: Hertz
Recent Posts
QuickTime is a vital app for many Mac users, and if you’ve recently bought a new microphone, you might wonder how to use it optimally. QuickTime cannot record audio content if it doesn’t have...
Every microphone leaves a unique signature on the quality of its output. If you’re a podcaster trying to melt your way into your audience’s hearts, a muddy, distorted recording won’t cut it....
