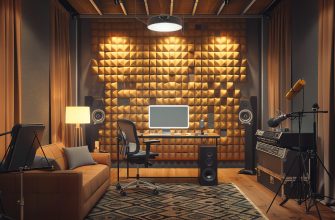
While setting up your home recording studio can be a lot of fun, it can also be an overwhelming process. We’ve compiled a list of some simple yet effective DIY ideas you can use to help make your workspace uniquely yours.
Here are 7 simple DIY home studio desk ideas to try:
- Stain or paint your desk.
- Use stacked shelving above/attached to your desk.
- Install mounted, labeled cubby holes.
- Use an Ikea desk as an affordable base.
- Use desk plans to build your own.
- Build your own equipment stands.
- Incorporate LED light strips.
Keep reading if you’re interested in building a home studio desk that’s modern, sophisticated, and will make your creative endeavors shine in your personalized space.

1. Stain or Paint Your Desk
If your studio desk happens to be made of wood, a great idea to help make it fit better with your home’s aesthetic is to stain it a certain color. A wood stain will protect the surface and make it last longer, and it’ll also give the material a sleek, modern appearance.
Plus, you can use a wide range of colors and styles to give an otherwise plain wooden desk a distinctly professional look, from black to dark browns and even shades of blue. Using wood stain is a great idea if darker, muted colors characterize your home studio, as the stained wood will help it fit in very nicely with the subdued shades.
In addition to being inexpensive, painting your home studio desk with wood stain requires little effort. It’s a one or two-day project that has lasting results, and is an excellent DIY idea for making your recording studio look that much more classy and professional.
2. Use Stacked Shelving Above/Attached to Your Desk
Nobody likes a cluttered studio, especially considering how delicate and expensive most recording equipment is. You ideally want a home studio setup that is efficient and neat and has everything you need within arm’s reach.
A great way to accomplish this is by attaching shelving above your desk for extra storage space. You can mount all kinds of equipment and accessories just above you so you won’t ever have to dig through crowded, messy drawers to find what you need.
Plus, creating your own shelving is as easy as cutting pieces of wood and mounting them on the wall–but you can also get creative and use other materials like plastic, or even glass, for a modern and exquisite look.
Your studio desk should be reserved for the equipment you’re actively using to make your creative endeavors as efficient and straightforward as possible. By adding some nice shelving to your setup, you can keep your space organized, chic, and stylish, giving this DIY idea both form and function.
The best part is, it’s simple and cheap, and it’ll save you a lot of frustration when you’re trying to work on various creative projects.
3. Install Mounted, Labeled Cubby Holes
This idea is a bit similar to the shelving option above but with a few extra steps. If you use your home studio often, there’s a good chance you own lots of different hardware, instruments, and other accessories that tend to take up a lot of space even when you’re not using them.
A great solution to clearing up some of this clutter while also making your equipment easily accessible is to mount cubby holes either on the wall near your desk or to attach them to the desk itself, depending on your setup. You can even add labels to individual cubby holes for specific hardware and accessories to make them easy to reach for in a pinch.
The best thing about this DIY idea is that you can customize your cubby holes in so many ways! You can build your own out of wood or other materials or even buy crates to mount sideways on the wall.
The possibilities for this are endless, as you can paint them, label them, and customize them in so many different ways to make your studio desk a bit more organized and put together.
Plus, they’ll help to preserve the quality of your recording equipment by keeping them out of the way when you’re not using them. If regular shelving is a little too dull for your taste, mounted cubby holes are a fun way to store your materials and proudly display them to visitors.
4. Use an Ikea Desk as an Affordable Base
Perhaps you’re searching for a new desk altogether to use in your home studio. If you want something that’s a good blend of DIY and ready-to-use, Ikea has a wonderfully diverse range of inexpensive yet sturdy desks that are great for personal recording studios of any kind.
Most of Ikea’s furniture comes packaged with everything you’ll need to put them together, making them great little one-day DIY projects for creators, producers, and musicians who want just a little bit of customization without having to necessarily build everything from scratch.
You also won’t have to worry about not finding a desk to suit your needs, as Ikea has thousands of different desks with unique shelving and storage options. We recommend a desk like the Ikea Fredde Desk (available on Amazon.com) for a nice blend of simplicity and specificity when it comes to organization and storage. It has lots of space for your recording materials and can be easily customized.
Many people like the idea of a DIY project but don’t want something that’ll take too much time or money to produce. If this sounds like you, consider buying an Ikea desk for your home studio to put together and customize to your liking.
It isn’t as elaborate as some of the other options on this list, but we wanted to focus on simpler and more accessible projects to provide a little something for everyone, even those of us who aren’t very skilled with designing or building things but still want to create something unique and personalized.
5. Use Desk Plans To Build Your Own
This idea is similar to the Ikea desks above but with more customization, effort, and payoff. While it’s generally more costly and time-consuming to build a desk from scratch, it can also be an incredibly rewarding experience. Knowing you created your desk all on your own will add an extra degree of individuality to your studio space.
There are various materials you can use, though we highly recommend using reclaimed wood for a rustic yet professional look that doesn’t create excess waste. Plus, wood is durable, long-lasting, and can be painted or stained however you’d like later.
The best part about constructing a desk at home is the abundance of desk plans available online for free! It’s easier than ever to search for a desk plan that is well-suited to your experience level, whether you’re a skilled woodworker or a complete beginner.
If you’re particularly daring, you can even make your own unique desk plan and build an entirely personal and individualized desk that is truly one-of-a-kind.
Check out whether you can produce music on a Google Chromebook.![]()
![]()
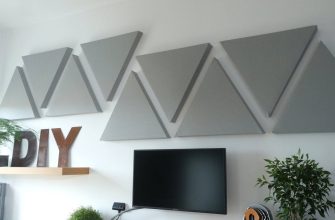
6. Build Your Own Equipment Stands
Depending on the equipment you’re using in your home studio for your creative projects, you’ve probably ended up with a lot of clutter and not many places to store or mount your items. Consider building your own stands like these for microphones, monitors, pedalboards, MIDI controllers, headphones, and any other accessories to save some space.
Plus, you’ll be able to display your recording equipment in a way that doesn’t look messy or haphazard. Again, reclaimed wood is an excellent material to use due to its durability and sturdiness, but you can get creative and try things like plastic, canvas, metal, and more.
You could even repurpose other types of storage for your studio, like shoe and clothing racks and plastic crates. Try customizing them with spray paints, labels, stickers, and art to make them stand out.
7. Incorporate LED Light Strips
Your home studio desk should be well-lit to make your recording experiences as efficient and enjoyable as possible. If the lighting in your studio isn’t quite bright enough for your liking, a perfect way to add a bit of fun, colorful lighting to your setup is to decorate your desk space with Gusodor LED Strip Lights (available on Amazon.com).
These light strips can easily be affixed to just about any surface and can be adjusted to fit anywhere on your desk. You could line the whole thing with light strips or just place short pieces in areas where you’ll be using your equipment frequently.
Plus, they come in plenty of fun colors and are relatively inexpensive, so feel free to get creative with them! They can give your studio a futuristic, unique appearance depending on how you set them up.
- Smart strip lights app controlled: The led strip lights can be controlled by smart app, 44 key…
- Led strip lights sync music: Built in sound sensor, the light strip will dance with the melody of…
- Timing led lights: Through the App, you can set a specific time to turn on or off the light strip;…
Last update on 2023-05-30 / Affiliate links / Images from Amazon Product Advertising API
Check out how to build a soundproof room inside a room.![]()
![]()
Sources
- TheHomeRoute: 19 DIY Studio Desk Plans and Ideas
- MIDI Lifestyle: 5 Awesome Recording Studio Desk Plans on a Budget
- Producer Hive: 14 Producer Setups That Make Amazing Use Of Space
- Producer Hive: 7 Ingenious DIY Recording Studio Hacks