Do you use FL Studio and are you wondering how to improve your vocals and get them in tune? You may have heard of Autotune already, but does FL Studio come with Autotune or do you have to buy a separate plugin to tune your vocals? How does one go about this?
The FL Studio Signature Bundle comes with a free autotune plugin called Newtone. If you’re like most FL Studio users, you probably own the Producer’s Bundle, which means you’ll have to either upgrade for $100 or pay $100 outright for Newtone. If you don’t want to spend money, there are several free autotune VSTs available to choose from (See FAQs). However, if you are a serious music producer or engineer looking for the best long-term value, the best overall autotune plugin on the market is Antares Autotune Pro. In this article, we’ll dissect both Newtone and Antares Autotune Pro and show you the best techniques and practices with each plugin so that you can tune your vocals like a professional.
In this article, we’ll go over a few of the best methods to autotune in FL Studio so that you can get your vocals sounding excellent!

- Which Autotune Is The Best For You?
- Option 1 – Newtone (The Cost-Effective Method)
- What is Newtone?
- Recording your vocal
- Setting up Newtone
- Basic Controls
- Editing Your Vocals
- Advanced Controls
- Best Techniques and Practice
- Option 2: Antares Autotune Pro (Best Overall Method)
- What is Antares Autotune Pro?
- Best Techniques and Practice
- Full Overview Of Autotune
- Basic Controls
- Four Main Controls
- Advanced Controls
- Tracking
- Vibrato
- Notes:
- Wrapping Up:
- Frequently Asked Questions
- How Do I Use Autotune For Free In FL Studio?
- Does FL Studio Have Autotune?
- What Is The Best Autotune For FL Studio?
- Does FL Studio Mobile Have Autotune?
- What Good Alternative Third-Party Plugins Are There?
Which Autotune Is The Best For You?
Autotune Prooffers a 14-day free trial, which is a great long-term value for music producers and mix engineers but not as much for hobbyists. Newtone is free with the FL Studio Signature Bundle or at a price on its own. Again, there are also several free autotune VSTs on the market. (see FAQs).
Overall, I think you get what you pay for with autotune plugins. Therefore, it’s best to purchase what you can afford depending on how much you want to invest in your craft.
Check out:
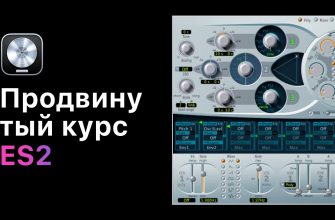
Option 1 – Newtone (The Cost-Effective Method)
What is Newtone?
Newtone is a native Image-Line plugin that excels at taking pre-recorded vocals and fine-tuning the pitch to be in key with the song. While Newtone doesn’t automatically tune your vocals for you, there are plenty of parameters that streamline the process of pitch correction and also plenty of parameters that allow you to go into the details of each note.
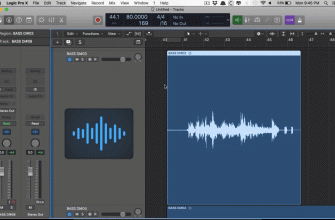
Recording your vocal
Unlike Pitcher or Antares Autotune Pro, you can’t autotune your vocals in real-time with Newtone. But, the good news is that most people don’t prefer or need to use real-time pitch correction.
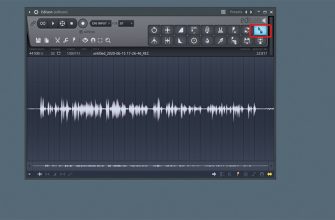
Setting up Newtone
You can load Newtone on any insert plugin. Another quick way to open the plugin is to double left- click on your file, right-click in the waveform window, and then click “edit in pitch corrector.”

Once in Newtone, it is highly recommended to click the scissors icon at the top of the plugin and select the scale that your song is in. This will help you avoid any key mistakes that can ruin a performance. It’s also recommended to change the snap to grid feature to 1/8 bars. (see later)

Basic Controls
There are three global controls at the top: Center, Variation, and Transition. Center will center the notes onto the nearest notes in key. Variation will either increase or decrease the natural vibrato in the vocal performance(it’s important not to adjust this to any extreme length unless you are seeking an unnatural performance). Transition time will change the time between the notes. Turning both the transition and the variation all the way down will sound like a perfect autotune robot stripped of any humanity.
Editing Your Vocals
The main way to use Newtone is to simply drag a note from the middle onto any note you like. This can be used to adjust notes that are slightly off, or even change the melody completely. But beware, the more you use Newtone to manipulate vocals, the less human the vocal will sound.
Advanced Controls
While these three parameters in the top right corner will quickly autotune your vocals and change the settings, you’ll get better overall results if you use the advanced features that allow you to edit the pitch and performance in detail with individual notes.
First of all, double-clicking on a note will open up a green and red graphical display called the “advanced edit” mode, which is very helpful to work with.

In each note, if you left-click and drag at the top where it says volume, you can change the volume of the note.
Over on the left and right-hand sides, you can change the fade-in and fade-out volume of each note by dragging the top of the green arrow up and down.
At the bottom of each note, you can drag right underneath the red triangle where it says “variation” which will do the same thing as the “Center” control does in the top right. It will increase or decrease the natural vibrato, but for each individual note.

Dragging the green and red sections out from the side of each note and clicking down on the bottom of the red arrows on the side will allow you to change the transition pitch of each note.
If you end up changing a note by a few semitones, you can adjust the formant to change the tone hopefully for the better by dragging between the red and green arrows on each side. Be careful adjusting the formant too much as it makes your vocal sound artificial.

Finally, you can drag the whole note if you drag the corner left and right. It is scaled to the grid, but if you hold alt while you click it will move smoothly without a scale.
Best Techniques and Practice
When it comes to using Newtone, most professionals are in agreement with a technique that works 99.9% of the time. What you first do is click the scissors icon on the top right corner, select “snap to grid,” and then 1/8 beat (as recommended before). You can then press C on your keyboard or select the “cut” tool on the top right. What you do is you slice each individual note as finely as possible with the cut tool, then deselect the cut tool and right-click each sliced note, which will snap each note in key. Do this to your entire vocal and you will have pitch-corrected it in a very quality manner. However, you must listen the whole way through as you make these changes because there is no “formula” to pitch correction. Errors will likely rise up along the way. It’s also important to listen to the vocal within the context of the song rather than listening to it solo for better results.
Check out:
Option 2: Antares Autotune Pro (Best Overall Method)
What is Antares Autotune Pro?
Antares Autotune Pro has been the industry standard in pitch correction since its inception in 1997. You’ve heard it blatantly introduced by T-Pain and Kanye West alike, but more recently with the new generation of hip-hop artists. You’ve also heard it subtly in Justin Bieber and other mainstream pop artists. Autotune quite literally automatically tunes your vocals for you without having to go in and manually change each note. While it gives you less overall control of the details, it saves you a lot of time in the mixing process and does a great job at keeping your pitch in key. You can also manually pitch-correct in fine detail if you’d like using the graph mode.
Best Techniques and Practice
The best Autotune practice is to first select your input type and key and then find the right retune speed depending on the type of vibe you’re looking for (human or heavily-effected). Dial in the main controls: retune speed, humanize, vibrato and flex-tune to get everything sounding right. After this, if you’d like to go into more advanced features, see the advanced controls subheading below. Be cautious of automating parameters in Autotune, as it can usually be better to go in and use the graph mode to change specific parts of the algorithm instead.

Example of Natural/Human-sounding settings
Full Overview Of Autotune
Basic Controls
The first thing to do with Antares Autotune Pro is to open it up as an insert effect and select the input type on the top left-hand corner. Bass is for low male range, Tenor is for high male range, Alto is for low female range, and Soprano is for high female range. Selecting this accurately will help inform Autotune how to do its job more effectively. Once you’ve done this, the next step is to select your key. 99.9% of the time it will be a major or minor key.
Four Main Controls

Autotune’s four main controls are: retune speed, humanize, flex-tune, and natural vibrato. Retune speed is by far the most important. It sets how quick autotune will pitch-correct. A retune speed of 0 will get you your “T-Pain” autotune effect, while a higher number will be more subtle and natural-sounding. Set the humanize higher if you are working with a vocal that has a lot of long sustained notes, as it will enhance the way that autotune works on sustained notes. Flex-tune is best used in moderate amounts as it effects (slows down) the transition between autotune changing the pitch. Natural vibrato will effect how much vibrato is in the vocal, but is best tweaked using the advanced controls as well as the main control.
Advanced Controls
Tracking
The tracking knob in the top right corner in most cases should be left at its default value of 50; however, a noisier signal or a vocal performance that is very breathy may require a higher tracking value, and a vocal with lots artefacts such as clicks or pops will likely sound better with a lower tracking value.
Vibrato
Changing the vibrato in the advanced settings (create vibrato) usually makes for better performance. Sine wave usually works best in most cases, but square and sawtooth work, too. Any more than +- 3 in this department will start to sound unnatural. The rate is in Hz and typically works best between .5 and 2. “Onset delay” is the time in milliseconds it takes for your autotune to start. “Onset rate” is the time it takes for your vibrato to max out. “Pitch” changes the fine pitch between 0-100 cents of the vibrato, “variation” controls the randomization of vibrato; the “amplitude” and “formant” control the subtle volume and timbre changes of the signal.
Notes:
Bypassing or removing some notes from Autotune can sometimes make for better performance. Sometimes, a vocal note within a key simply doesn’t sound good in the context of a song. For example, if you remove or bypass C# in the note section, autotune will skip or not tune the nearest note to C#. If you want to go even further in-depth, you can go into graph mode and change individual notes.
Wrapping Up:
In this article, we’ve gone over the best autotune plugins on the market for FL Studio, both native and 3rd party. The bad news is that almost every autotune plugin takes time to understand and get used to, but the good news is that they all have basic controls that are easy to learn as well as more advanced controls if you want to control the fine details of a vocal performance. Regardless, of choice, you’ll be able to tune your vocals professionally with either one of these plugins, but choosing Autotune Pro is a recommended long-term investment for serious producers and engineers alike. If you are interested in finding the best free autotune plugins, see the frequently asked questions below.
For more on problems with FL Studio, check out:
Frequently Asked Questions
How Do I Use Autotune For Free In FL Studio?
Graillon 2 (free edition), MAutoPitch, GSnap, KeoVee, and Voloco are all free autotune plugins that you can download for FL Studio. Alternatively, you can download the free trial of Antares Autotune Pro for 14 days or purchase/upgrade to the Signature bundle of FL Studio which gives users both Newtone and Pitcher.
Does FL Studio Have Autotune?
FL Studio does not have Autotune, however, Pitcher and Newtone, which are Image-Line’s native autotune plugins, are both included in the Signature Bundle for $299.
What Is The Best Autotune For FL Studio?
The best autotune for FL Studio is Antares Autotune Pro, however, it is fairly expensive at $400. Image-Line has two native autotune plugins for FL Studio, however, called Pitcher and Newtone, that are less in quality and less in price as well, at $50 and $100 respectively.
Does FL Studio Mobile Have Autotune?
Yes, FL Studio Mobile has Auto-Pitch, which gives users real-time pitch correction and the ability to create special autotune effects as well.
What Good Alternative Third-Party Plugins Are There?
Antares Autotune Pro and Melodyne, while quite expensive, are the most popular third-party Autotune plugins on the market. You can also get MAutoPitch, GSnap, KeoVee, and Voloco if you’re looking for a free third-party autotune plugin.