
There are many ways to record a song with background music or instrumentals. Recording songs has never been easier since we have easy access to various apps and software options. Some methods may require a bit of an investment, while other methods may be free. If you want a high-quality result, then for sure, it will cost you some bucks.
So how do you record yourself singing with background music? To record songs with background music, first, download a karaoke app like SingPlay. Then find your chosen track to download to the app. Finally, open your track through the app and then press record to sing over the track whilst it plays.
I will be including alternative professional methods at the end, too (P.S. – this will cost some bucks, but the end product will be better)
Here are 3 ways you could record a song with background music:
- Using only a smartphone.
- Using only a laptop or PC.
- Using dedicated equipment.
How to Record Songs with a Background Music App?
You can record a song with background music with apps. We recommend using SingPlay. This is the best Karaoke app to record songs with background music.
You can easily do this with apps that would act as a voice recorder with background music for your Android Smartphones or iPhones.
There are plenty of apps that you can sing a song with the music you want as background music.
You will not need anything more than your smartphone to do this. You could potentially use an external microphone so that your vocals sound better.
Record your Song with Background Music on an App
Step 1 – Download App
First of all, you have to download an app to record singing with music – such as “SingPlay” (free) from the Playstore for Android or Appstore
for IOS, which you will use to record the song into the background music.
There are other similar apps out there, and you can use any other app if you find something else that you prefer.
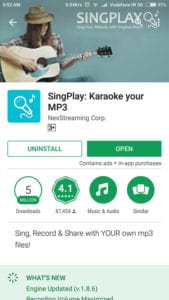
Step 2 – Choose Music Track
Now, open the app, and you will see all the music you have on your device. You will see that you can choose any music you like by using different options.
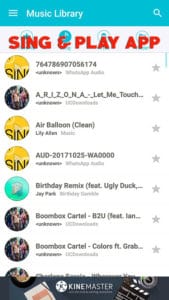
Note: you cannot directly use this music to record as they are not music tracks, and they are the song itself with the vocals and all. What you need is only the instrumental music track or the karaoke music.
Step 3 – Download Music Track
You have to download the music track for the song you like to sing. You can easily find the music tracks online by searching on Google like “karaoke music for ….”, “Music track for ….” or “Instrumental for…”.
Step 4 – Open Music Track
After you have downloaded the track, Open the app and search for the music on the folder you have downloaded it
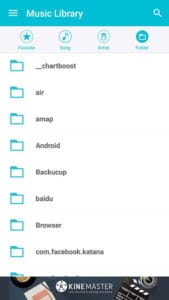
Click on the Music, and the recording dashboard with the music you have selected will show up.
Step 5 – Record Your Track
Hit the record button, and you can do your thing. You should wear headphones so that you can record better.
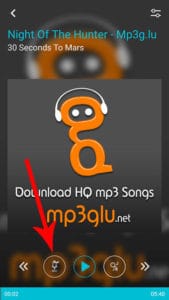
And make sure you are recording in a good environment where noise is minimal, or it will ruin your recording very easily.
If you want to do more with your record, like editing and adding effects, then you can download apps like EZ voice, Voice FX, etc., which can alter or add effects to your original recording. These are third party audio editing tools.
Recording with “Smule”
You might have heard about it. It’s a top-rated singing app that is available for both Android and IOS. You can sing solos, duets, even groups if you like.
You can send invites personally or keep them public. There is a free version and a paid VIP version. In the free version, you have limited access to songs.
If you want to sing a song on the VIP list for free, you have to watch some ads, and you will get access to it.
The VIP access price goes like this – $2.99/week, $7.99/month, $39.99/year. With this, you will get unlimited access to the songbook without any interruption from ads.
You can add audio and video effects to your original recordings too. It’s pretty much an all in one app for singers.
How to record a song with background music using a Laptop or PC?
All you need is a laptop or PC that you are going to use to record. And you don’t need a high spec one too, your personal computer that you have will do the job very well.
The next thing you will need is software for your pc where you can record the song into the background music you like. There are different free and paid software out there that can do this.
But for this, I think you can manage with a free one. You can use Audacity, a free music recording software, which can pretty much do everything that we are talking about and more.
This is how the dashboard looks like –
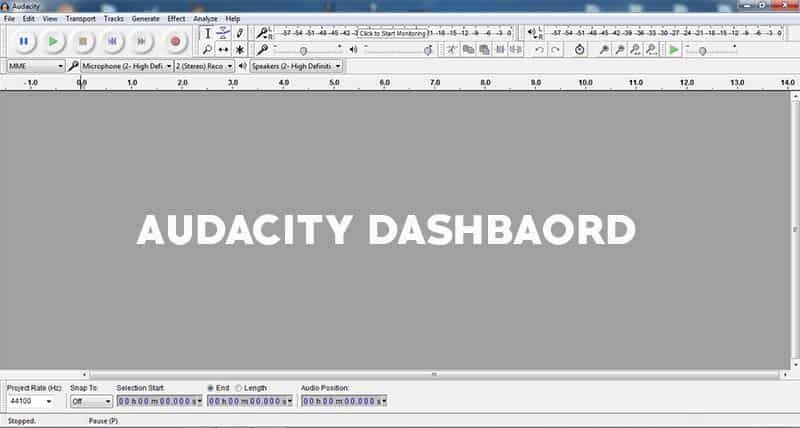
You can remove the noise, edit, cut, change the amplitude, add multiple tracks together, whether they are original recordings, multiple songs, vocal cords, etc. You will be able to manage audio clips, making the editing process a lot easier.
Of course, it is free too. Just visit their website, and you can download the software for free.
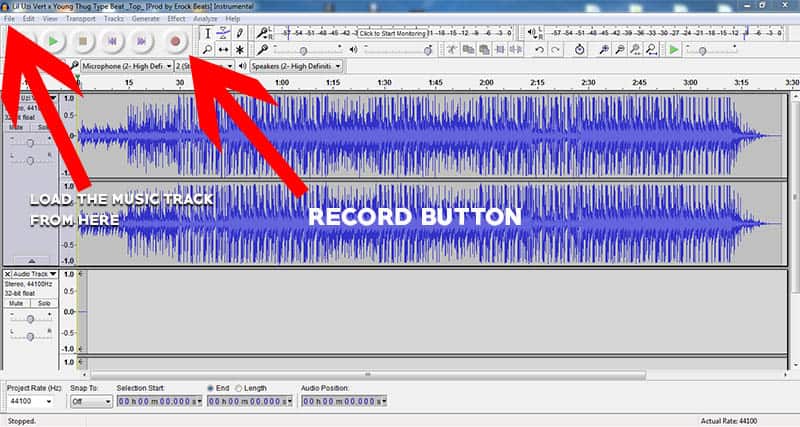
After you have downloaded and installed Audacity, open it, and you can load the music track or the background music you want from the Audacity dashboard.
Then you can press the record button to record the song into the background music track. I suggest using a proper microphone like this USB Microphone if you are going with this method.
- Plug and Play: With a USB 2.0 data port, no additional driver is required. TC30 is compatible with...
- Cardioid Pickup Pattern: The mic has a cardioid pickup pattern and an excellent off-axis suppression...
- Easy to Install: Without any assembly, only need to attach the pop filter to the mic tripod, then it...
Last update on 2025-05-30 / Affiliate links / Images from Amazon Product Advertising API
It’s because the built-in mics won’t be that good, and even if you use the mics present at your headphones, the quality won’t be that good.
Besides, USB mics are generally not expensive, and you can always add something that will give your recordings a boost.
Warning: Do not forget to hear the background music using headphones while you are recording your vocals. If you don’t use headphones, then all the music will get picked up by your mic.
This could ruin your recording, so take care of this too.
By the way, you can record all the instruments using only the mic, audacity, and your pc. The quality won’t be at the top, but still, you can see how easy it is to record a song nowadays.
If you don’t know where to get the music tracks, check the article on karaoke music websites where you will find some of the best sites – you can even sing online on some of them.
Find out more about recording music on a laptop with a microphone here.
Check out:
How to do it using dedicated equipment?
To end up with a quality outcome, you will definitely need to invest in professional equipment. Find out our 15 best products I believe you should invest in for your home recording.
Find out more about making your home studio look professional and whether you need professional equipment to start recording.
To professional record a song with background music, we will need the following dedicated equipment:
- Digital Audio Workstation (DAW)
- XLR Microphone
- Audio Interface
The first piece of equipment needed is a Digital Audio Workstation (DAW) – like audacity but with more functions and complex in nature. It is used for recording, editing, and producing audio files.
The next piece of equipment you need is an Audio Interface where the analog signals are converted to digital ones. Audio interfaces allow you to record your vocals and background music into your PC or laptop by providing all the required connections for microphones, instruments, and synths.
After the conversion, the signals will go into the Digital Audio Workstation, and you can do any editing to make it better.
You are going to need an XLR microphone too. This type of microphone will be much better than the USB mics. They are used for professional settings. XLR microphones offer a lot more adaptability and customization from being linked through an audio interface.
An extremely highly rated XLR microphone I recommend is the Blucoil MXL770. It is under $100, and the sound quality is phenomenal for the price you pay. If you do not believe me – check out the reviews here.
- PROVIDES WIDE DYNAMIC RANGE AND LOW NOISE - The MXL 770 Microphone employs premium FET pre-amp and...
- REDUCES UNWANTED RUMBLES - The low-frequency roll-off minimizes the undesirable ambient room noise...
- PROVIDES SUFFICIENT NOISE ISOLATION - The cardioid polar pattern of MXL 70 picks up sounds in front...
Last update on 2025-05-30 / Affiliate links / Images from Amazon Product Advertising API
The mics that you see inside a recording studio are XLR ones. All you have to do is plug the mic into the Audio Interface and start recording using the Digital Audio Workstation.
Find out more about our recommended Audio Interfaces here.
Now all you have to do is load the background music at the Digital Audio Workstation and add a new track where you will be singing. Don’t forget to use a pair of headphones to hear the music track.
You can also record a whole band using this setup and create a whole song with the gears. I know this is a bit overwhelming and kind of sounds difficult.
You will need to learn the basics of using the gear and software to record like this.
However, you can go with the first two ways if you want the easy way.
If you want to find out how to make music sound old, read this article here!
For more information, check out this article on whether you can record vocals with a iPhone.
Recent Posts
QuickTime is a vital app for many Mac users, and if you’ve recently bought a new microphone, you might wonder how to use it optimally. QuickTime cannot record audio content if it doesn’t have...
Every microphone leaves a unique signature on the quality of its output. If you’re a podcaster trying to melt your way into your audience’s hearts, a muddy, distorted recording won’t cut it....


