The built-in mic of your iPhone is good enough for personal videos and non-professional recording purposes. But if you’re considering vlogging or podcasting using your iPhone or taking on similar endeavors, your phone’s integrated mic will most likely not be up to the task. In such situations, connecting an external mic to your iPhone will be the only way out.
To connect an iPhone with an external microphone, grab a mic with a Lightning or TRRS connector. You may need a few adapters, such as the 3.5mm TRS-TRRS adapter and/or a 3.5mm jack to Apple Lightning adapter. By daisy-chaining multiple adapters, you could even connect an XLR mic to your iPhone.
Connecting an external microphone to an iPhone is more than just plugging in a mic into the 3.5mm or Lightning port of the phone. There are more pieces to the puzzle than you might have thought initially. Keep reading to learn everything you should know about the topic.
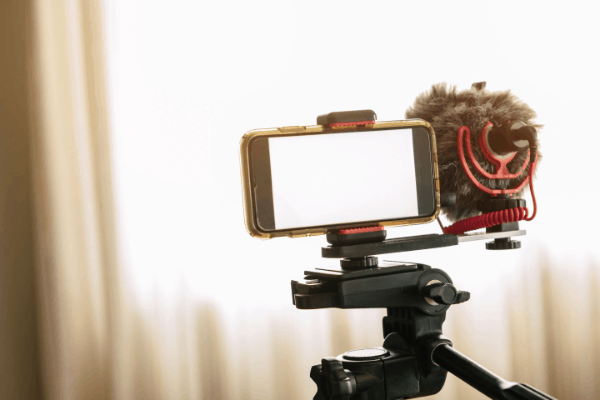
The iPhone’s Built-In Microphone
The microphone built into an iPhone is not shabby by any stretch of the imagination. If your audio recording requirements are modest, you should be more than happy with an iPhone’s integrated microphone’s performance.
An iPhone’s built-in mic is omnidirectional, which means it is designed to pick up pretty much all surrounding or background noises
. Most newsroom microphones are omnidirectional as they need to pick up voices from all directions. If you have multiple people talking and just one microphone, an omnidirectional mic works the best.
However, the drawback is the mic will pick up a significant amount of room noise, as mentioned above. That would make capturing audio with an iPhone not very ideal, both outdoors and in noisy indoors. And if the subject or the primary audio source is a few feet away from the phone, the audio would lose its integrity further and sound only worse.

Since the iPhone 4 to the iPhone 13, quite a few radio reporters have resorted to using their iPhones to record the field. Since an iPhone is more than just an audio recording tool, it enabled them to grab multiple audio bites quickly and edit and email full reports with proper audio to their newsrooms.
Check out my guide to turning a phone into a recording studio.
Accessories Needed to Connect an External Mic to Your iPhone
Based on the iPhone you rock, the accessories required for hooking up an external mic with it could vary. If you’re carrying an iPhone with a 3.5mm audio jack, both the Lightning and headphone sockets could be used for audio input. If your iPhone has no headphone jack but only the lightning port, you’ll need to work with a few adapters.
iPhone Requires TRRS Plugs for Audio Recording
Even if your iPhone has the 3.5mm jack, it will not record audio with any mic with a 3.5mm connector. iPhones typically accept 3.5mm headphones with a TRRS (tip, ring, ring, sleeve) tip. A headphone with a 3.5mm TRS plug can be plugged into your iPhone, and you will also be able to listen to music with it.
But if it’s an external mic with a TRS connector, the mic won’t be detected by your phone despite the microphone plugging in fine. The iPhone will use its built-in microphone instead for recording. A TRS plug doesn’t work with an iPhone for audio recording as the electrical connections do not match up or the audio doesn’t travel in two directions with such connectors.
To learn the fundamental differences between a TRS, TRRS, and a TS audio jack, watch this short video:
Thankfully, most microphones with a 3.5mm connector plug incorporate the TRRS standard. Therefore, if you come across an external mic that states “iPhone compatibility” in its product description, you can pretty much be sure it uses a TRRS plug.
Check out: Can You Use a Lavalier Mic for Streaming?
Connecting a Microphone with a TRS/TRRS Connector to Your iPhone
If your iPhone has a 3.5mm jack and the external mic you’re using employs a TRS audio connector, plug the connector into a TRS-TRRS adapter. Plug on the other side of the adapter into your iPhone.
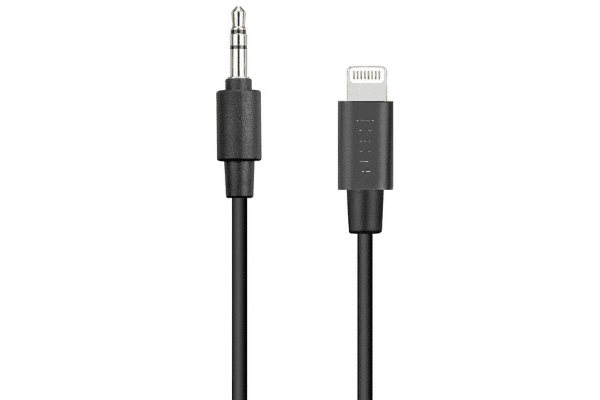
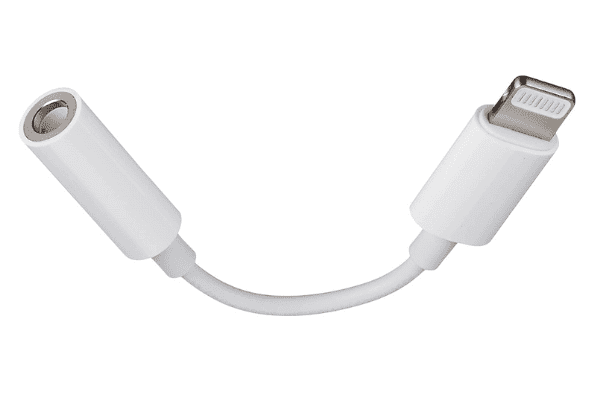
If the iPhone you carry doesn’t have the traditional audio jack, plug the microphone (the same as above) into the TRS-TRRS adapter, then plug into a Lightning to a 3.5mm audio jack adapter. The Lightning side of the adapter will go into your iPhone’s lightning connector.
If the external mic uses a TRRS connector, you can take the TRS-TRRS adapter out of the equation – irrespective of the iPhone version or model you’re using.
Check out my article:
How to use a Lavalier Mic with an iPhone
To use a lavalier mic with iPhone, you need to connect a PowerDeWise mic and a Comica CVM-WS50(C) or other lavalier microphones to your iPhone, by plugging it into your iPhone’s 3.5mm audio jack. If using an iPhone 7 or a later generation device, you’ll need the 3.5mm to Lightning adapter to connect the microphone.
You may even use a wireless lavalier mic. These wireless mics connect to your phone through a transmitter, which then communicates with the receiver that’s hooked on to your iPhone. You can be anywhere between 5 feet (152.4 cm) and 50 feet (1524 cm) away or more from the wireless transmitter for the recording to work.
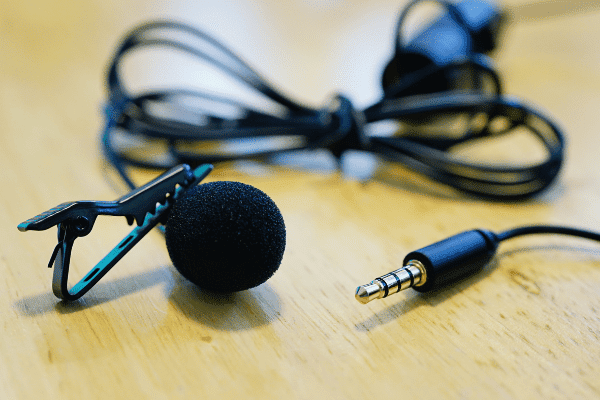
Since the lavalier system employs a powered condenser mic and offers its own power, audio is recorded at a higher level, not requiring any amplification or other work during post-production.
Several wireless lavalier mic setups also offer the choice of changing the output level directly from the receiver. That lets you modify your audio levels right there instead of depending on your phone’s gain adjustment, which will only introduce more noise.
Wireless Lavalier Mic Paraphernalia
Based on your lavalier mic’s brand, price, and wireless range, the accessories needed to connect the mic and overall audio quality will vary.
For example, this Sony Wireless Lavalier Mic’s setup of adapters comprises:
- A wireless receiver with an XLR output
- XLR to TRRS adapter, and
- Lightning headphone adapter
The XLR-TRRS adapter also comes with a headphone out jack for monitoring your audio.
Using a Condenser Mic With Your iPhone
The above-mentioned microphones are great for the price. They are convenient, effective, reliable, and much better than the integrated mic of an iPhone. However, those external mics are still not the best audio you could extract from your iPhone if you’re going the external mic route. To churn out the best-quality audio using your iPhone, you’ll need a condenser microphone.
An XLR condenser mic or any XLR professional microphone can be connected to your iPhone if you have a soundboard or an audio mixer handy. This setup quite obviously is not ideal or feasible for the outdoors or when you’re moving around with your phone, vlogging. But if you’re stationed, it doesn’t get better than an XLR condenser mic setup.
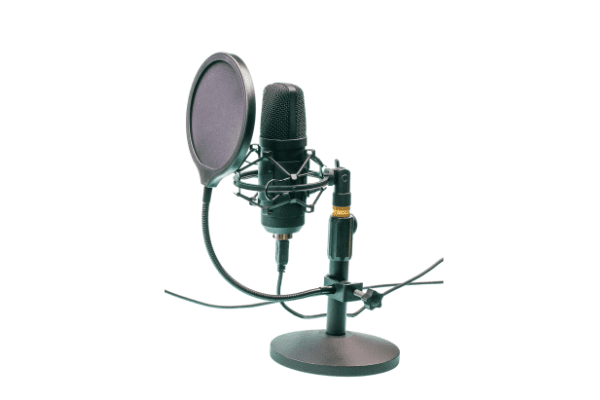
Not to mention, this mic arrangement entails more effort and practice since there are greater chances of failure or more potential noise sources spoiling your recording. But if you get the setup right, the audio quality and the level of control you’ll have over your recordings will be next to none.
Using a soundboard or a dedicated audio mixer for recording audio with your iPhone not just lets you use any audio source or mic you might have. Still, you are also able to use various sources at once.
Each audio channel, or pot, comes with independent controls that let you adjust the microphone’s audio level, besides letting you fine-tune things such as the high, mid, and low frequency for individual sources.
For instance, the low-level humming noise of a refrigerator can be minimized using low-frequency adjustment. A soundboard or audio mixer also provides the 48v phantom power needed for powering a condenser microphone.
Check out my picklist for the Best Condenser Mics for Under $200.
Connecting the Condenser Mic to Your iPhone
As mentioned above, the setup for connecting a condenser microphone to an iPhone is a bit complex. You’ll need the following to establish a proper connection between your mic and iPhone:
- XLR to the XLR mic cable
- Audio mixer
- RCA
to 3.5mm TRS adapter
- TRS to TRRS adapter
- Lightning headphone adapter
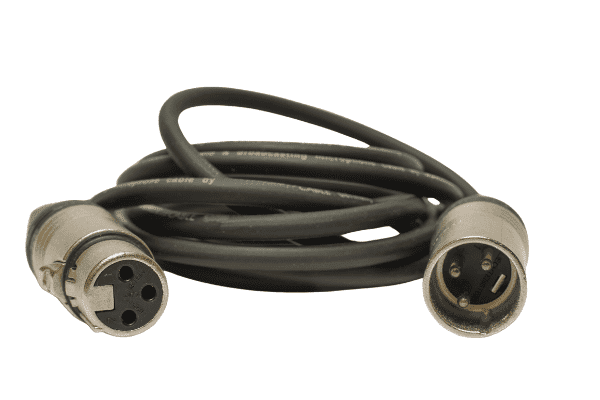
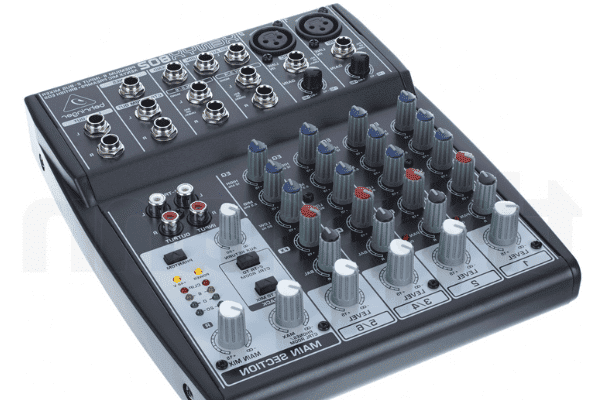
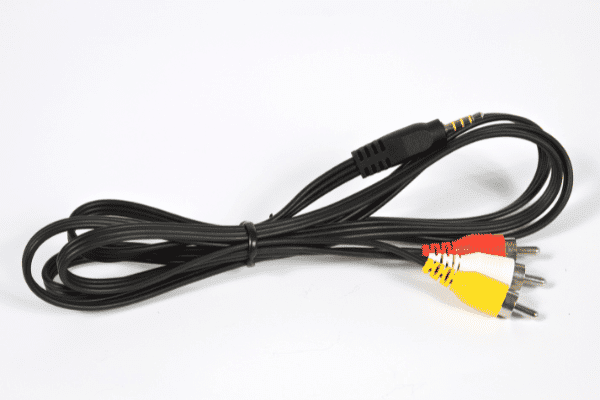
 to 3.5mm TRS adapter
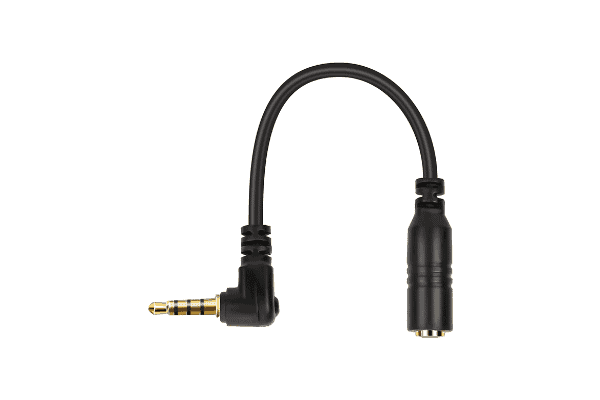
Ensure all the devices/tools are securely connected, as even a slightly loose link at any point in the chain will introduce noise into your audio.
The setup has three unique points for controlling audio levels:
- Audio mixer microphone input
- Audio mixer master audio output
- iPhone recording level
If the gain or audio level is turned a bit too high for individual controls, background noise and hum will infiltrate your recordings. This means you’ll have to experiment with the setup, starting with turning up each level to the 25% point and adjusting things from there incrementally to ensure optimal recording quality.
Recording audio on your iPhone using an audio mixer is the nearest you will get to professional recording quality. That said, the setup is not for everyone – especially not for audio recording noobs. Even if you have your feet dipped in audio production, be willing to learn and experiment with the gear and the settings to attain the best audio.
Check out my guide to the Best Boom Arms.
Capturing Multiple Audio Sources
By bringing a soundboard or audio mixer on board, newer recording avenues or methods open up. For instance, you can record multiple audio sources and mix them into one single file. Audio mixers were designed precisely for this, and you can achieve those results even when using them with an iPhone.
To use multiple microphones and record multiple voices simultaneously, simply plug the individual mics into different pots on the mixer and set the levels independently. The setup also lets you include a participant who cannot be in the same room as you and others at the time of recording.
To add the remote individual, call them through Facetime, Skype
, or any other audio chat application and plug another iPhone into the mixer. Wear headphones to make sure you can hear the person on the phone and set everybody’s audio levels accordingly.
Troubleshooting iPhone and External Mic Connection Issues
Despite using the right microphone, adapters and daisy-chaining them correctly, you may face trouble recording audio on your iPhone with an external mic.
In some instances, the order in which the various adapters are connected could be the reason for the audio problem. Connecting the microphone and Lightning adapter before hooking up your iPhone and the Lightning adapter might help remedy the issue. This may not work for everybody, however. And in most scenarios, the order in which the adapters and cables connect may not be the problem at all.
The Wrong Headphone Adapter
The headphone adapter could be the issue in some cases, particularly the cheap Chinese adapters bought online. Those inexpensive adapters may not present problems when you listen to your recordings on your headphones, but they may not be able to record to your iPhone.
The third-party headphones adapters for the iPhone fail to work not because they are cheap or “Chinese” but because those connectors are not designed to be bi-directional. At $9 apiece, the official Apple headphone adapter
is one of the most inexpensive pieces of accessories Apple sells.
Despite its relatively low price, it works because it has been made to comply with iPhone hardware. In other words, your iPhone recognizes it instantly, or it works as a bi-directional adapter.
Therefore, even if you get a headphone adapter cheaper than the official one and it offers bi-directional functionality, it’s recommended you use the Apple product instead because you never know when the third-party adapter would give up the ghost.
The Best Microphones to Pair With an iPhone
The following are some of the best external microphones to use with an iPhone. Kindly note, none of them have been specially designed to work with an iPhone. But of all the external mic options available on the market, these are some of the best.
Shure MV88
- IOS LIGHTNING CONNECTION - Apple MFi certified and compatible with all iOS devices with a Lightning...
- POCKET-FRIENDLY - Capture powerful audio recordings on the move without the need for large and heavy...
- FULLY ADJUSTABLE - Flexibility to tilt, flip and rotate the microphone up to 90° to get stereo...
Last update on 2025-05-30 / Affiliate links / Images from Amazon Product Advertising API
The Shure MV88 is an all-metal, compact external mic that offers both directional and stereo pickup. Thanks to its relatively small size, it’s easy to carry around or travel with. The mic can be directly connected to your iPhone’s Lightning port, and it pivots and rotates so that you could position it the way you want to.
The microphone produces excellent audio, particularly for the price, and it truly sets itself apart from its competition in the outdoors or when documenting live events. Other features worth mentioning include:
- 20Hz to 20KHz frequency response
- 0 to +32dB adjustable gain
- Sound pressure level
(SPL) of up to 120 dB
The ShurePlus MOTIV application lets you record uncompressed audio, adjust gain levels, alter stereo width, swap left and right, modify EQ
settings, headphone monitoring, and lots more. Besides physically moving the microphone, all other features and functions of the mic can be accessed and adjusted from within the app.
The microphone is also bundled in with a foam windscreen, headphone adapter, and a carrying case. If you’re using the mic outdoors, the windscreen will come in quite handy. If, however, you need even better wind noise protection, consider pairing the MV88 with the Shure AMV88-FUR Rycote Windjammer.
PowerDeWise Lavalier Microphone
- 100% WIRED. Always ready to use. Stable communication without radio interference in any place. Never...
- UPGRADED 2022. Professional Grade Lavalier Microphone has new fully shielded cord that makes your...
- UNIVERSAL COMPATIBILITY. For Android, GoPro, Cameras, Camcorders, Audio Recorders, Tablets, Laptops...
Last update on 2025-05-30 / Affiliate links / Images from Amazon Product Advertising API
A lavalier microphone isn’t the most advanced external microphone setup for your iPhone. But it certainly is a step above your iPhone’s built-in mic. The mic may not completely eliminate room noise, but the audio it primarily captures will be significantly better. The lavalier by PowerDeWise is worth taking a look at if all you need is marginally yet discernibly better audio recording than your iPhone’s mic on a budget.
Besides being extremely affordable and quite useful, the mic is pretty easy to set up and roll with. The plug-and-play mechanism is quite convenient. Though the Rode VideoMic Me (mentioned below) too works similarly, it’s expensive compared to this PowerDeWise offering. Use a Lightning to 3.5mm adapter if you’re carrying an iPhone 7 or later-gen iPhone.
The extension cable is relatively long, and recording with your iPhone even if you’re 10 feet (3 meters) away should not be a problem. Most importantly, the mic is sensitive; it even picks up whispers. This sensitivity, however, will hurt the audio when using it outdoors. A wind muffler is, therefore, recommended.
If you’ve used many lavalier mics before and have never thought of them highly, this PowerDeWise lavalier mic would change that thought.
Shure MV51
- Large-diaphragm condenser capsule for full-bodied sound recording
- iOS and USB connectivity offers quick setup without an audio interface or need for additional...
- Integrated rear kickstand for tabletop use. Or, unscrew the end cap and mount to standard 5/8” mic...
Last update on 2025-05-30 / Affiliate links / Images from Amazon Product Advertising API
The Shure MV51 is a USB microphone known for its versatility and stable audio signal in various recording modes.
Marrying retro design with modern features and capabilities, the MV51 can record directly to iPhones and other iOS devices, using the Lightning cable included in the product box. Under the grille, the mic incorporates a one-inch cardioid capsule.
Contrasting the vintage motif, the MV51’s front panel has an LED-backlit dashboard. The dash offers mute mode icons, along with icons for various recording modes. A headset volume adjuster is also available.
The icons are touch-sensitive. Tapping the headset button, for instance, lets you adjust headphone volume. Tap it again to turn the volume slider to gain control sliding.
The MV51 offers DSP (digital signal processing) mode and also DSP-free mode. There are, in fact, four DSP modes that offer different uses. If that doesn’t sound impressive, the onboard gain controls and latency-free headphone jack are sure to grab your fancy.
The metal construction lends the mic great sturdiness. The mic also comes with a kickstand. Though capable of holding the mic in place, the stand is not height-adjustable or not ideal for vocal recording with your desktop. But that’s not a deal-breaker and certainly not an issue if you already have a capable microphone stand handy.
Long story short, the Shure MV51 is versatile enough to work effectively and reliably for musicians and podcasters.
Comica CVM-WS50(C)
- ►【Built-in rechargeable battery】CVM-WS50 wireless lavalier microphone for smartphone comes...
- ►【Optional 6 Channels】Comica WS50 iphone microphone has 6 channels optional, channel matching...
- ►【Real-time Audio Monitor】Comica WS50 wireless microphone for android initially built-in...
Last update on 2025-05-30 / Affiliate links / Images from Amazon Product Advertising API
The Comica CVM-WS50(C) is a wireless lavalier microphone for iPhones and Android devices. With a wireless range of up to 194 feet (59 meters), this Comica is a solid alternative to the PowerDeWise mic (mentioned above) if you’re looking for a wireless solution. The mic can be used for interviewing, online teaching or learning, live streaming, podcasting, etc.
The integrated real-time monitoring functionality lets you listen to and monitor audio while recording. The mic is equipped with ultra-high frequency (UHF) radio wave technology, used in the 520-526MHz frequency range.
The bonus elements are the other accessories packed in along with the mic. The CNC processed mini tripod and adjustable phone clamp are made of metal, lending the gear sturdiness and a high-quality look and feel.
The clamp is adjustable to accommodate all iPhone sizes – right from the iPhone 12 Mini to the iPhone 12 Pro Max
. The mini ball head is designed to rotate 360 degrees and tilt 45 degrees, providing you the perfect shot every time.
The LCD screen is quite handy, offering vital data such as power consumption and audio status. Talking about power, the audio receiver and audio transmitter have their built-in rechargeable batteries. Not to mention, the bundle has its carrying case so you can safely stow all the peripherals needed to set this mic up and rolling when not using them.
For a lavalier mic, the price tag of $159 may seem on the higher side. But if all the other items bundled in are accounted for, the product’s value proposition is quite strong.
Rode VideoMic Me
- Compact Trrs Cardioid Microphone Designed For Ios Devices And Smartphones
- High-Quality Directional Microphone That Connects Directly To The Iphone Trrs Microphone/Headphone...
- 3.5Mmm Headphone Output
Last update on 2025-05-30 / Affiliate links / Images from Amazon Product Advertising API
The Rode VideoMic Me is an extremely compact microphone that directly plugs into your iPhone’s 3.5mm audio jack. The most convenient aspect of the mic is not just that it directly plugs into a 3.5mm jack, but that it also employs a TRRS plug. In other words, it can seamlessly work with any iPhone for audio recording purposes.
The microphone also has a pass-through earphone jack so that you could listen to your audio recordings without removing the microphone. Not to mention, the adjustable mount ensures a snug fit. The mic also comes with a furry windshield for wind protection.
The VideoMic Me, unlike its bigger sibling, the Rode VideoMicro, doesn’t require multiple adapters to connect to your iPhone. It can be directly plugged into your phone, thanks to the native TRRS plug it comes with.
If your iPhone doesn’t have a 3.5mm jack and you want a mic that plugs directly into the phone’s Lightning port, the VideoMic Me-L is your best friend. The letter “L” in the name denotes “Lightning” if you didn’t get that already.
Choosing Apps for Audio Recording on Your iPhone
Recording audio on your iPhone is a process that needs both hardware and software to work in synchronization. The built-in mic or the external microphone you attach to your phone covers the hardware part. The apps, which process the information captured by the microphone, take care of the software side of things.
Compared to video recording tools and technology, audio recording (the hardware component) hasn’t undergone many significant changes. The software side, however, has been taken good care of by various apps. Since the app you use to record audio ascertains how the final audio comes out, it’s imperative to put some thought into the audio recording app you choose for your project.
Here are some important things you must go over when perusing audio recording apps:
Recording Format
Ensure the app records audio in a format that’s easy to edit and share. WAV is the default for high-quality audio; however, the files it churns out are bigger than usual. Compared to WAV, an MP3
file is lightweight as it’s a compressed variant of the original file.
The compression may affect audio quality, but that difference may not be discernible to the untrained ear or the regular listener – especially if they use non-audiophile headphones.
For voice recordings, the MP3 file format is ideal. The minor differences in audio quality between WAV and MP3 come through only in music recordings.
Audio Monitoring
Monitor your recordings with the right tools to accurately gauge the performance of your microphone and recording app. Some apps may not allow listening to your recording live through headphones.
Many amateur recording artists overlook this step, only to find unwanted noises in their recordings later, leaving them with no option but to re-record the entire thing. Therefore, make sure the iPhone app you pick lets you monitor your recordings live.
File Exporting
Most audio recording apps also vary in how they let you export your audio files. The majority provide SMS and email export options. The best ones tend to offer sharing options such as Wi-Fi downloads, FTP server transfer, direct upload to the cloud from your iPhone, etc.
If you need multiple sharing options for increased flexibility or convenience, you may want to check out whether the app of your choice offers them all.
Check out: Can Reset AirPods Be Tracked?
Conclusion
Remember, the best external mic audio setup is the one that works for you and not the one that’s the most expensive or professional-looking.
The condenser mic setup promises excellent audio quality and increased flexibility, but it may not be for everybody. And even though lavalier mics do not offer the best audio performance, they may be ideal for people on a budget and/or whose recording requirements are minimal.
The external microphones mentioned above are great mics to get started and could be the endgame microphone for quite a few.
Sources
- Mediashi: How to Record Professional Audio on an iPhone or iPad with an External Microphone
- Podcast Insights: Shure MV88 Review: Best Lightning iPhone Microphone?
- Improve Photography: My Review of the Rode VideoMic Me
- PCMag: Shure MV51 Review
- B&H Photo Video: Podcasting with iPhones and iPads
- Shure Publications: MV51
- Producer Hive: 7 Best External Mics for iPhones & iOS in 2020 (That Don’t Suck)
- iMore: Best iPhone External Microphones for Video 2020
Recent Posts
QuickTime is a vital app for many Mac users, and if you’ve recently bought a new microphone, you might wonder how to use it optimally. QuickTime cannot record audio content if it doesn’t have...
Every microphone leaves a unique signature on the quality of its output. If you’re a podcaster trying to melt your way into your audience’s hearts, a muddy, distorted recording won’t cut it....


